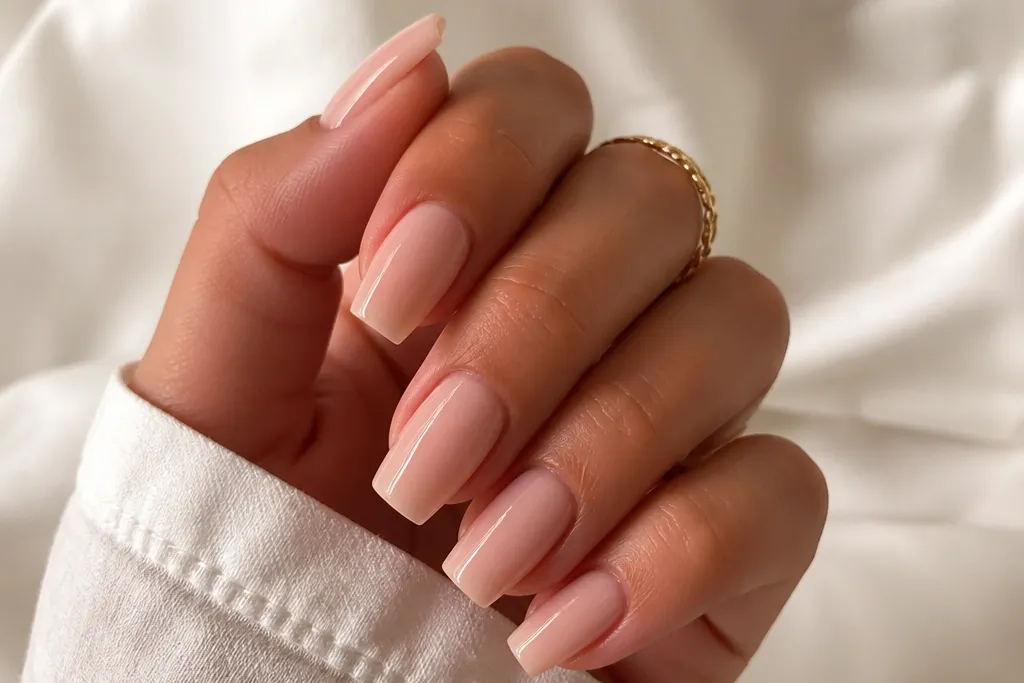
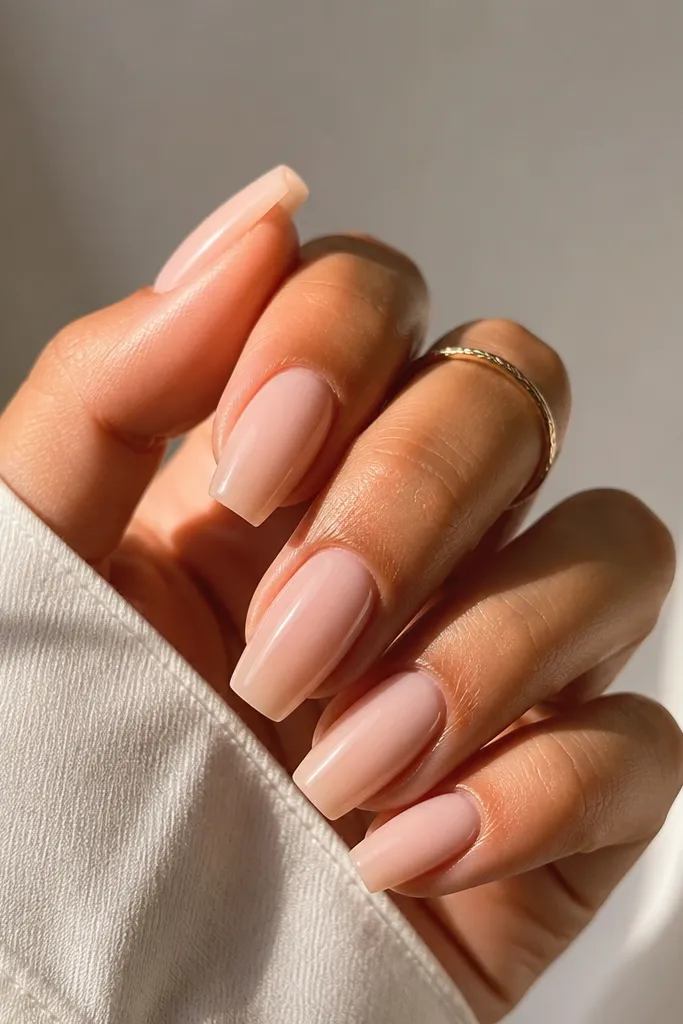
1. Butter Cream Gloss Coffin
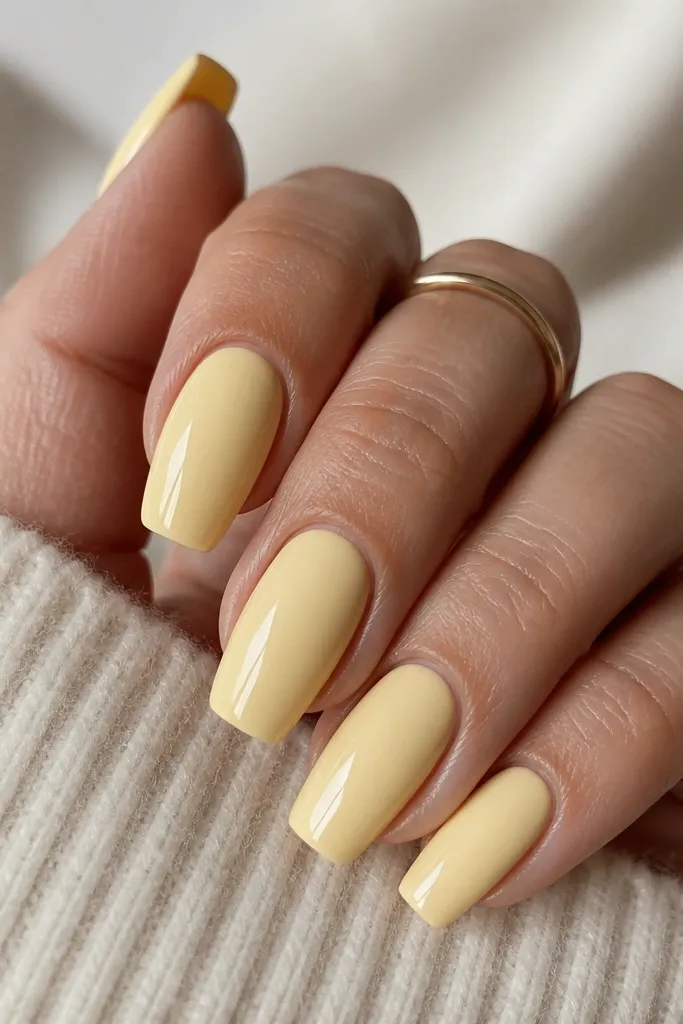
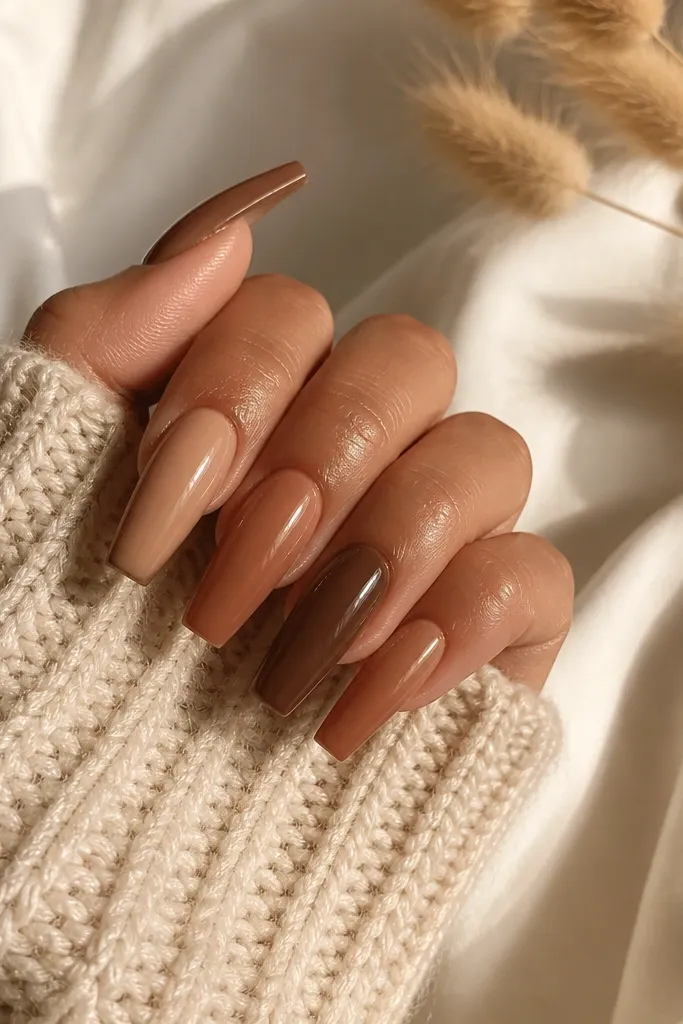
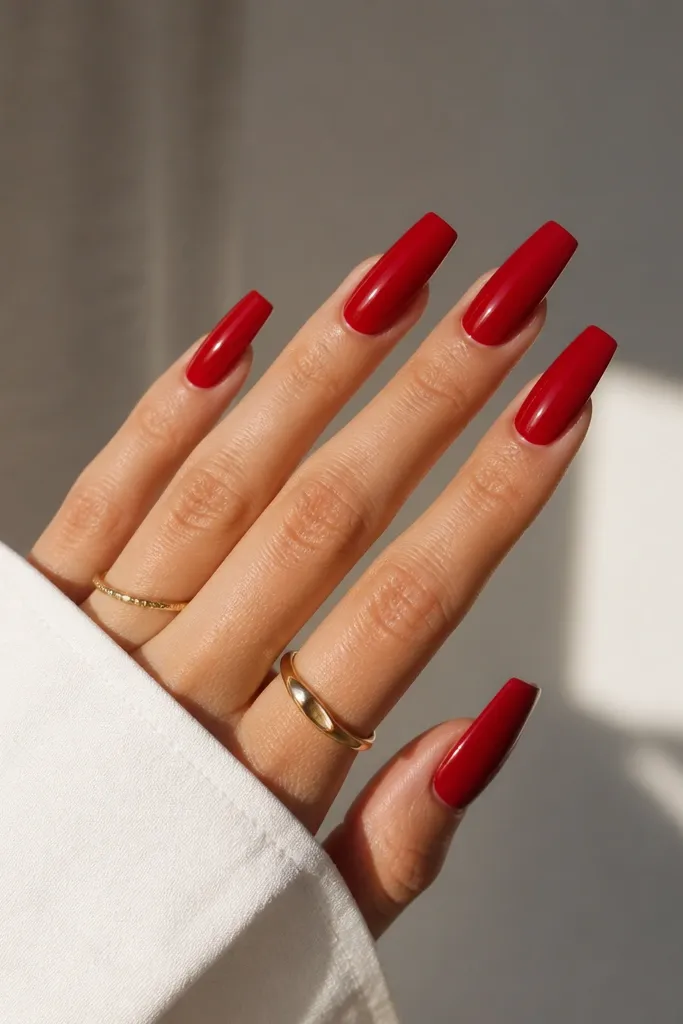
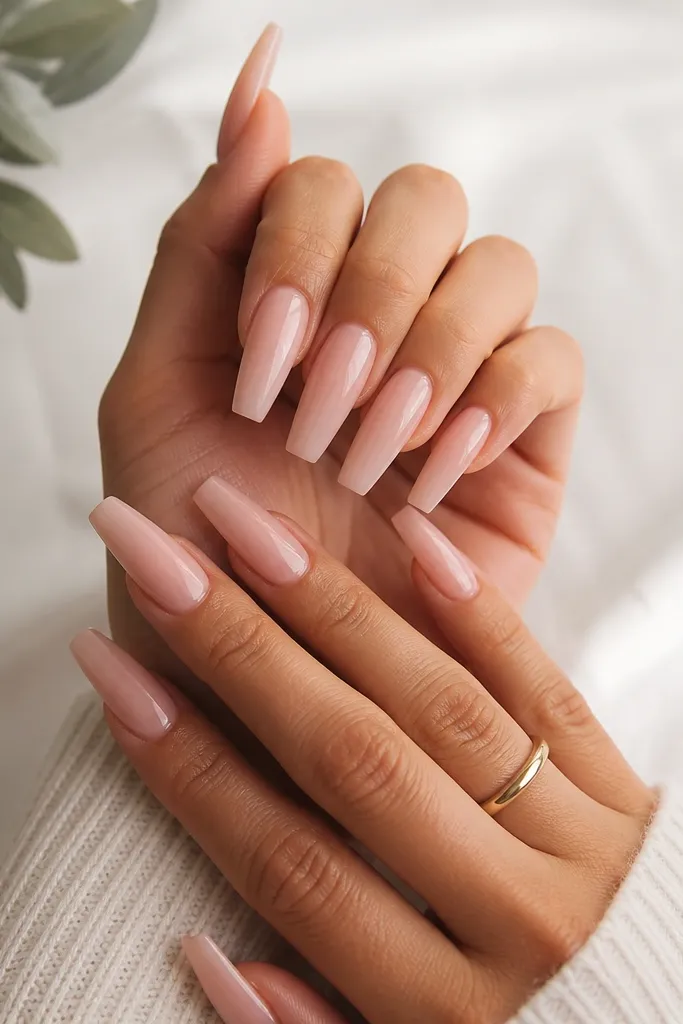
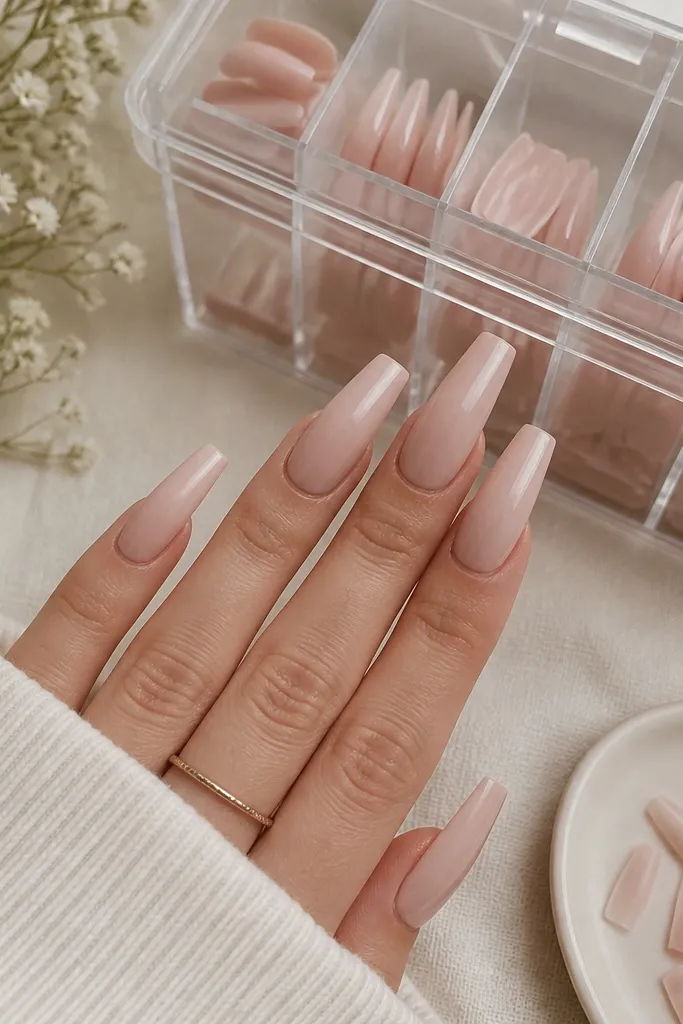
This is the easiest "looks expensive" set because the color hides tiny imperfections. The butter cream (think pale yellow with a hint of beige) looks soft against most skin tones, and the glossy topcoat makes the nail look freshly done instead of dry. I keep the coffin tips slightly rounded so the set feels wearable, not sharp.
Use a nude-butter base gel or acrylic color, then apply one thin layer, cure, repeat if needed for opacity. Shape tips to 6mm to 7mm free-edge, then file sidewalls to meet at the tip without pinching. Finish with a thick-but-level topcoat for that glass shine.
Editor's noteIf your cream looks streaky, do two thin coats instead of one thick coat and cap the free edge lightly.
Watch outSkipping cuticle-side cleanup makes cream polish look messy and uneven.
2. Milky Pink With Micro French Tips
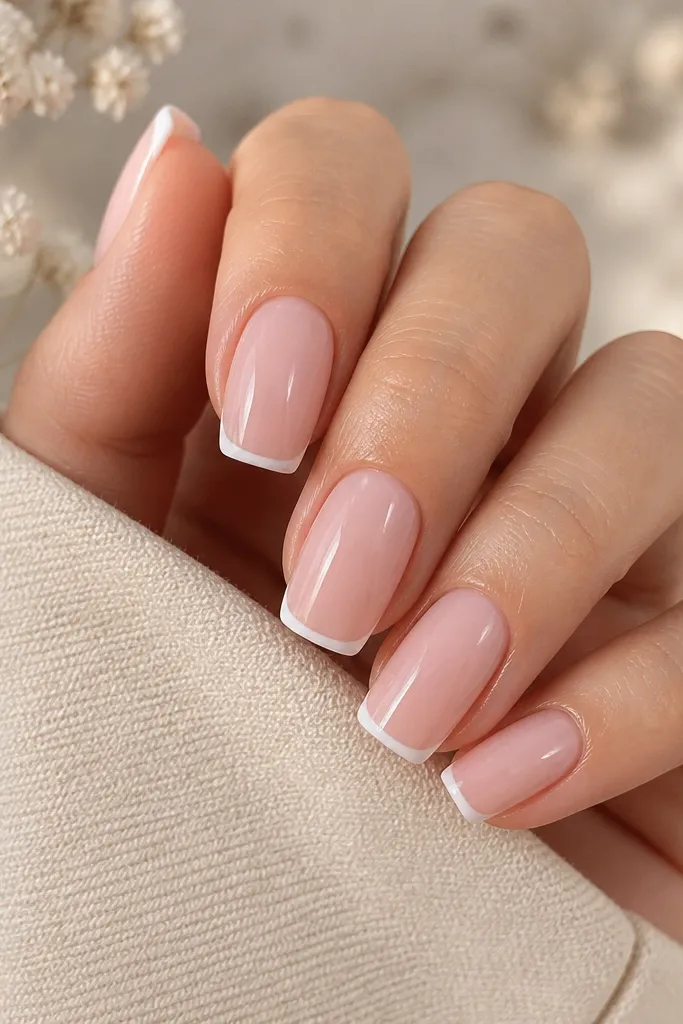
Micro French makes short nails look longer without adding bulk. The milky pink base stays translucent, so your nail bed still shows through. Keep the French line thin (about half the width of a pencil eraser) so it doesn't turn into a thick stripe.
Start with a milky pink base that covers but still looks airy. Use a fine liner brush to paint the French line, then apply a clear builder layer if you're doing acrylic to smooth the top. Keep the tip length around 7mm so the French sits proportionally.
Editor's noteDrag the white from the sidewalls inward, then clean the edge with a brush dipped in alcohol or acetone.
Watch outA wide French line makes short coffin nails look stubby.
3. Rose Quartz Marble Accent
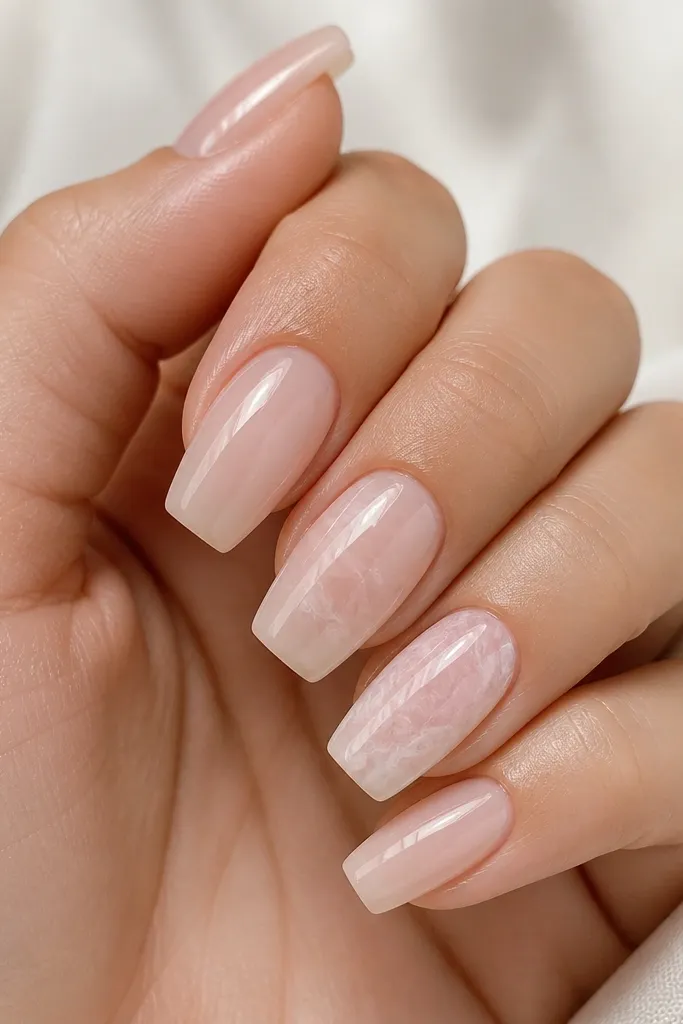
Marble looks fancy because the veining adds depth, but on short coffin it needs restraint. Use a sheer blush foundation so the marble lines look suspended in glass. Pale pink and white veining gives that rose quartz vibe without turning into loud, heavy swirls.
Paint all nails with sheer blush, then pick two accent nails for the marble. Use a thin brush or striping tool with white and pale rose to draw irregular lines, then soften edges with a light second pass. Seal with a clear topcoat and keep the marble nails slightly smoother on top so they don't snag.
Editor's noteDo the marble on a tacky layer or right after base dries, so the lines blend just enough.
Watch outOver-darkening the marble makes it look like cheap sticker art.
4. Champagne Nude With Side Glint
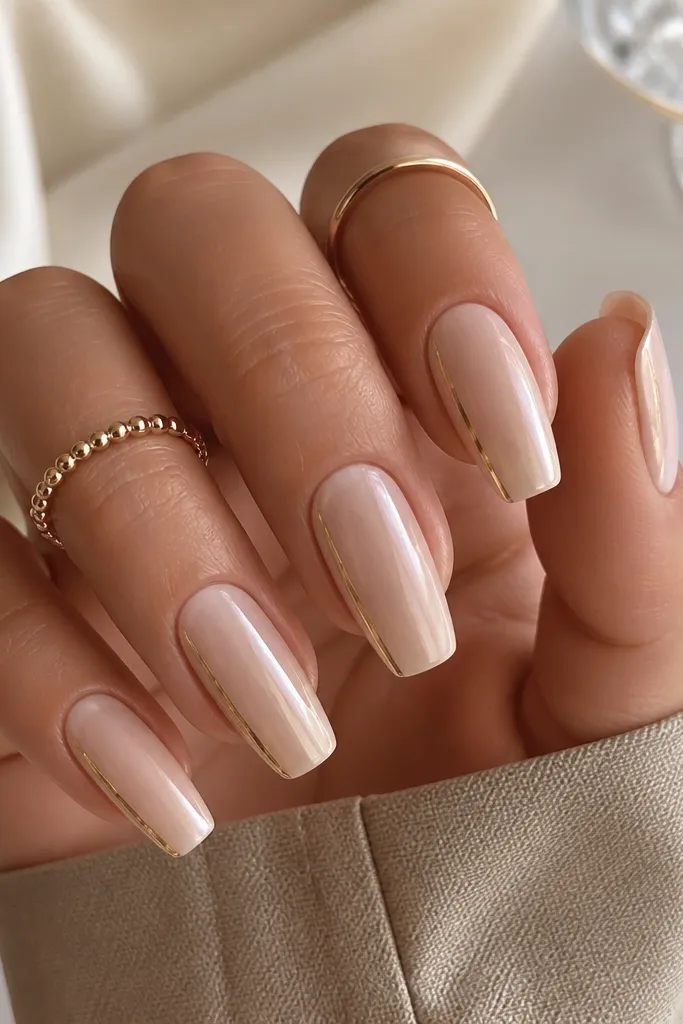
This set is subtle glam. The champagne nude reads warm and clean, and the side glint catches light as your hand moves - it's more interesting than a full French line. I like gold foil or a metallic strip because it looks crisp, not chunky.
Use a nude champagne base, then place a thin gold strip along one sidewall starting about 2mm from the tip. Seal it under a clear top layer so it feels smooth. Keep the strip narrow so it doesn't widen the nail visually.
Editor's notePlace the strip at the same side on every nail so the set looks intentional, not accidental.
Watch outLetting foil sit above the surface makes it lift and snag.
5. Black Cherry Gloss Tips
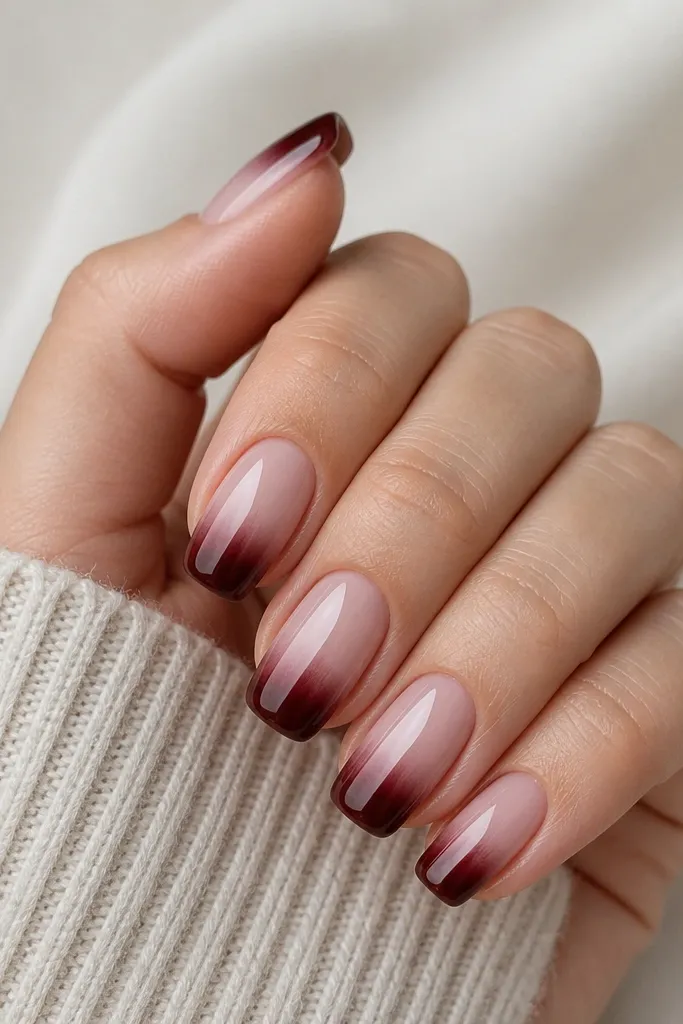
A cherry-to-nude gradient looks rich without needing jewels. The dark cherry base absorbs light, so the gradient looks smooth and flattering on short nails. I keep the fade high (about one-third of the nail) so you get drama without making the nail look too heavy.
Start with a nude base, then sponge or airbrush cherry gel on the top third. Blend the edges with a clean brush before curing. Shape to 6mm to 8mm and cap the free edge with clear builder for durability.
Editor's noteUse a makeup sponge for the gradient and keep the sponge light - too much pressure creates harsh rings.
Watch outA hard line at the fade looks like a sticker edge.
6. Iced Vanilla Glitter Fade
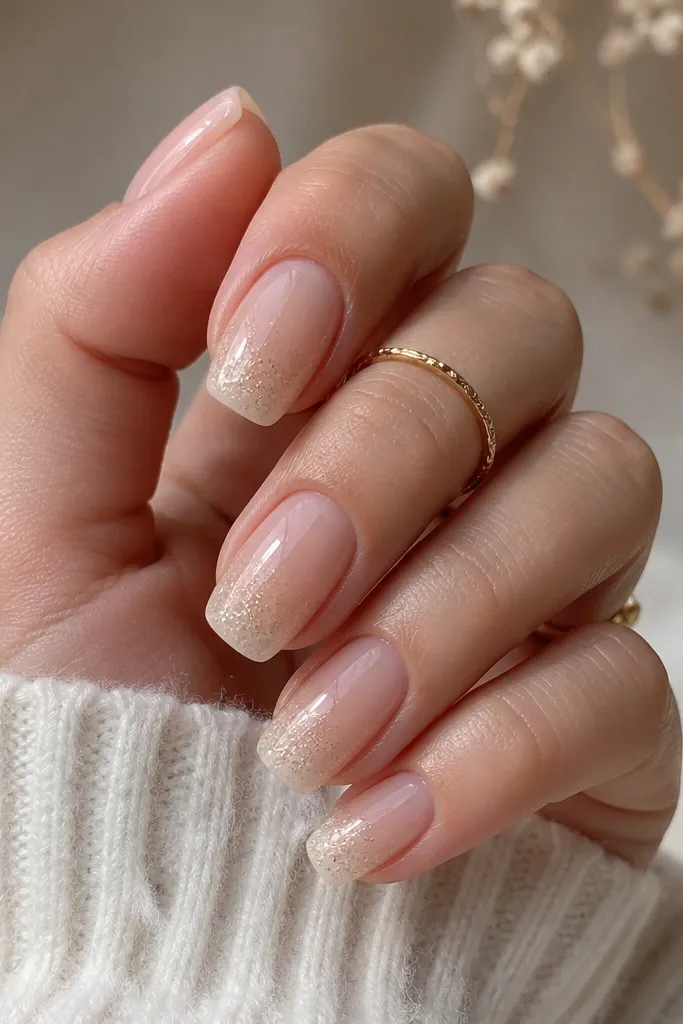
This is sparkle that still looks wearable. Vanilla glitter is finer and more forgiving than chunky glitter, which matters on short coffin nails. Concentrate the glitter at the tips and fade upward so it doesn't thicken the center.
Use a sheer nude base, then dab fine vanilla micro-glitter near the free edge. Blend upward with a clear gel brush so it looks like a gradient, not a glitter blob. Seal with a topcoat thick enough to smooth glitter texture.
Editor's noteIf glitter feels gritty, add a thin clear layer before topcoat so it levels out.
Watch outSkipping extra sealing makes glitter catch on hair and fabric.
7. White Cloud Puff Effect
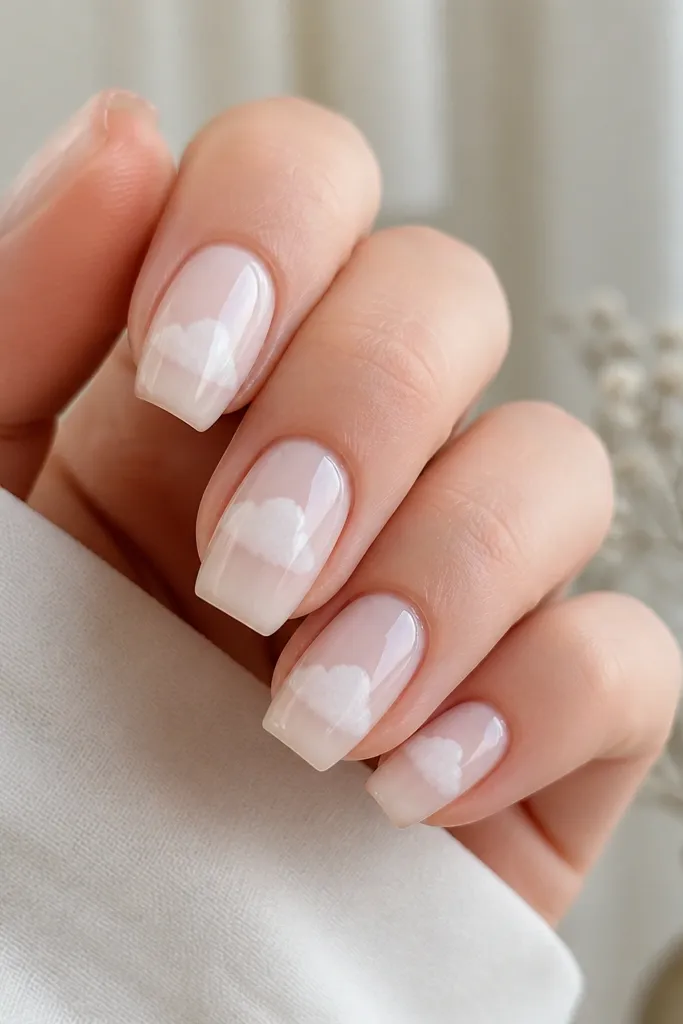
The puff effect creates a raised, plush look that photographs well. On short nails, place it near the center so it doesn't crowd the cuticle. Use milky white so it looks snowy instead of stark, and keep the puff small for a clean silhouette.
Build a sheer milky base, then use a gel thickener or acrylic paste to place tiny rounded mounds. Cure evenly and avoid overfilling - puff too big and it looks like a bump. File very lightly only if needed, then topcoat for shine.
Editor's noteUse a silicone dotting tool to shape the puff - it gives you control over diameter.
Watch outOver-filing after puff makes the texture disappear and can thin the apex.
8. Emerald Glass Dots
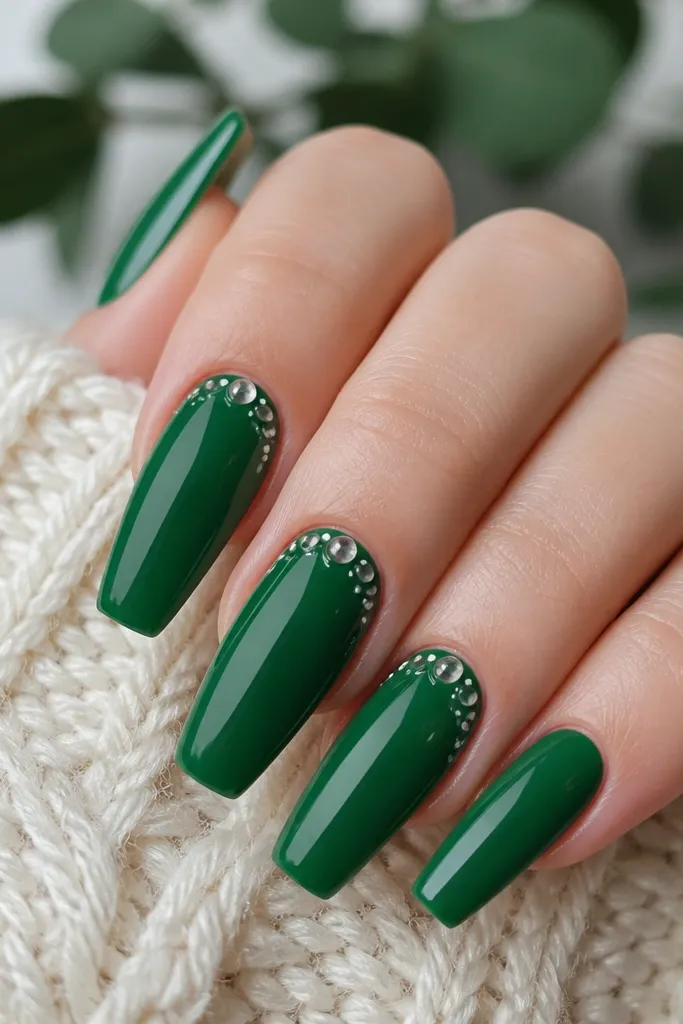
Emerald green looks bold, but short coffin keeps it classy. The clear-domed dots add a glassy dimension that feels modern. Micro white dots act like highlights and keep the design from looking flat.
Paint all nails emerald, then add dot details on two accent nails. Use a dotting tool to place tiny dots, then cure. Seal with a clear topcoat so the dots look suspended under glass.
Editor's noteKeep dot spacing consistent - measure about 2mm between dots using the width of your brush tip.
Watch outToo many dots across every nail turns it into clutter.
9. Smoky Taupe Nude With Thin Black Line
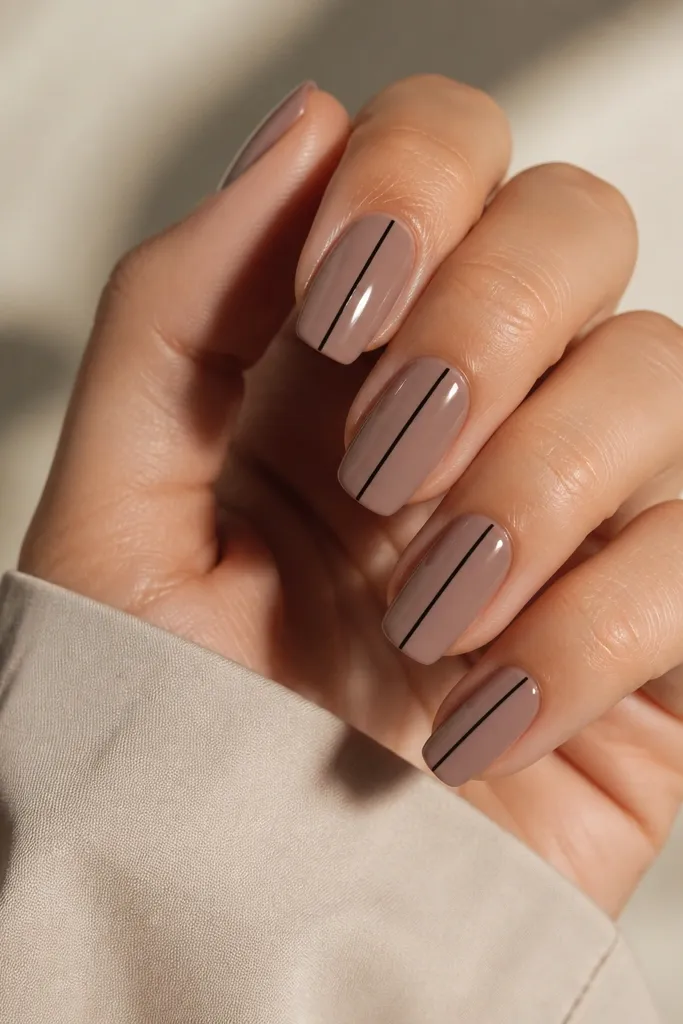
A vertical line makes short nails look longer, and taupe keeps it neutral. The black line should be hair-thin so it looks graphic, not harsh. I like this set for everyday because it reads polished even without glitter.
Apply a smoky taupe nude base, then use a liner brush for one vertical line per nail. Cure, then topcoat. Keep the line slightly off-center toward the sidewall so it looks like a designed "shadow," not a stripe taped on.
Editor's noteIf your line gets shaky, let it cure, then trace over it once for a clean edge.
Watch outThick black lines make short coffin look wider.
10. Lavender Mist With Tiny Stars
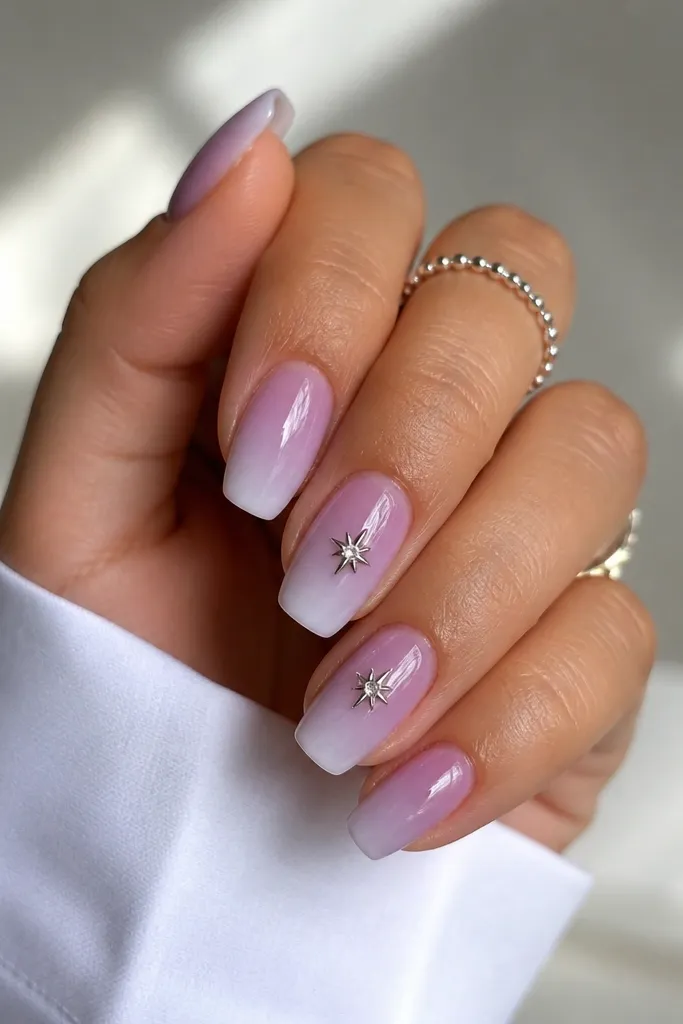
Lavender mist feels soft but still fun, and the stars add a little whimsy. Keep star charms small so they don't look heavy. The gradient should be subtle - think misty haze, not full-on purple block.
Use a light lavender base, then sponge a slightly deeper purple at the tips. Place tiny silver star charms near the ring finger and middle finger. Encapsulate with clear gel or acrylic so the charms don't catch.
Editor's noteChoose stars that are flat-backed or small enough to sit within the nail width without hanging off the sides.
Watch outBig charms on short nails look like they're about to pop off.
11. Red Velvet Matte With Glossy Half-Moon
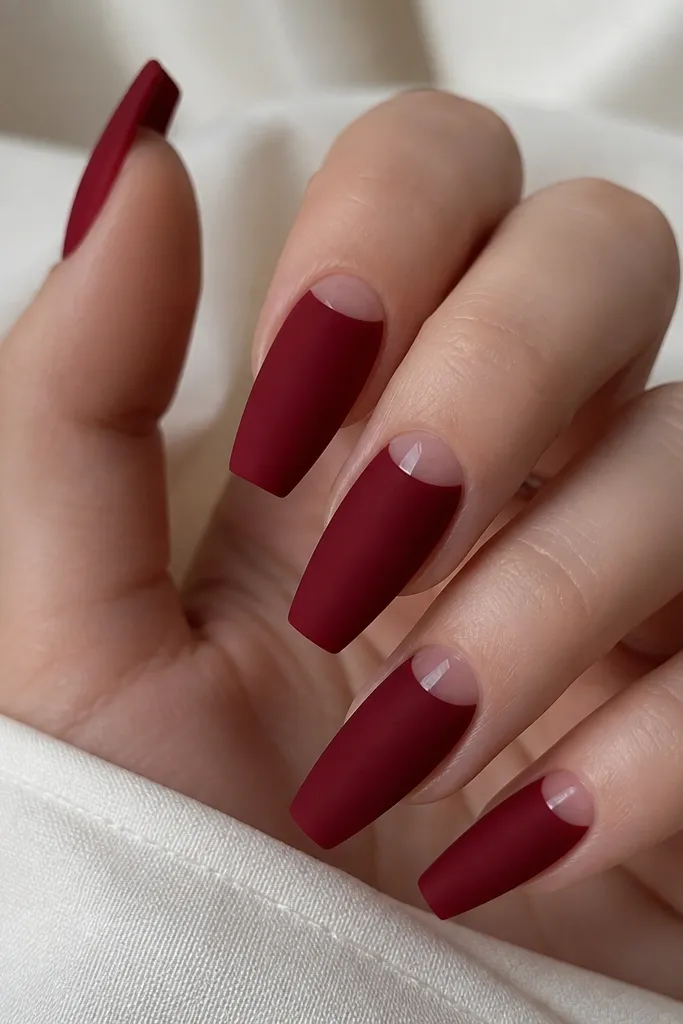
Matte plus gloss contrast looks high-end fast. The deep red velvet color gives a soft, velour look, and the glossy half-moon draws attention to the cuticle area. Keep the half-moon small so the design stays clean on short nails.
Apply deep red and finish with matte topcoat. For the half-moon, use a small brush to paint clear gel or glossy nude gel at the cuticle curve, cure, then leave it glossy. Clean the edges with a brush dipped in remover for a crisp arc.
Editor's noteUse a cuticle-shaped guide by lightly marking the curve with a liner brush before filling.
Watch outGetting matte topcoat on the half-moon ruins the contrast.
12. Nude Pink With Crystal Line Overcoat
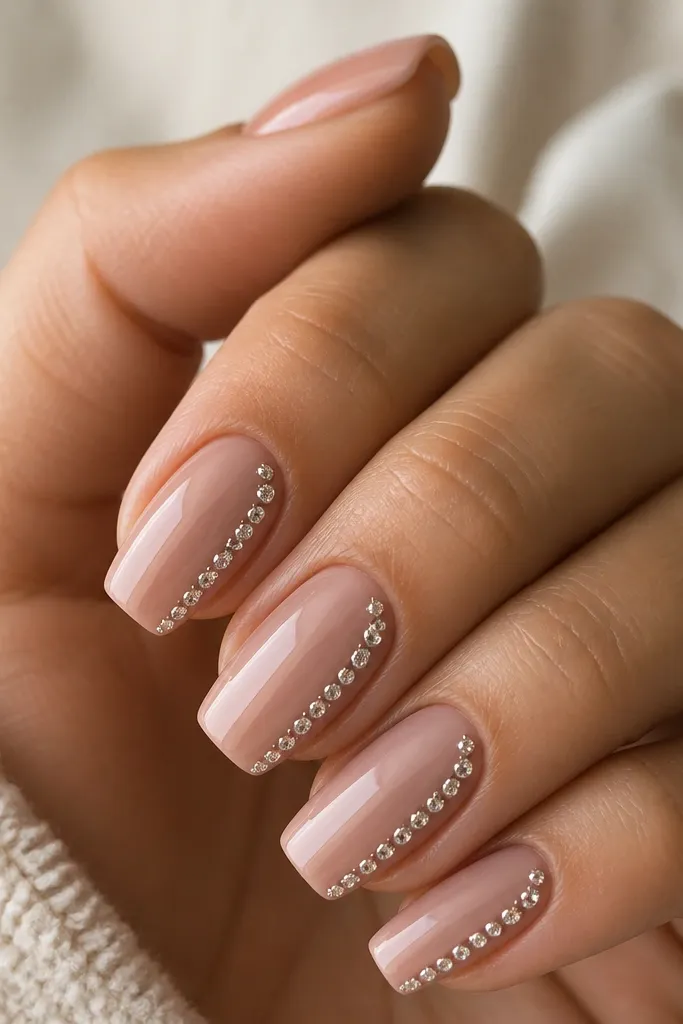
A crystal line makes nails look dressed up without needing full coverage. I like small clear crystals because they sparkle without turning into a thick rhinestone tile. The side placement keeps the nail looking longer and slimmer.
Apply nude pink base, then place crystals on one side starting about 3mm from the cuticle. Leave a small gap at the top so it doesn't look like a border sticker. Seal with clear gel in thin layers so the crystals stay secure and smooth.
Editor's notePress each crystal gently with the dotting tool so it sits flat before sealing.
Watch outGlobbing topcoat over crystals makes them look cloudy.
13. Ocean Blue Micro Skies
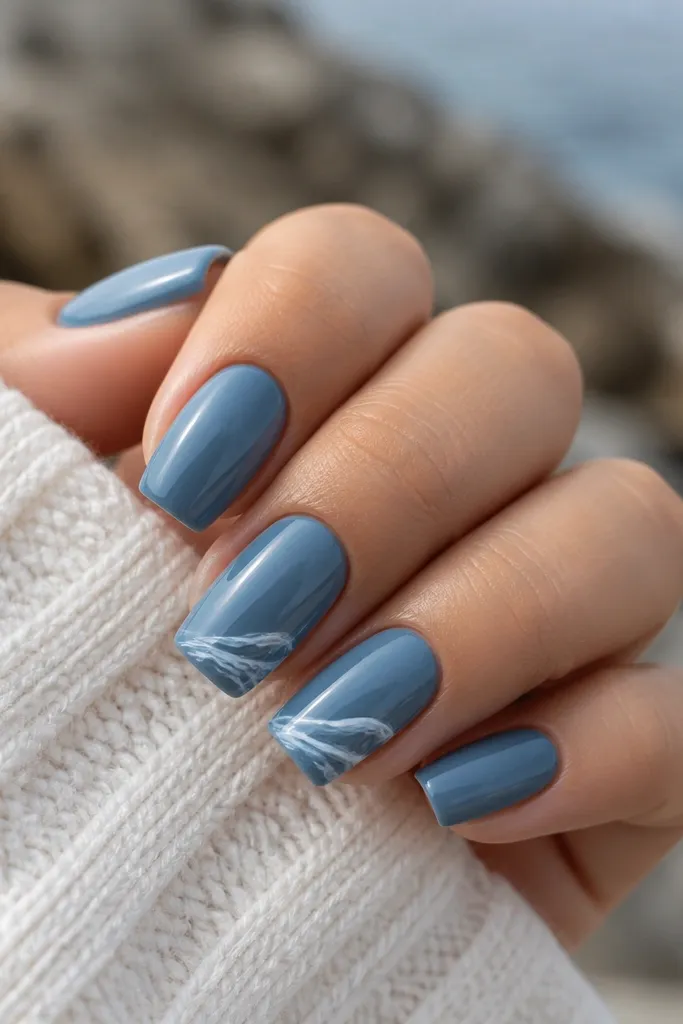
Ocean blue is one of the few colors that looks clean and bold on short coffin. Micro wave lines add movement without taking over the nail. Keep the waves thin and irregular so they look hand-drawn, not stamped.
Paint all nails with ocean blue gel or acrylic color. On two accent nails, use a fine liner brush to draw tiny wave lines near the tip, then cure. Seal with topcoat to smooth the linework.
Editor's noteLet the base cure fully before drawing so the white line stays crisp.
Watch outThick wave lines look like a child's drawing.
14. Pearl Nude With One Rose Stud
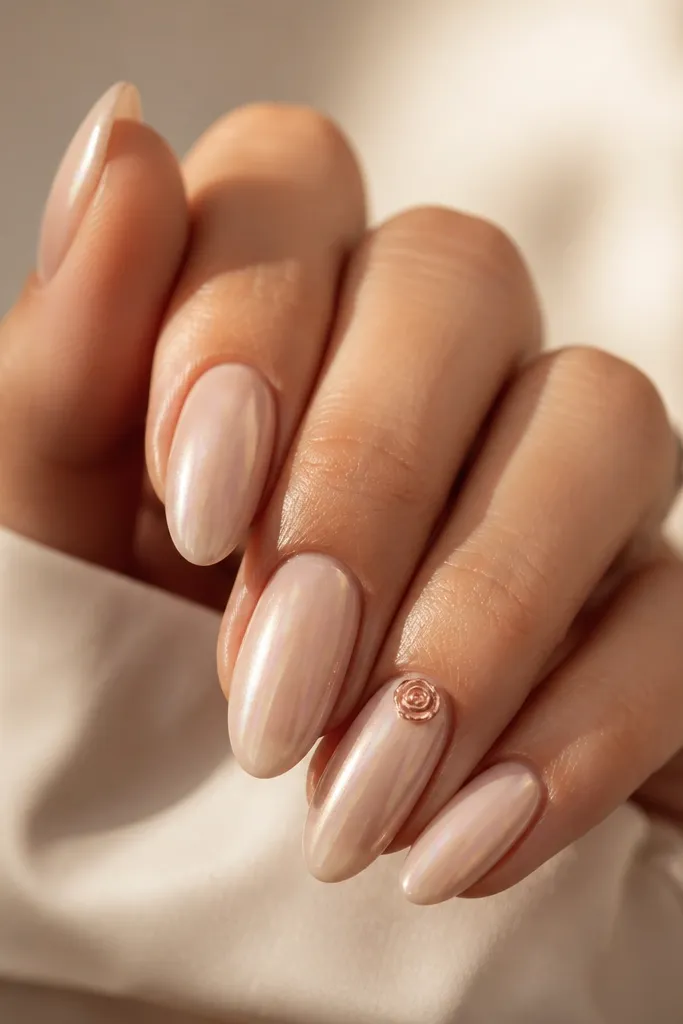
Pearl nude gives a soft glow that looks expensive in daylight. One rose stud keeps the set feminine without clutter. I place the stud slightly above the center so it catches light when your hand lifts.
Use a pearl nude base with a fine shimmer, then topcoat. Add a small rose gold rose stud on one or two nails, not all. Seal with a clear encapsulation layer so the stud feels smooth.
Editor's noteIf the stud sits uneven, add a tiny clear gel mound under it before curing.
Watch outPutting studs on every nail makes the set look heavy.
15. Mocha Swirl Liner Lines
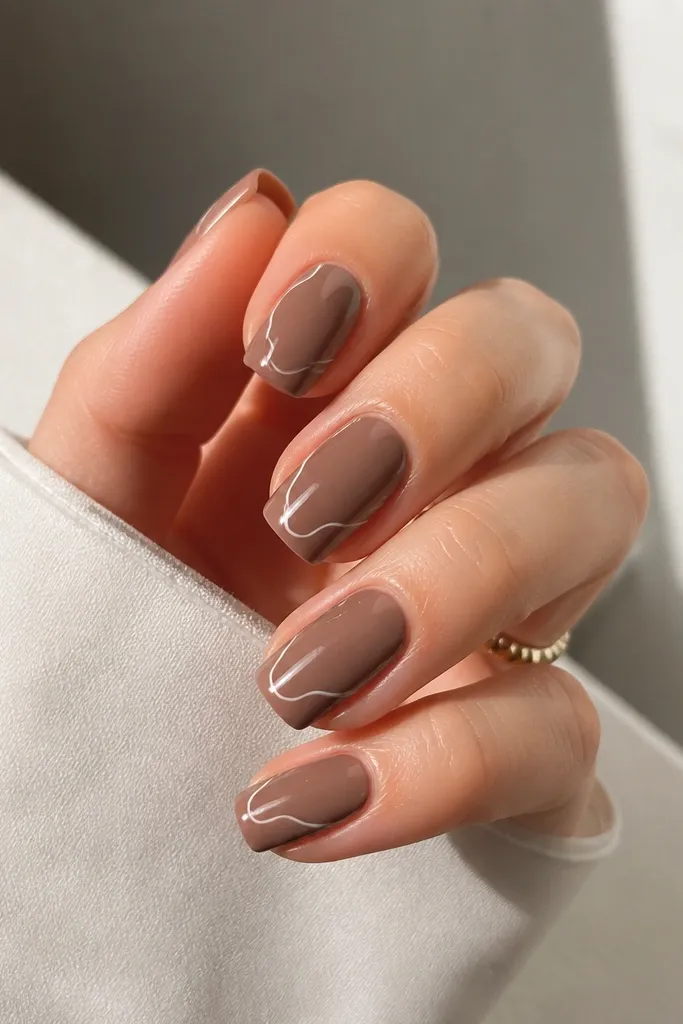
Mocha with white liner looks like latte art on nails. The thin swirl lines add movement and keep the set from looking flat. On short coffin, swirl lines should be small and placed near the tip so they frame the nail shape.
Paint with a mocha nude base. Use a thin striping brush to add white swirl lines on each nail, keeping them within the top half. Cure and topcoat for a smooth finish.
Editor's notePractice the swirl on paper first - your hand learns the curve faster than you think.
Watch outWide swirls cover the nail and make short coffin look crowded.
16. Terracotta Nude With Soft Orange Tips
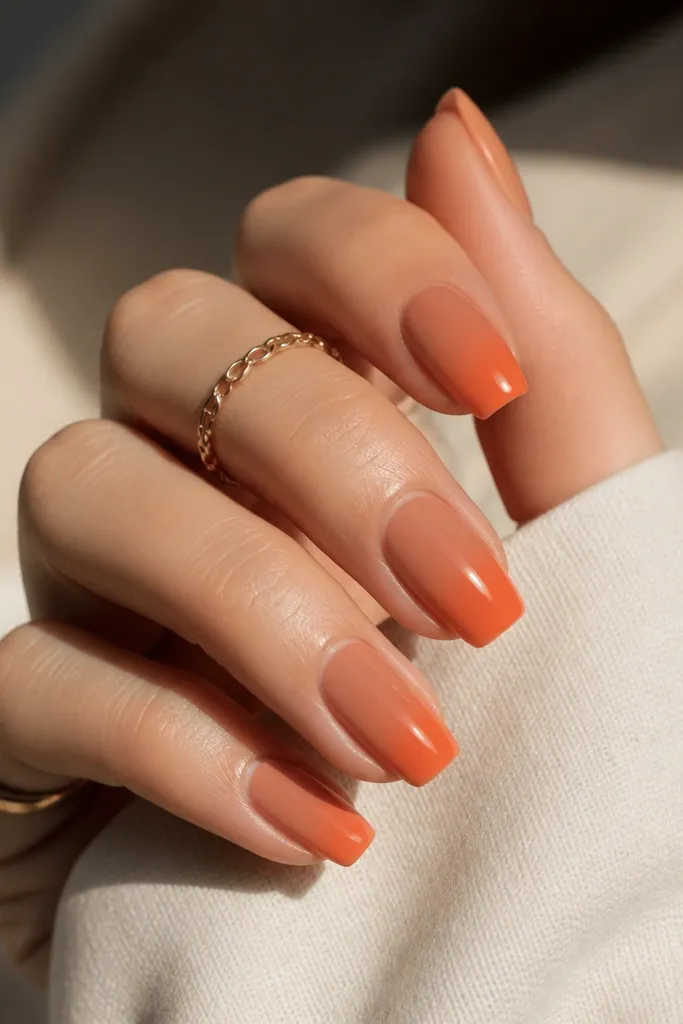
Terracotta nude flatters warm undertones and still looks wearable. Orange tips add a sun-kissed feel without the contrast shock of bright neon. Blend the orange lightly so it looks like a tint rather than a stripe.
Use terracotta nude as the base. Sponge or brush orange gel onto the tips and blend upward 2mm to 3mm. Seal with clear topcoat and keep the tip length around 7mm so the colors stay balanced.
Editor's noteAdd a thin clear layer over the blended area before topcoat to smooth any sponge texture.
Watch outLeaving sponge specks uncovered makes the gradient look grainy.
17. Clear Jelly Base With Pink Hearts
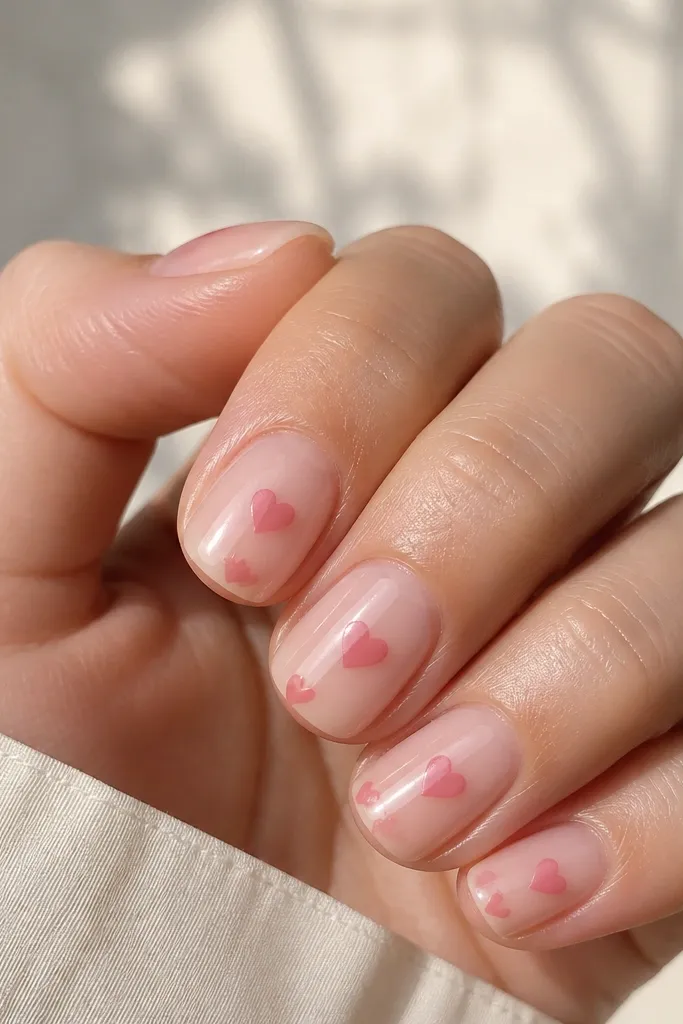
A clear jelly base makes hearts look like they're floating under glass. Pink hearts add a sweet touch without needing long nails. Keep the hearts small and place them on two or three nails so the set stays refined.
Build a clear jelly base with a hint of pink or use a clear base with a pink tint. Apply small heart decals or paint tiny hearts with a dotting tool and liner brush. Seal with a clear topcoat or encapsulation layer so the hearts don't peel.
Editor's noteIf you're painting hearts, start with two dots, then connect them with a short curved line.
Watch outSkipping encapsulation makes decals lift at the edges.
18. Silver Chrome Half Tip
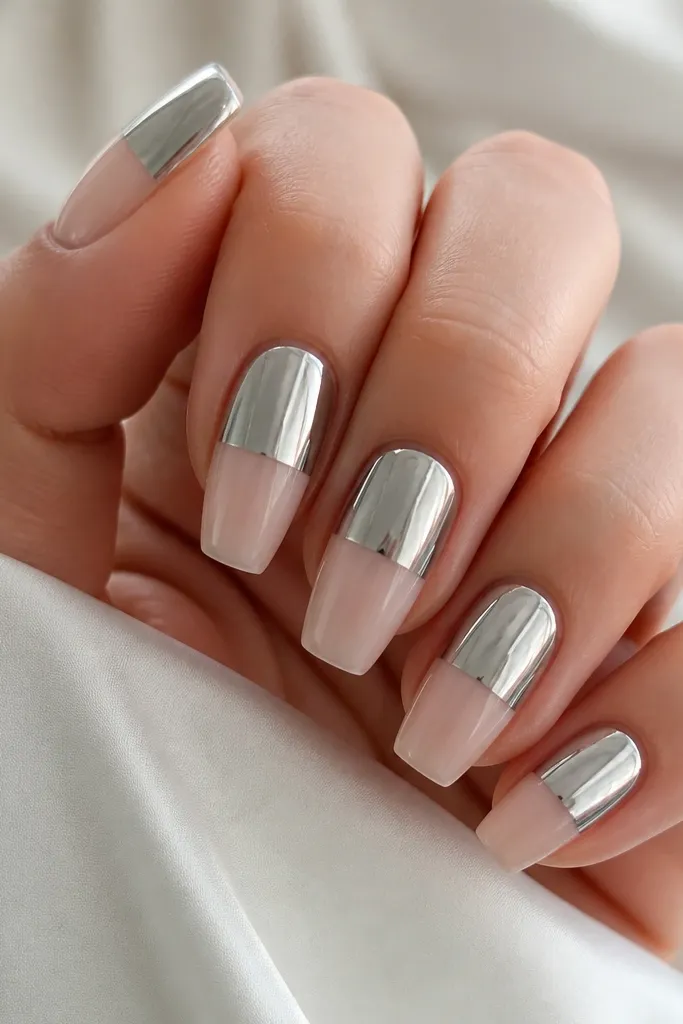
Chrome on short nails looks sharp and clean when the coverage edge is straight. The half-tip design keeps it sleek and prevents chrome from overpowering your nail bed. Silver chrome reflects light so it makes the nails look smoother even if your base is simple.
Apply nude base, then apply chrome powder/gel only on the upper half. Use painter's tape or a nail guide to keep the stop line crisp, then cure. Seal with a chrome-safe topcoat if your product requires it, or use a thin clear gel layer.
Editor's noteBuff lightly before chrome so you don't trap bumps under the reflective layer.
Watch outUsing too much chrome gel makes the chrome look dull and thick.
19. Green Tea Nude With Gold Foil Flecks
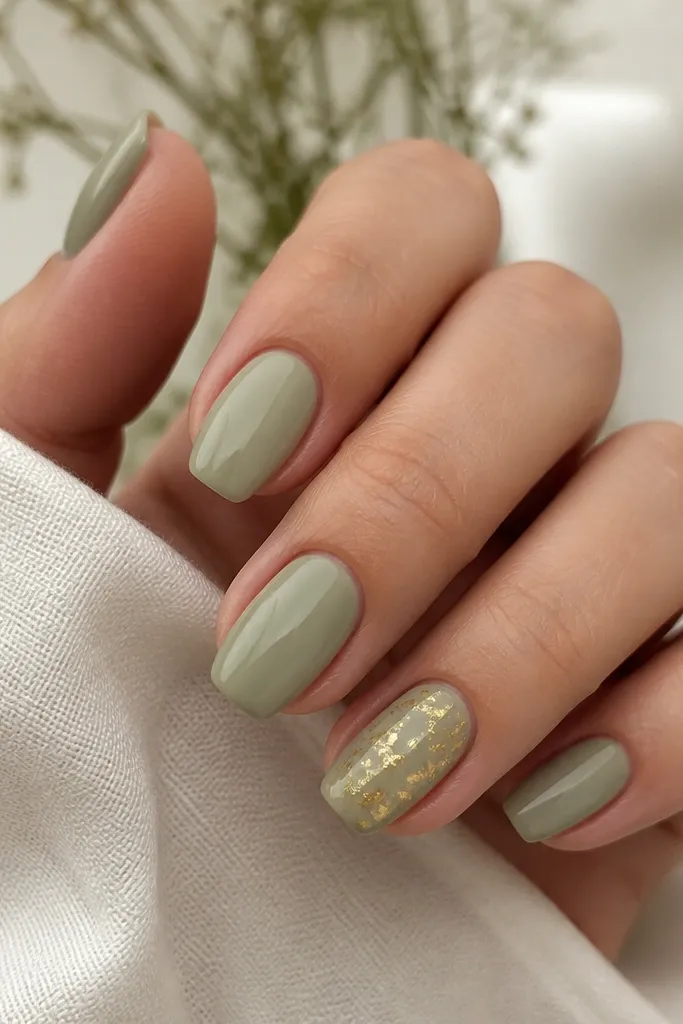
Green tea nude is calming and a little unusual, which is why it always gets compliments. Gold foil flecks add sparkle without turning into a full glitter mess. I keep foil scattered and uneven so it looks like natural highlights.
Paint all nails with green tea nude. On two accent nails, press small pieces of gold foil into tacky clear gel, then cure. Seal with a clear topcoat so foil edges don't catch.
Editor's noteUse small torn foil bits - larger pieces look like patches on short nails.
Watch outPressing foil too hard can create dents under the topcoat.
20. Black Lace Veil On Nude Coffin
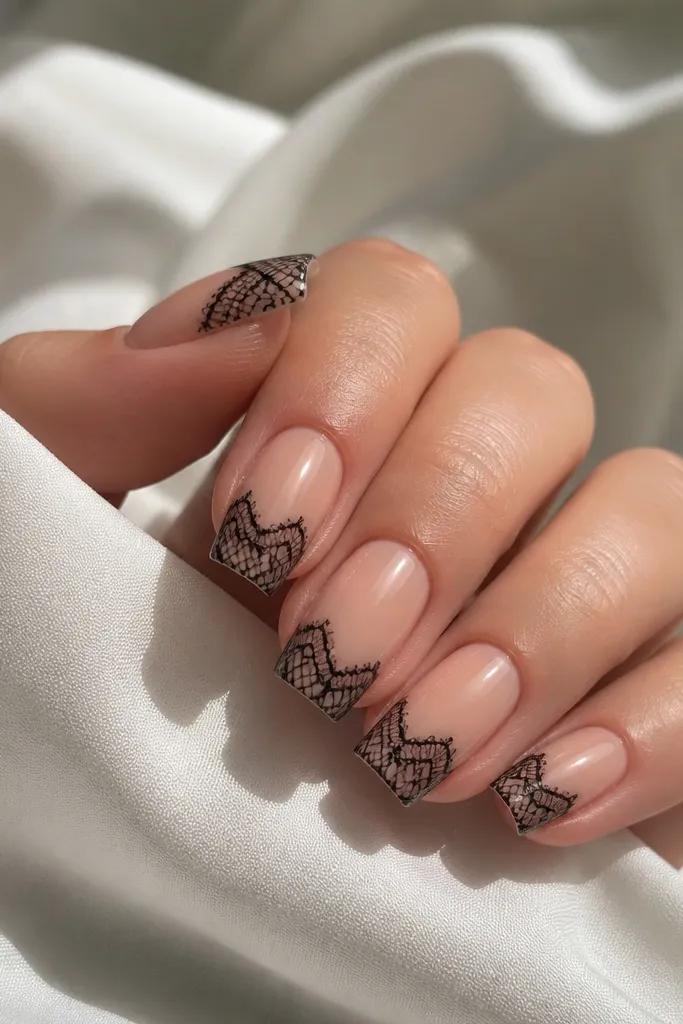
Black lace over nude looks like lingerie for your hands. The trick is to keep the lace confined to the tip area so it doesn't overwhelm the short nail. Fine lace patterns also make the nail look more detailed without needing gems.
Start with a nude base close to your skin tone. Use lace nail stickers or paint a lace pattern with a thin brush and a lace template underneath. Seal with topcoat, focusing on smoothing the lace edges.
Editor's noteIf you paint lace, do it in layers: base linework first, then add gaps so it looks like lace mesh.
Watch outUsing thick black lines turns lace into a solid blob.
21. Pink Chrome With Clear Crystal Corner
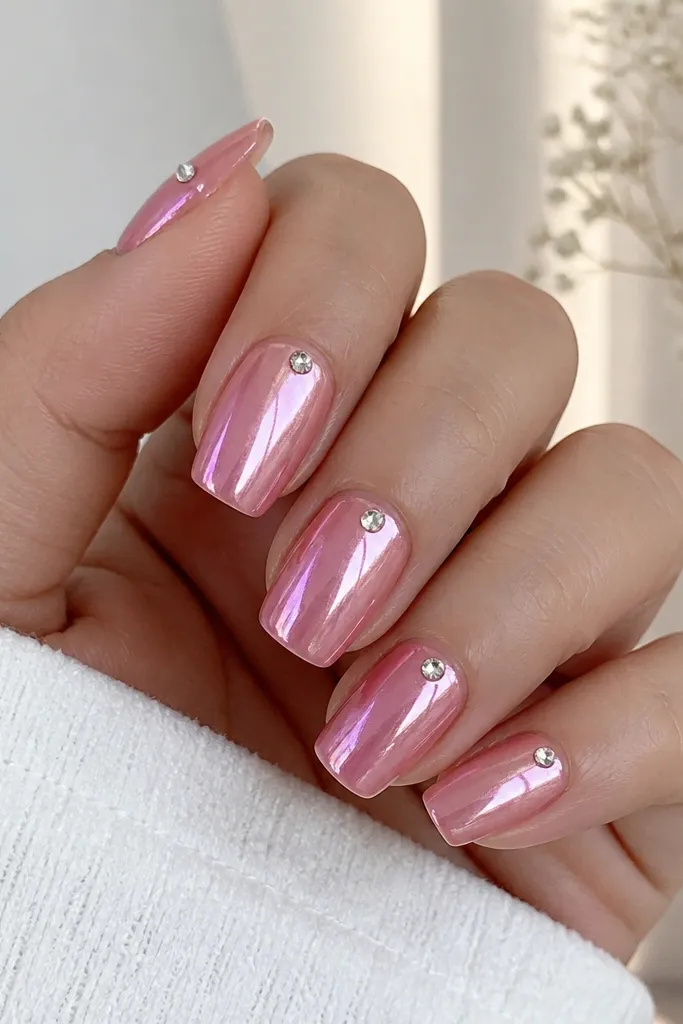
Pink chrome gives instant "done" energy, and the crystal corner makes it look intentional. The crystal sits near the sidewall corner so it flashes when you move your hand. On short nails, keep crystal size tiny so it doesn't look like a decoration on a toy.
Apply pink chrome over a pale base, then cure. Place one small clear crystal at the upper corner near the sidewall on each nail. Encapsulate with a thin clear gel layer to keep the crystal secure and smooth.
Editor's noteUse a gel adhesive for crystals if your base is not tacky anymore - crystals need grip.
Watch outSkipping encapsulation makes crystals lift at the edges fast.
22. Soft Gray Smoke With White Dot Trail
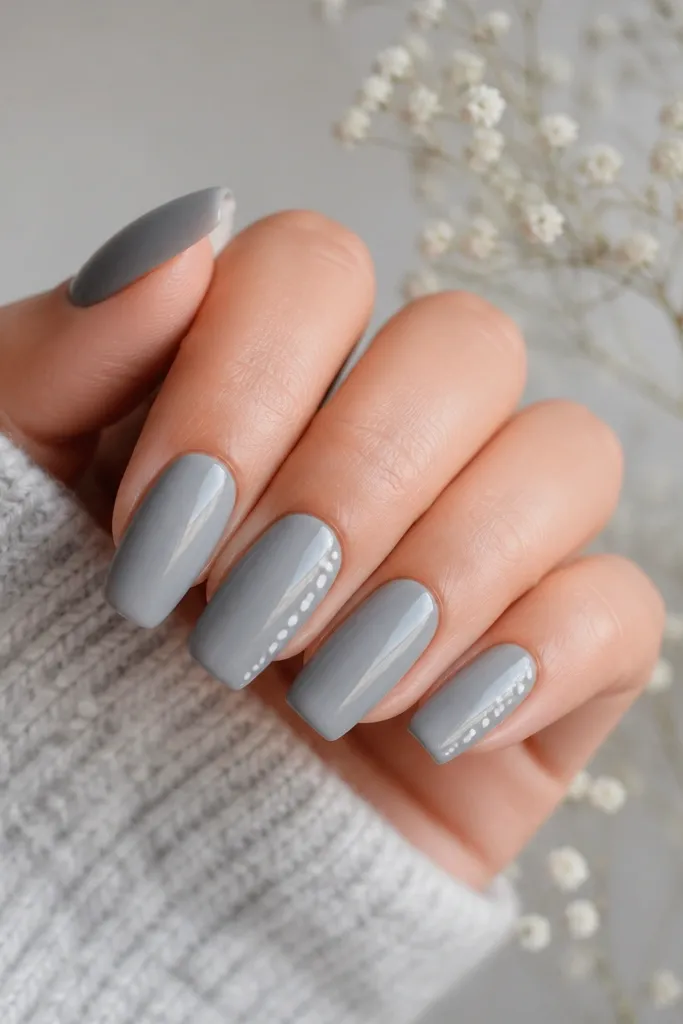
This set looks like smoke with a little light trail. Soft gray is forgiving and hides filing marks better than stark white. The dot trail adds movement and keeps the design delicate on short coffin nails.
Paint all nails soft gray. On two nails, place evenly spaced white dots in a curved line, starting near mid-nail and ending near the tip. Topcoat smoothly so dots stay rounded and glossy.
Editor's noteUse a dotting tool with a consistent tip size so the dots match across nails.
Watch outUneven dot sizes make the trail look messy.
23. Nude Coffin With Tiny Rainbow Foil
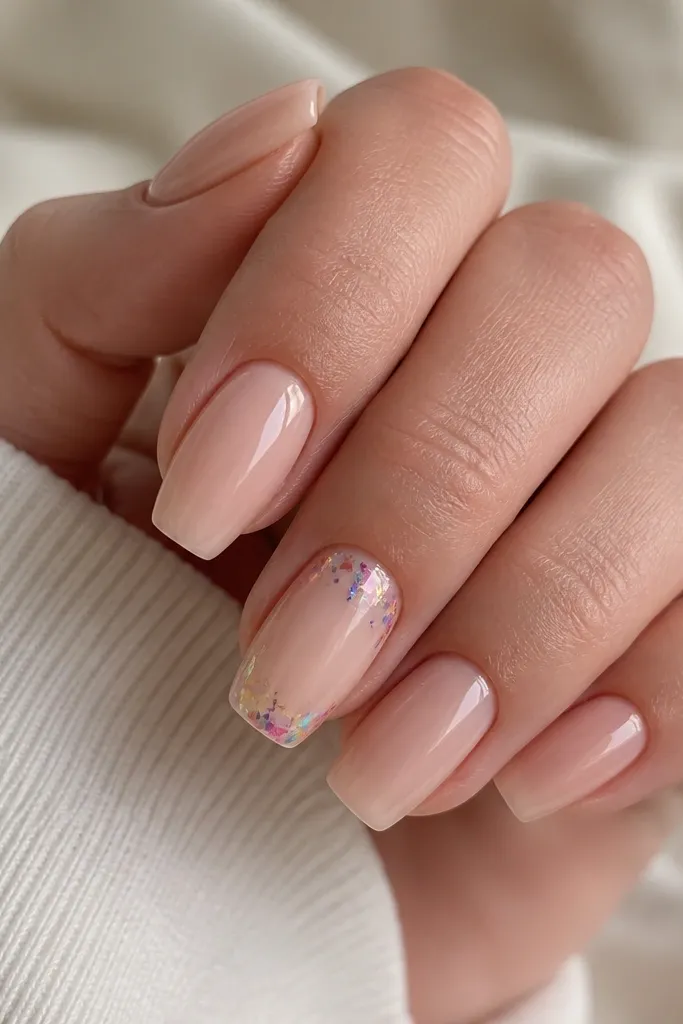
Rainbow foil flakes look cute without going full "arcade." On nude, the colors pop while still looking clean. Keep flakes tiny and place them in two spots so your eye has a rhythm across the nail.
Use a glossy nude base. Add tiny rainbow foil flakes into tacky gel near the cuticle on one nail, and near the tip on the same nail or a second accent. Seal with topcoat in thin layers to avoid lifting edges.
Editor's notePress foil gently with a silicone tool so it bonds without flattening the flakes.
Watch outLarge foil pieces look bulky on short nail beds.
24. Teal Aura Glow Tips
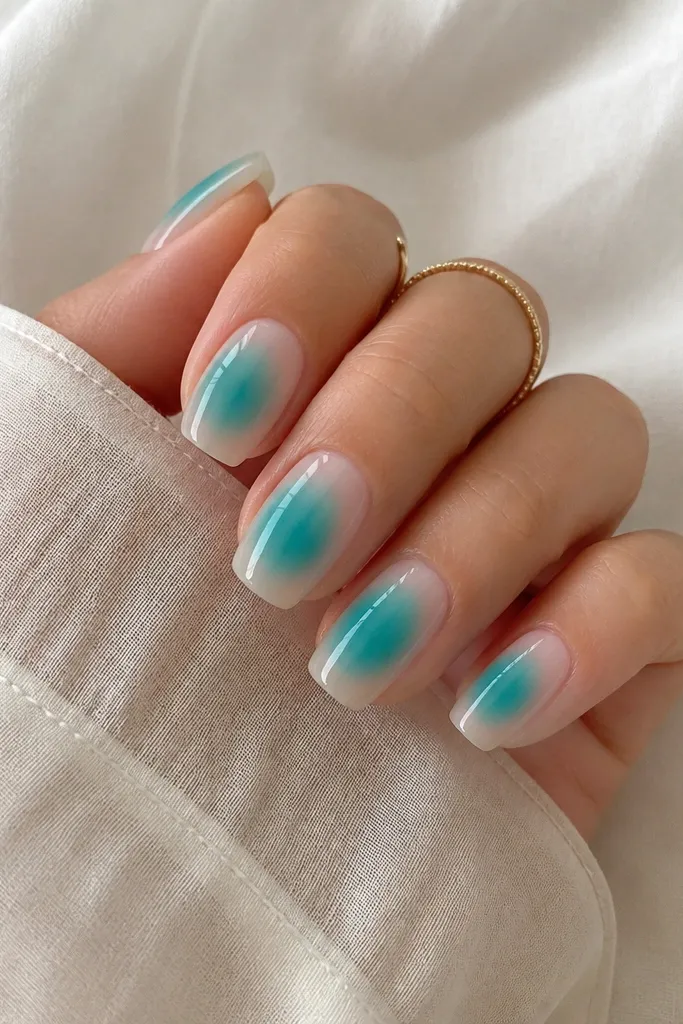
Aura glow looks like a soft filter on nails, and teal is flattering because it adds color without being neon. The glow effect works best when the center is more saturated and the edges fade. On short coffin, keep the aura centered so it doesn't push the design up toward the cuticle.
Start with a sheer nude base. Sponge teal gel around the center and blend outward toward the tips using a clean brush to soften the edges. Cure, then topcoat with a smooth, glossy layer to level the aura.
Editor's noteUse a makeup sponge and do three light taps instead of one heavy tap.
Watch outOver-pigmenting the edges makes aura look like a solid block.
25. Classic Nude With Micro Gem Row
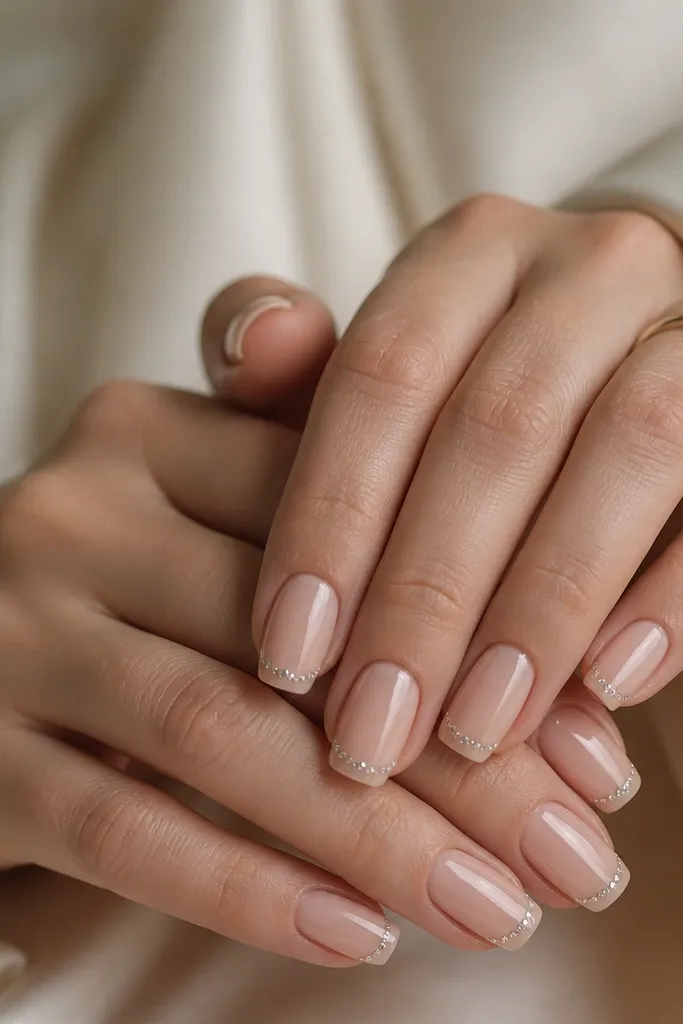
A micro gem row is the cleanest way to add sparkle to short coffin. The gems sit in a line so the nail still looks sleek, and the nude base keeps it wearable. Use very small stones so the row looks like light, not like heavy rhinestones.
Paint with a classic nude close to your skin tone. Place tiny clear gems in a straight row starting about 2mm from the free edge and finishing near the sidewall. Seal with clear gel and file lightly only if needed to keep it smooth.
Editor's noteIf gems move while curing, hold them in place for a full 10 seconds with gentle pressure before letting go.
Watch outA gem row too close to the cuticle looks crowded on short nails.