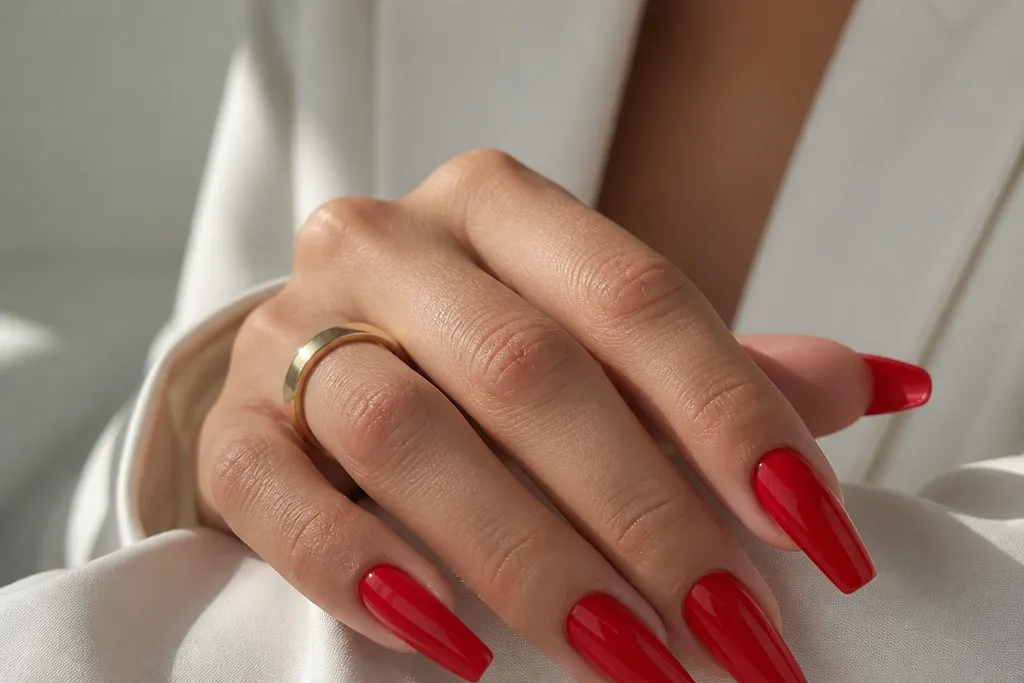
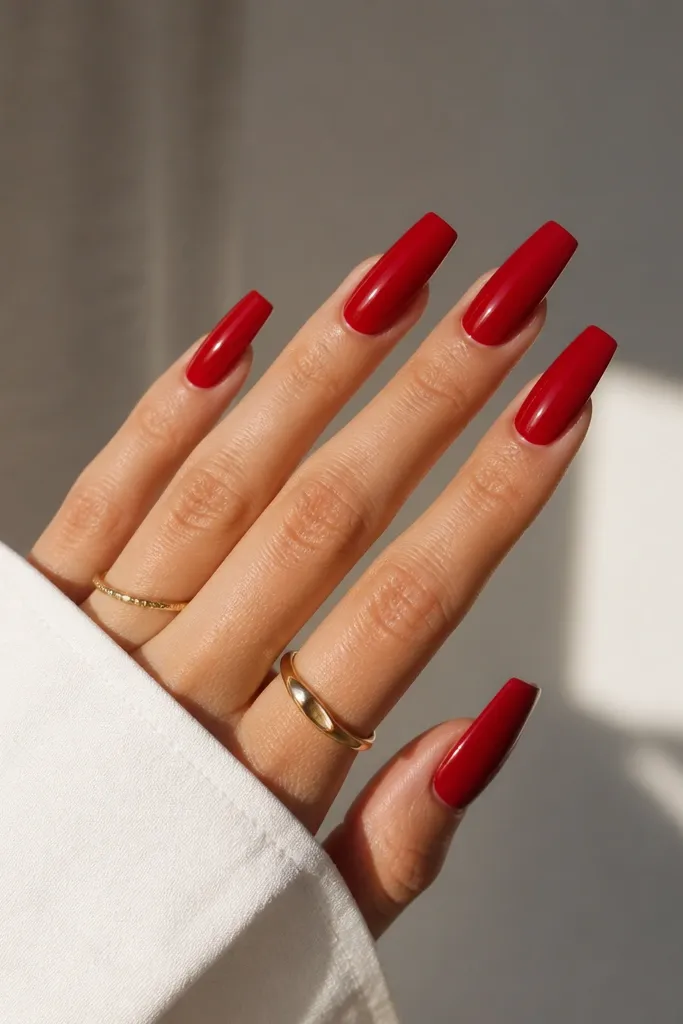
1. Micro French coffin line
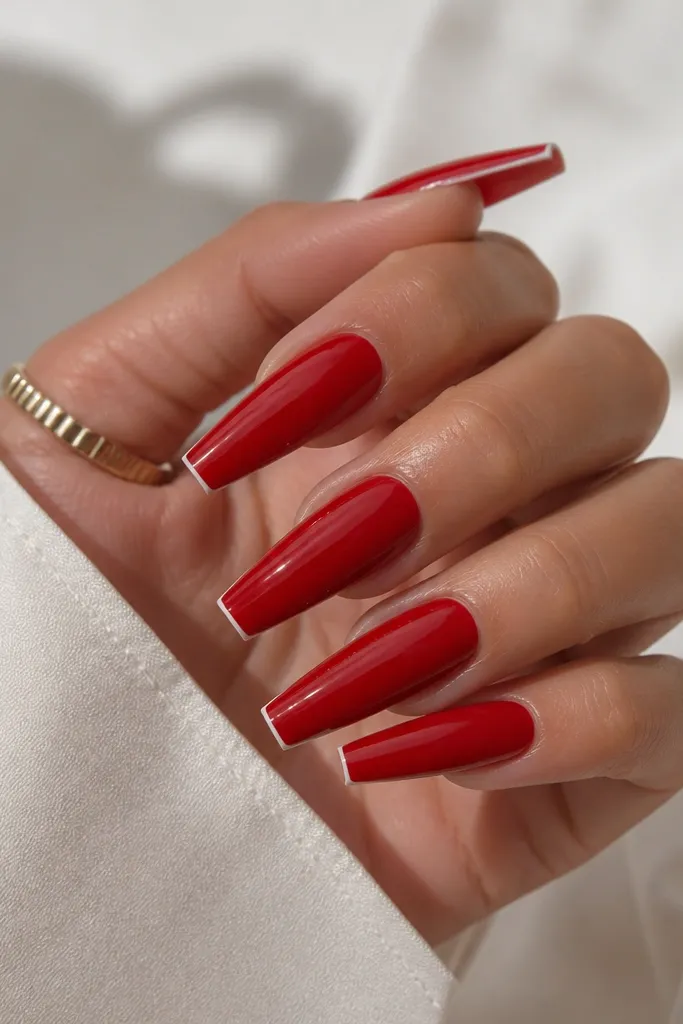
This is the minimalist French that reads sharp because the line is thin and placed slightly above the true tip edge. The red stays the main color, and the micro white line gives a clean frame without turning the set into a holiday look. I like it with a glossy top coat so the red looks smooth and reflective.
Paint red to the cuticle area cleanly, then use a 00 striping brush to pull a 0.5-1mm white line across each tip. Keep the line centered and stop it about 0.5mm before the sidewalls so it doesn't flood the corners.
Editor's noteIf your line wobbles, fix it with a tiny flat brush dipped in alcohol and wipe only the line edges.
Watch outAvoid a thick French band - it makes the coffin look shorter and clunkier.
2. Negative-space half-moon cuticle
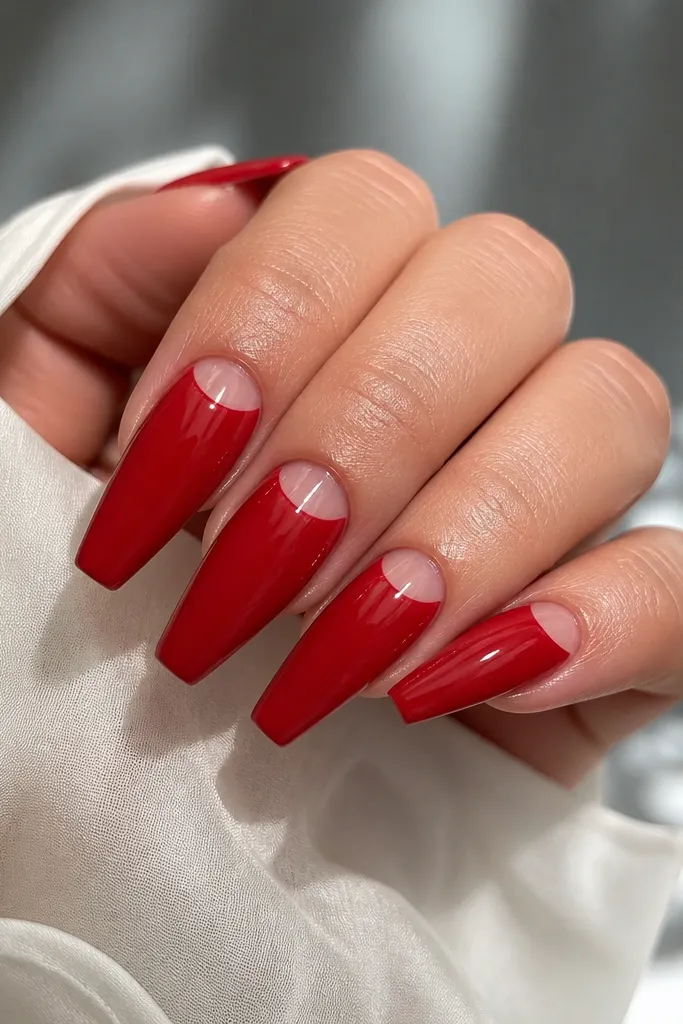
The half-moon creates a modern cuticle frame while keeping the nail minimal. The clear area makes red look lighter and more "fresh," especially on shorter coffin lengths. It's also forgiving because tiny imperfections blend into the negative space edge.
After acrylic and red base, use a small cuticle stencil or a curved striping guide to mask a half-moon. Leave 2-3mm of clear near the cuticle, then remove the mask before top coat.
Editor's noteDo the negative space before chrome or extra details so you don't smear anything while masking.
Watch outDon't make the half-moon too wide - a big cutout makes the nail look uneven.
3. Single chrome stripe down the center
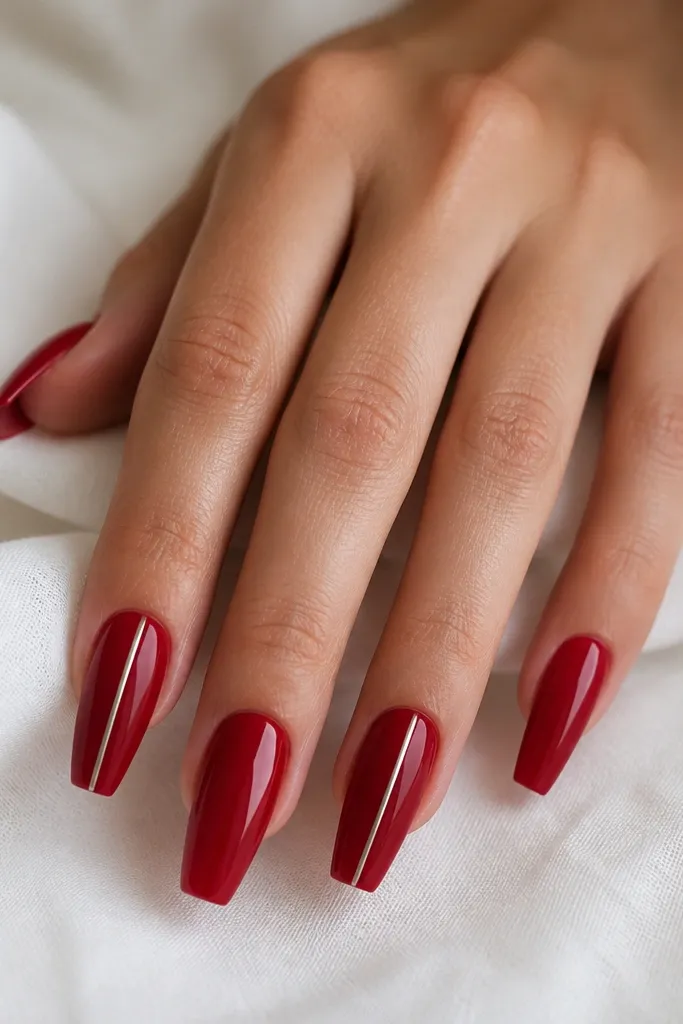
A single center stripe makes red look sleek and intentional. Chrome grabs light and turns a plain red set into something that looks styled without adding clutter. I prefer a straight stripe because it keeps the minimalist vibe.
Apply red first. Then dab chrome gel in a 1mm-wide line down the center, cure if required, and rub chrome powder over it. Seal with top coat carefully so the chrome doesn't dull - use a thinner coat over the stripe.
Editor's noteUse a striping brush to clean the line edges before you cure, so it stays razor-straight.
Watch outSkip thick chrome gel - it creates raised edges that catch on hair and clothing.
4. Matte red with one glossy accent nail
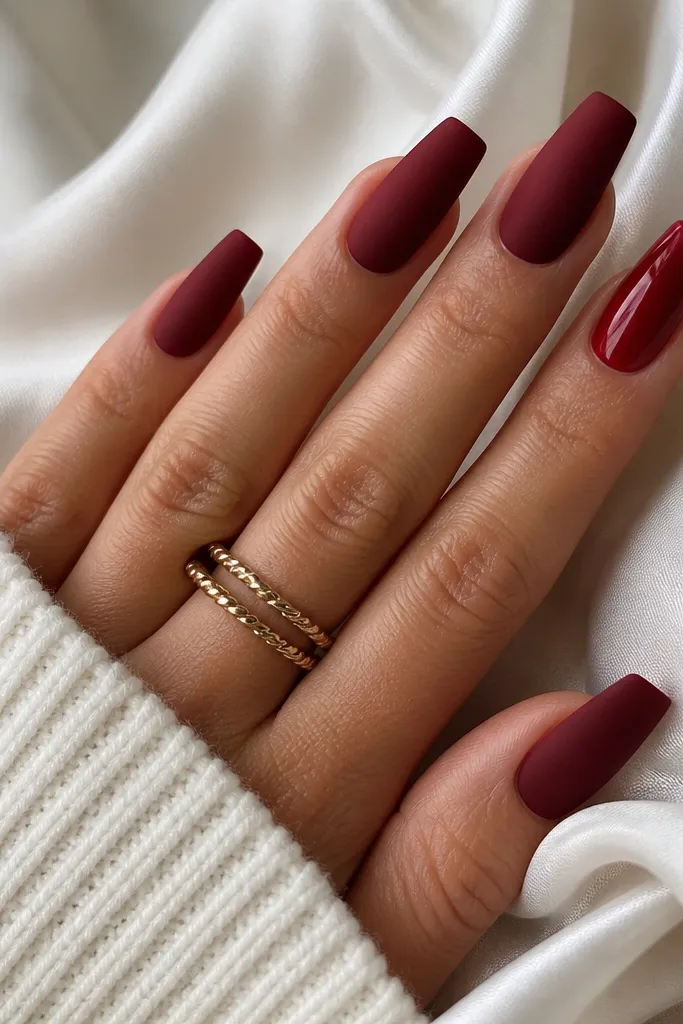
Switching finish is the fastest minimalist upgrade. Matte red looks velvety and modern, and the one glossy nail gives a clean focal point without adding art. It photographs well because the shine difference is obvious.
Do your red base in two thin coats. Apply matte top coat to all nails, then leave one nail glossy by sealing it with glossy top coat instead.
Editor's noteIf your matte top coat looks patchy, apply it in two lighter passes rather than one heavy coat.
Watch outDon't matte the entire set and then add chrome on top - it kills the shine.
5. Red micro dots at the sidewall
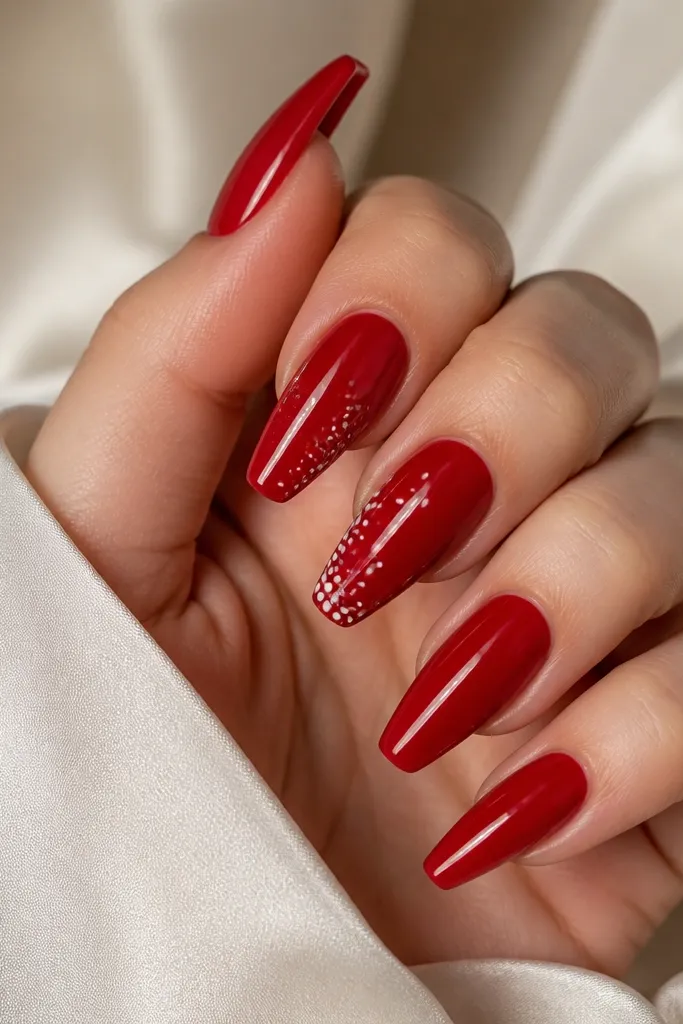
Micro dots look cute but still grown-up when you keep them small and placed near one side. The sidewall placement makes the nail look longer because the dots don't visually "shorten" the center. I stick to white or silver dots so the red stays the star.
Paint solid red first. Use a dotting tool to place 3-5 tiny dots in a diagonal near the lower half of the nail, leaving about 1mm space from the sidewall.
Editor's noteDip your dotting tool lightly and wipe once on a lint-free wipe so you get a consistent dot size.
Watch outAvoid big dots - they turn minimalist into cartoon quickly.
6. Thin black line at the tip edge
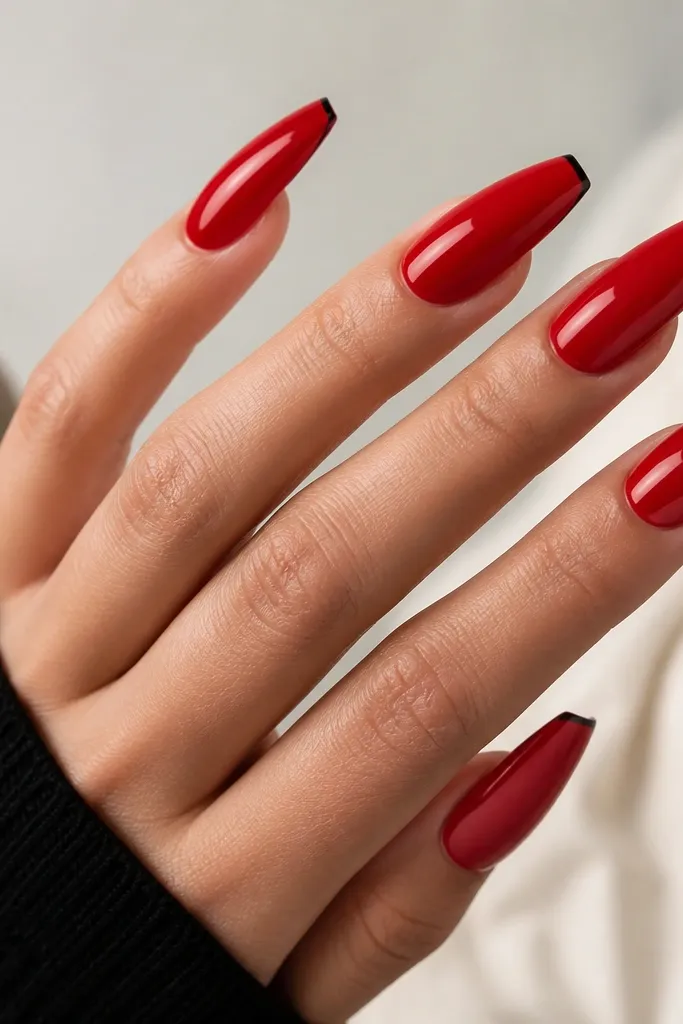
This looks like a high-end manicure because it's basically an outline, not a full design. Black adds contrast that makes red look deeper, and it stays minimalist because it's only one line. The tip outline also makes the coffin point look crisp.
After red is cured, use a striping brush to draw a 0.5mm black line along the very edge of the tip. Keep it centered and stop before the sidewalls to avoid thick pooling.
Editor's noteIf the line bleeds, let the red fully cure and then wipe the nail with alcohol before drawing.
Watch outSkip glitter or chunky black details - outline should stay clean.
7. Red ombre coffin with nude base
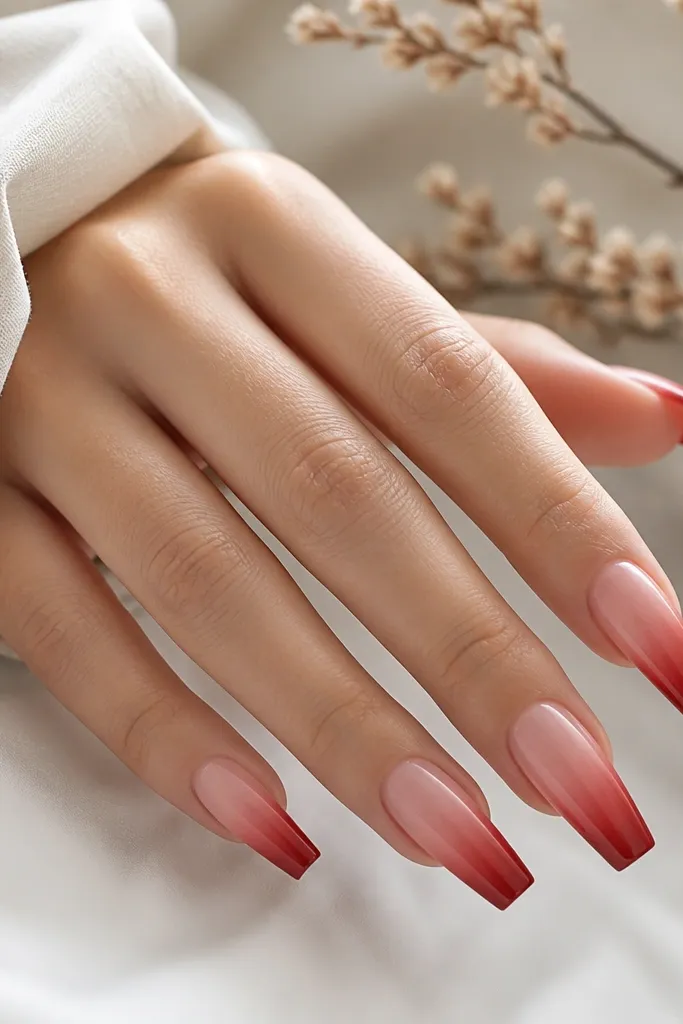
A red ombre over nude looks modern because the transition is soft instead of blocky. It also makes your nails look longer since the nude starts near the cuticle. I like this one when my hands look dry because it hides cuticle growth lines better than full red.
Start with nude base (or clear acrylic tinted nude). Sponge red onto the tip area and blend upward with a clean sponge edge, keeping the gradient smooth. Seal with glossy top coat.
Editor's noteUse a makeup sponge cut into a small square for tighter control at the coffin tip.
Watch outDon't rush the blend - harsh edges show up instantly on red.
8. Clear negative window with red border
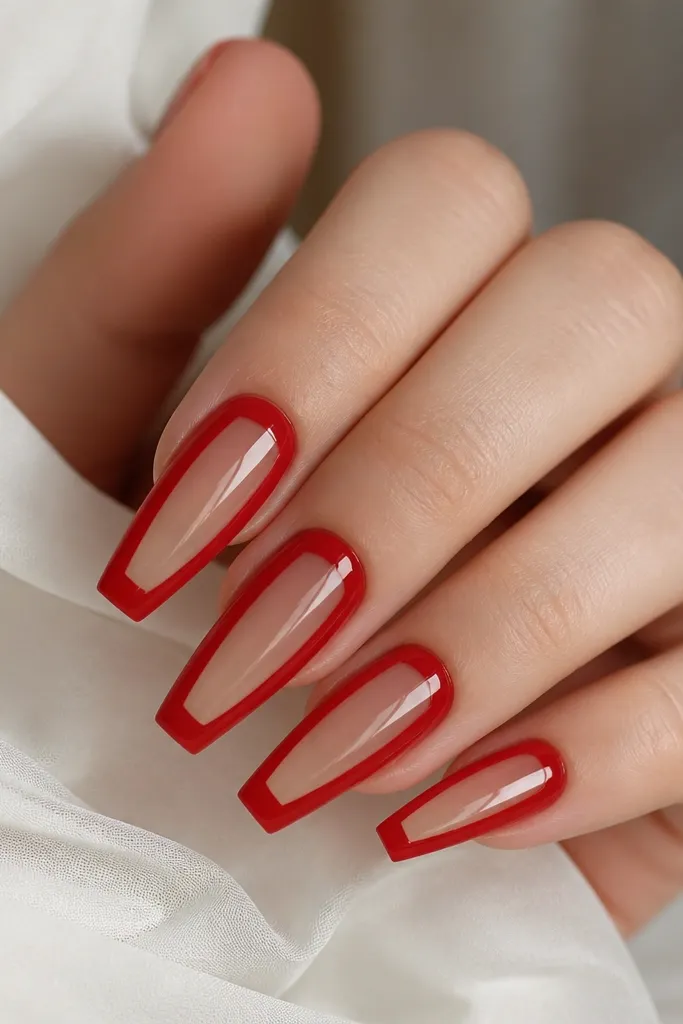
Windows feel architectural, but this one stays minimalist because the window is clean and only outlined. The clear space breaks up the red and makes the design feel intentional. A thin red border keeps it from looking like an accident.
After red base is set, mask a rectangle in the center using tape or a small stencil. Paint over the masked area with clear (or leave it unpainted if your base is clear), then outline the rectangle edges with thin red using a striping brush.
Editor's noteMeasure the rectangle width using your finger width - keep it around 1/3 of the nail width.
Watch outDon't make the window too low near the tip - it looks off-balance.
9. Single rhinestone at the cuticle corner
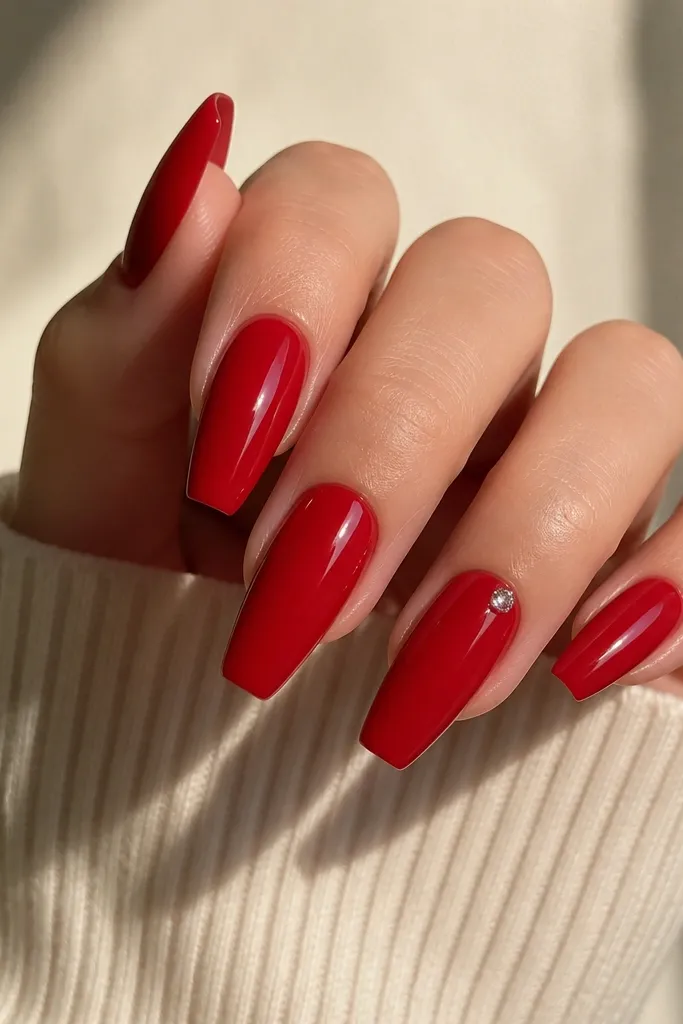
One stone is enough when it's placed precisely. The cuticle corner placement looks like jewelry without turning the nail into a full bling set. Use a flat-back gem so it sits flush and doesn't snag.
Seal your red base, then apply a tiny dot of nail glue or gel adhesive where the stone goes. Place the rhinestone and press gently, then cap the top with clear gel or top coat.
Editor's noteUse tweezers with a light grip - strong pressure can shift the stone before it sets.
Watch outSkip big stones - they make minimalist red look heavy.
10. Red glossy base with nude micro-curve
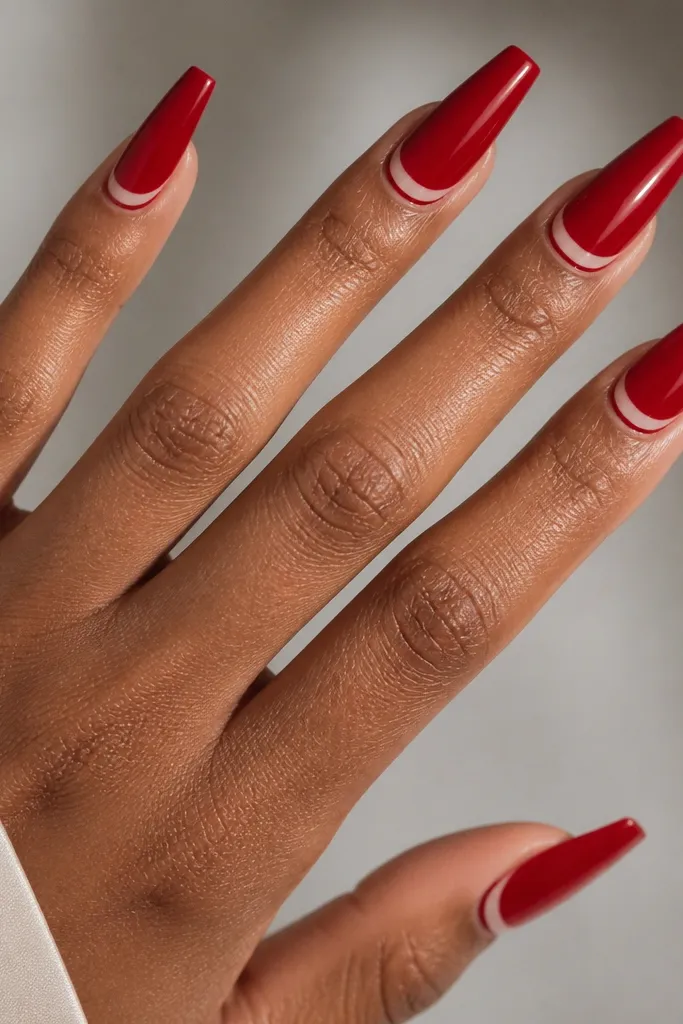
This is a tiny graphic element that still feels clean. The nude curve gives a gentle contrast and makes red look less solid and flat. It's especially good if you want something subtle for work but still fun for nights out.
Paint solid red. Then with a fine liner brush, paint a nude arc about 2mm long near the cuticle, curving with the nail shape. Seal with glossy top coat.
Editor's noteLet the nude line dry fully before top coat so it doesn't smear into the red.
Watch outAvoid thick lines - they look like sticker residue.
11. Matte red with a thin gold stripe
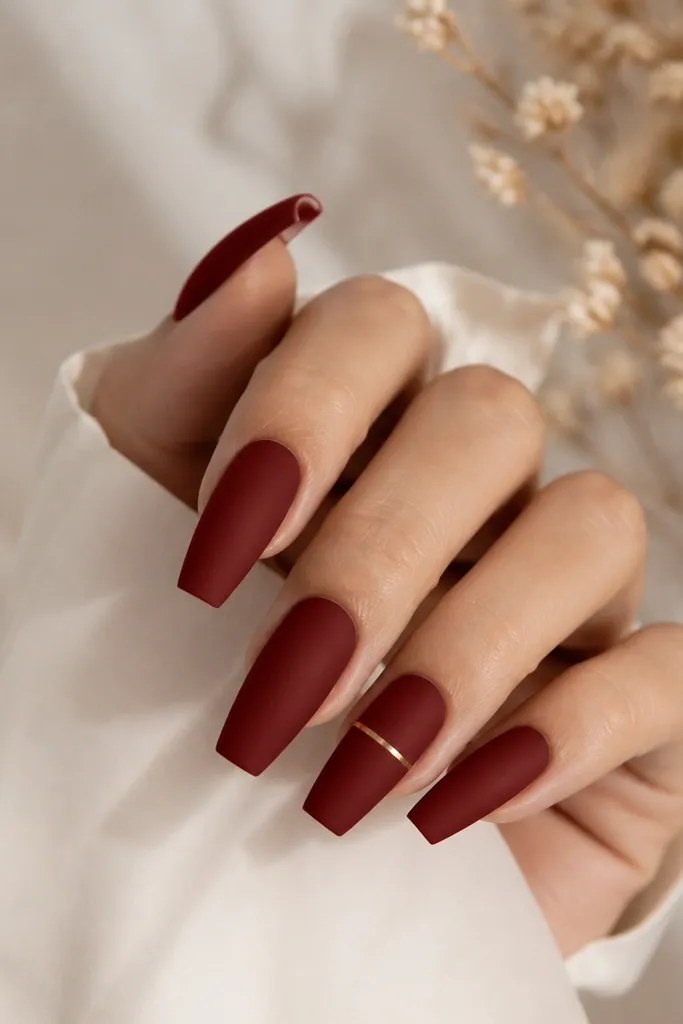
Matte red plus gold reads like jewelry, but the minimalist trick is keeping the stripe thin. Gold stripe catches light differently than chrome, so it feels warmer and softer on skin. This combo also looks great with both silver rings and gold rings.
Apply matte top coat to the full set. On the accent nail, add a 0.5-1mm gold stripe using gold striping tape or gold foil gel, then seal the stripe with a glossy top coat for contrast.
Editor's noteIf you use gold tape, burnish the edges with a silicone tool so it doesn't lift at the sides.
Watch outSkip chunky foil - it turns the stripe into a patch.
12. Red marble swirl on one nail only
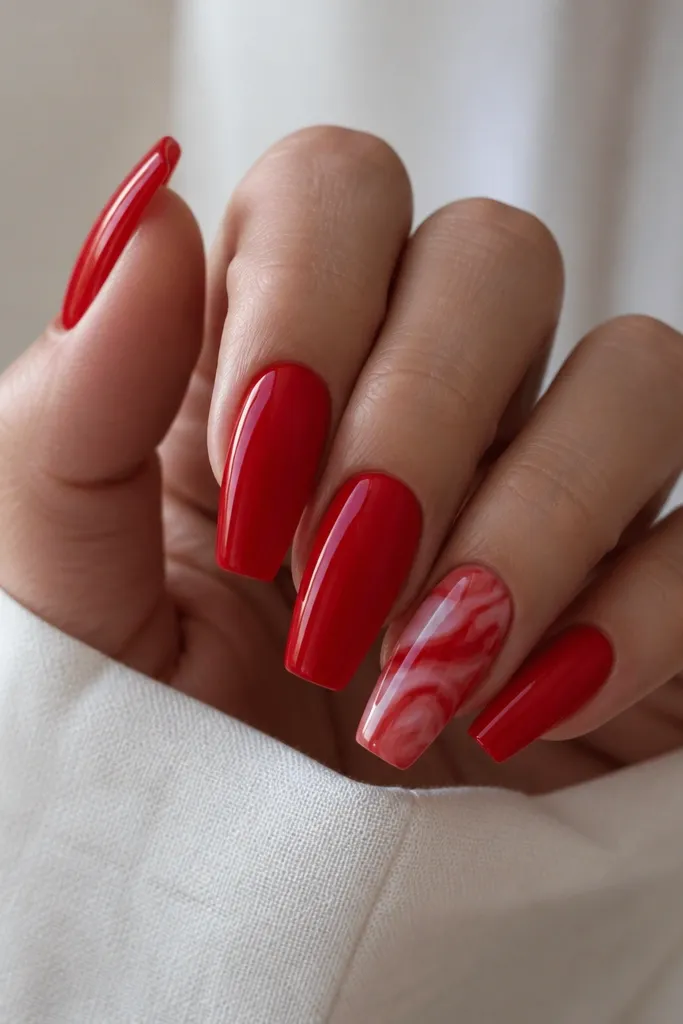
Marble can go loud, so I keep it to one nail and keep the colors close to the base. Lighter red and a tiny bit of nude make it look like real stone, not a sticker. The set stays minimalist because only one nail has movement.
Paint solid red on every nail. For the accent nail, sponge or brush lighter red streaks and drag them gently with a clean liner brush, then add a nude haze for depth. Seal with glossy top coat.
Editor's noteDo the marble right after the base is fully set but before you buff again so it blends smoothly.
Watch outDon't marble every nail - it stops being minimalist fast.
13. Red glazed donut shine
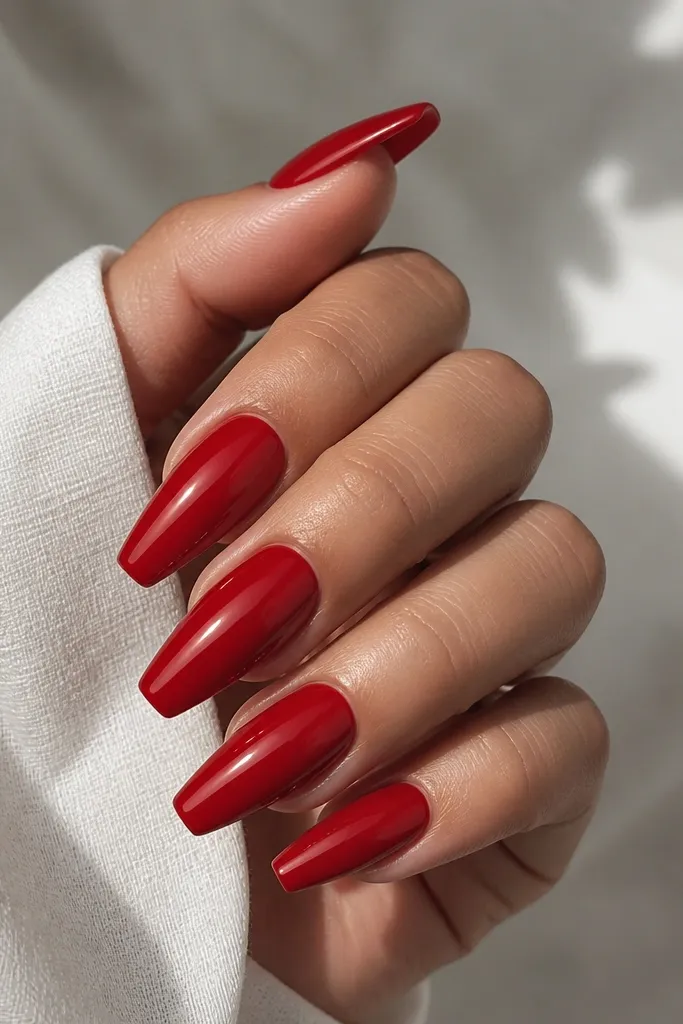
Glazed shine is what makes minimal red look like it costs more. The trick is making the top coat level and reflective, then using a very light lighter-red tint for the glazed effect. It looks like bakery glaze under light, not like glitter.
After red color, wipe the surface and apply a thicker, even layer of glossy top coat. For the glaze effect, add a tiny amount of lighter red gel in the center and swirl it lightly, then top coat again.
Editor's noteUse a gel top coat that self-levels; thin brush strokes leave ridges on glossy red.
Watch outAvoid overbaking the top coat - too much heat can dull the shine.
14. One-stroke red line art on nude accent
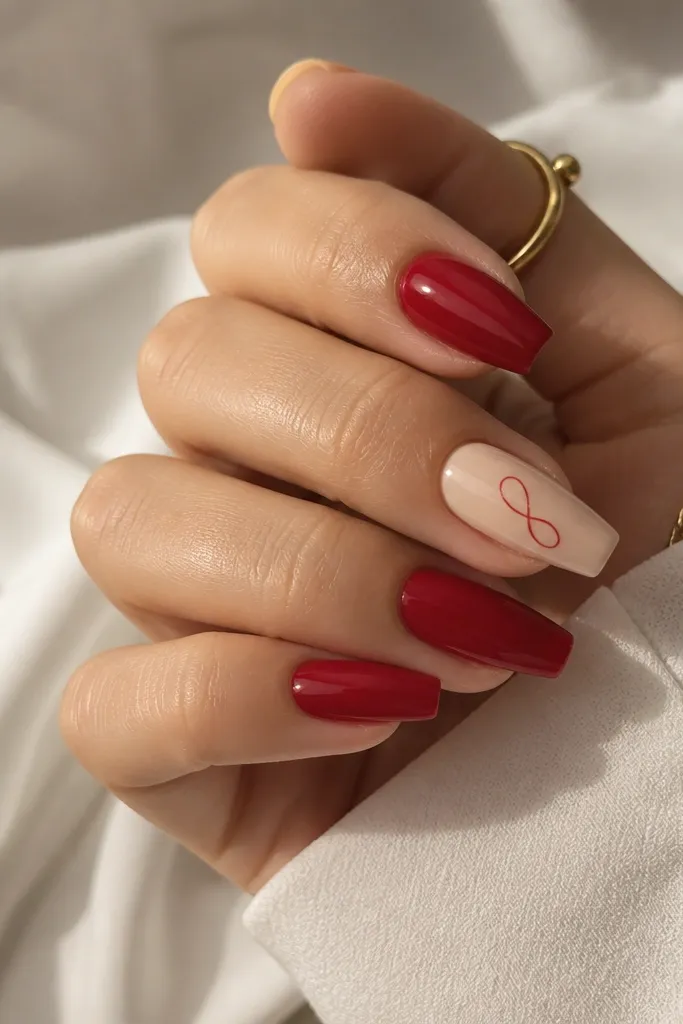
Line art looks modern when it's one continuous stroke. The nude accent makes the line art readable and keeps the rest of the hand simple. This one is perfect when you want something artistic but still wearable.
Keep most nails solid red. Paint one nail nude, then use a striping brush to draw a single looping stroke in red gel or acrylic paint. Seal with glossy top coat.
Editor's notePractice the loop on paper first - your hand will remember the curve.
Watch outDon't thicken the lines - wide strokes look messy on coffin tips.
15. Red and clear checker micro squares
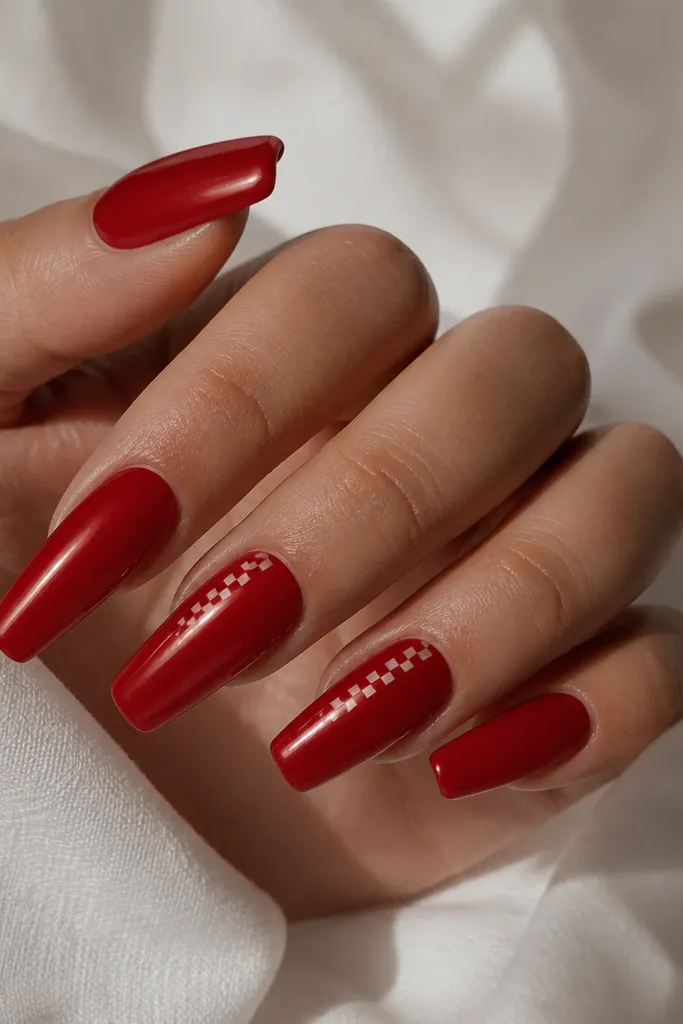
Micro checkers look playful while staying minimalist because the pattern is small and placed only at the side. Clear squares add contrast and prevent the set from feeling heavy. I keep it to one nail so it doesn't overwhelm the red.
After red base, use thin tape strips to section off 1-2mm squares near the sidewall. Remove tape to create clear areas, then fill red squares where needed. Seal with top coat.
Editor's notePress tape down firmly along the sidewall so the edges don't lift under top coat.
Watch outAvoid big checker patterns - they look like costume nails.
16. Red half-foil accent edge
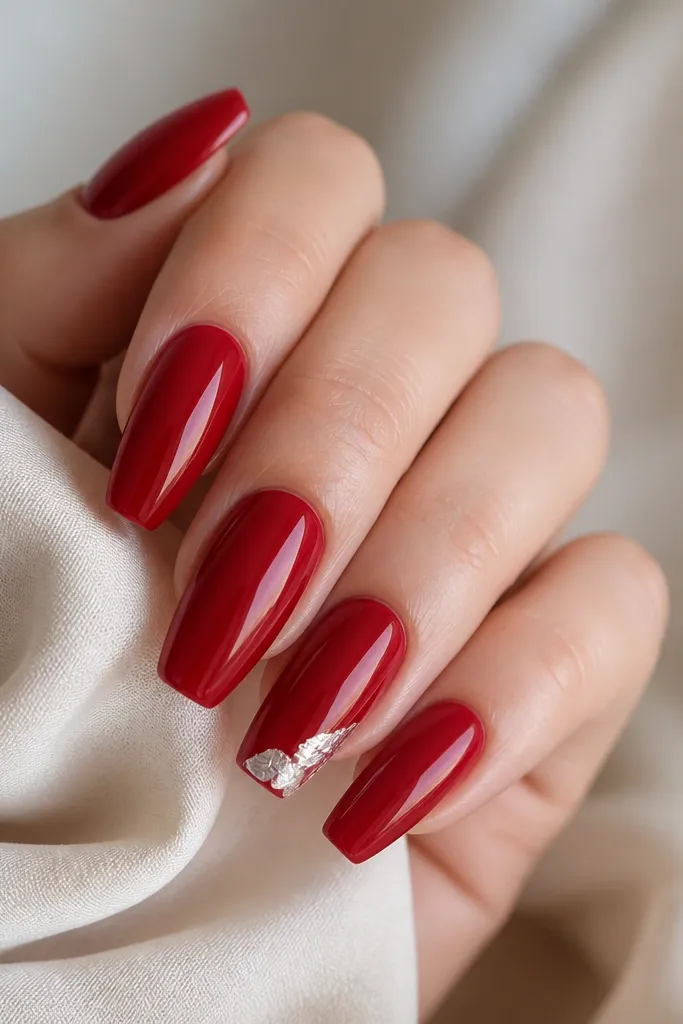
Foil fragments add texture without needing a full design. When you keep it at the tip edge, it looks like a deliberate highlight rather than messy glitter. The red base makes the foil look intentional.
Use foil adhesive or gel on the top edge area only, then press foil pieces lightly. Seal over the foil so it doesn't snag, but keep the foil area small - about 2-3mm.
Editor's noteTrim foil with scissors before applying so you don't get huge sharp shards.
Watch outSkip loose, unsealed foil - it lifts and catches on everything.
17. Red gradient cuticle fade
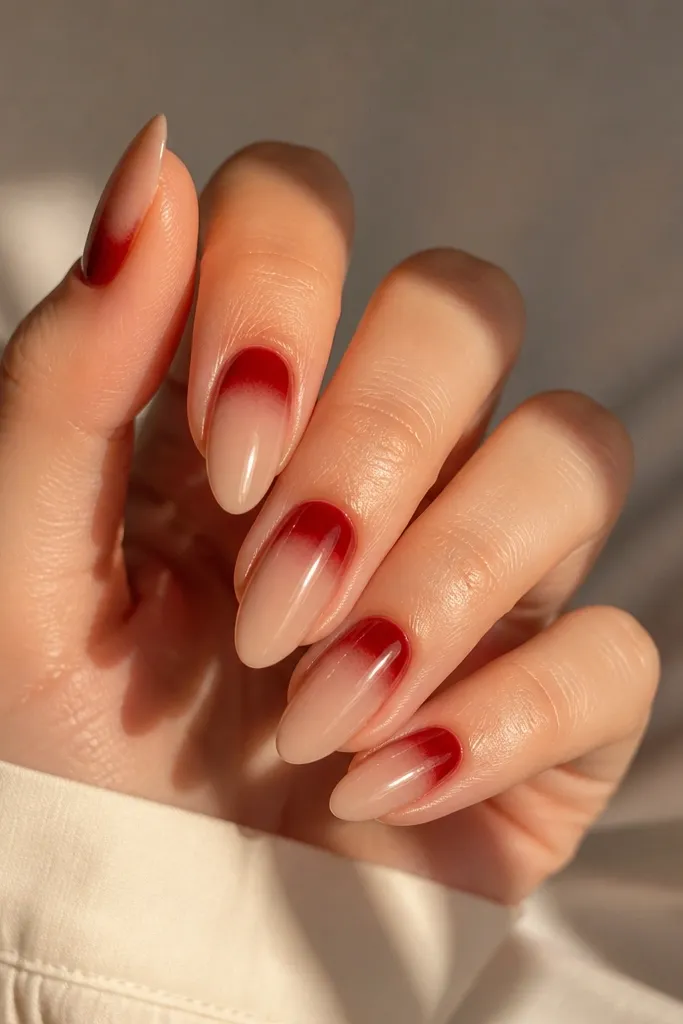
This is the reverse of ombre. The fade at the cuticle makes your nail bed look longer and hides early growth lines. It also looks clean with minimalist outfits because the top stays solid red while the base stays airy.
Start with clear or nude near the cuticle. Sponge or airbrush red downward from the tip, blending up until the entire nail is fully red at the free edge. Top coat for a smooth finish.
Editor's noteBlend upward in tiny steps so the fade stays soft, not striped.
Watch outDon't leave a hard line at the fade - it screams "sponge marks."
18. Red coffin nails with tiny vertical dots
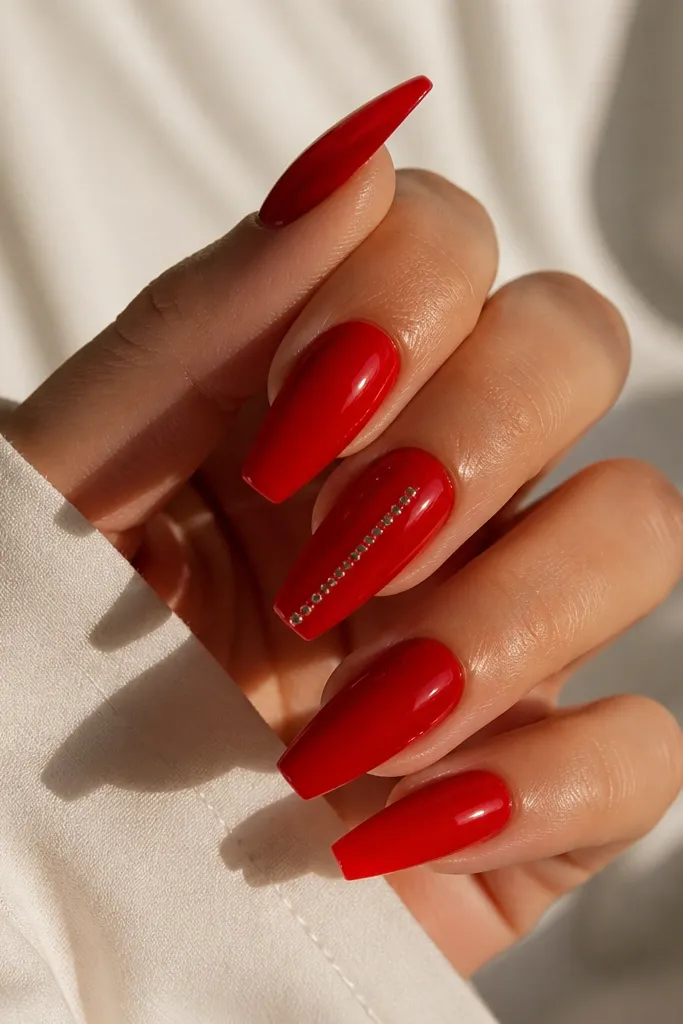
A single vertical dot column elongates the nail. It's minimalist because you're not scattering dots everywhere, just aligning them into one clean visual. Silver dots brighten red and look crisp under daylight.
Paint solid red on all nails. On the accent nail, place 6-8 tiny silver dots in a straight line using a dotting tool, keeping spacing consistent. Seal with glossy top coat.
Editor's noteUse the same dot size for the whole column - inconsistent dots make it look amateur.
Watch outAvoid dots too close to the cuticle - they can look like a mistake.
19. Red glossy with thin nude side stripes
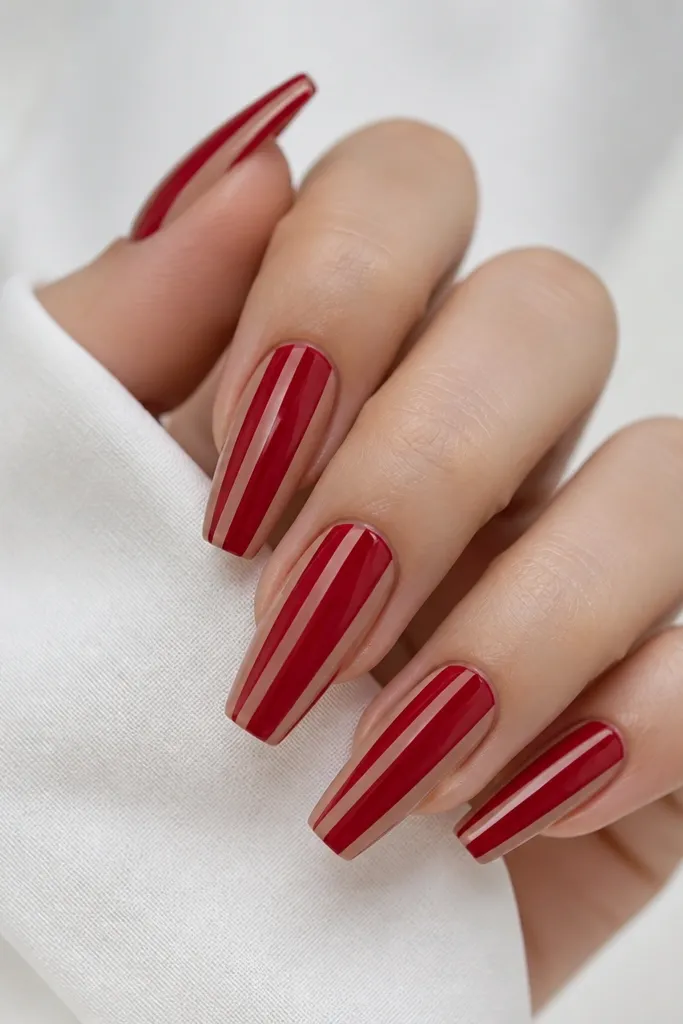
Side stripes make the nail look slimmer and more refined. Nude lines break up the red so the set doesn't feel like one solid block. It also pairs perfectly with gold jewelry because nude reads warm.
Paint solid red first. Then use a striping brush to add a thin nude line on each side, about 1mm from the sidewall. Keep the center red area wider than each nude stripe.
Editor's noteIf your nude line gets messy, wipe the brush with alcohol and drag it back into a clean edge before curing.
Watch outDon't put stripes too close to the edge - they look like sloppy filing.