1. Clean Snowcap Coffin
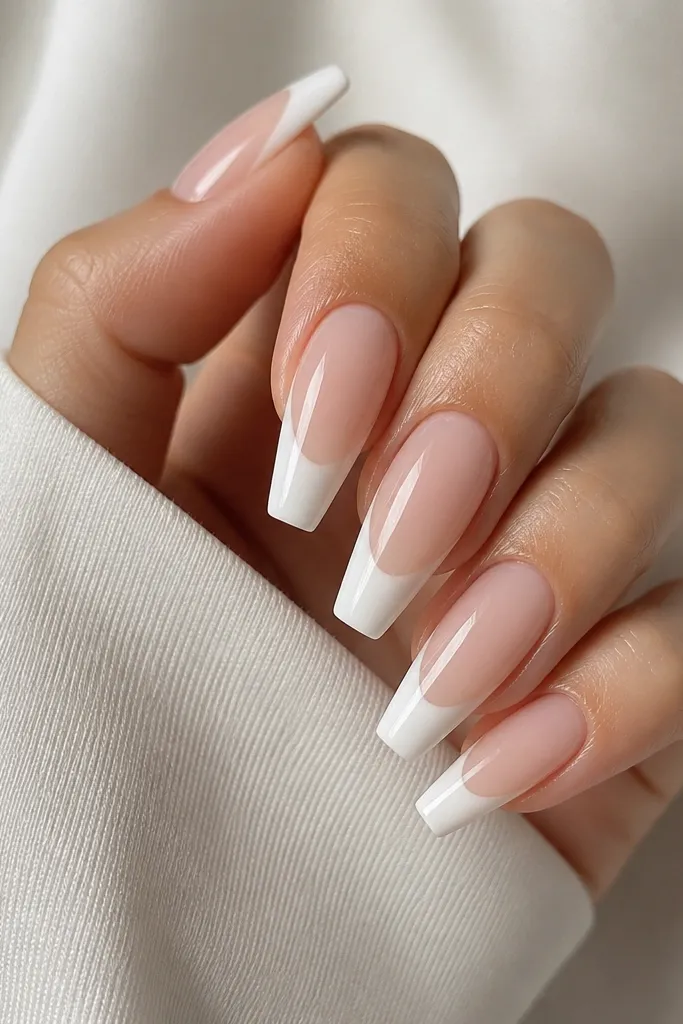
This is the low-maintenance look I reach for when I want white nails that still look "done" after growth. The sheer nude base hides uneven regrowth, and the opaque white cap stays bright instead of turning milky. Because the white is mainly at the tip, you avoid the messy look that happens when white covers the entire nail plate.
Build nude acrylic first, then press the white acrylic onto the free edge like you're frosting a cupcake - thicker at the tip, thinner as it blends upward. Keep the coffin tip length around 10-11 mm for a crisp line. Finish with a high-gloss topcoat and cap the free edge carefully.
Editor's noteIf you hate touch-ups, ask your acrylic supplier for a highly pigmented opaque white powder - it reduces streaking and saves time filing.
Watch outAvoid thin white acrylic that looks watery before filing - it turns translucent and chalky after topcoat.
2. White Half-Moon Negative Space
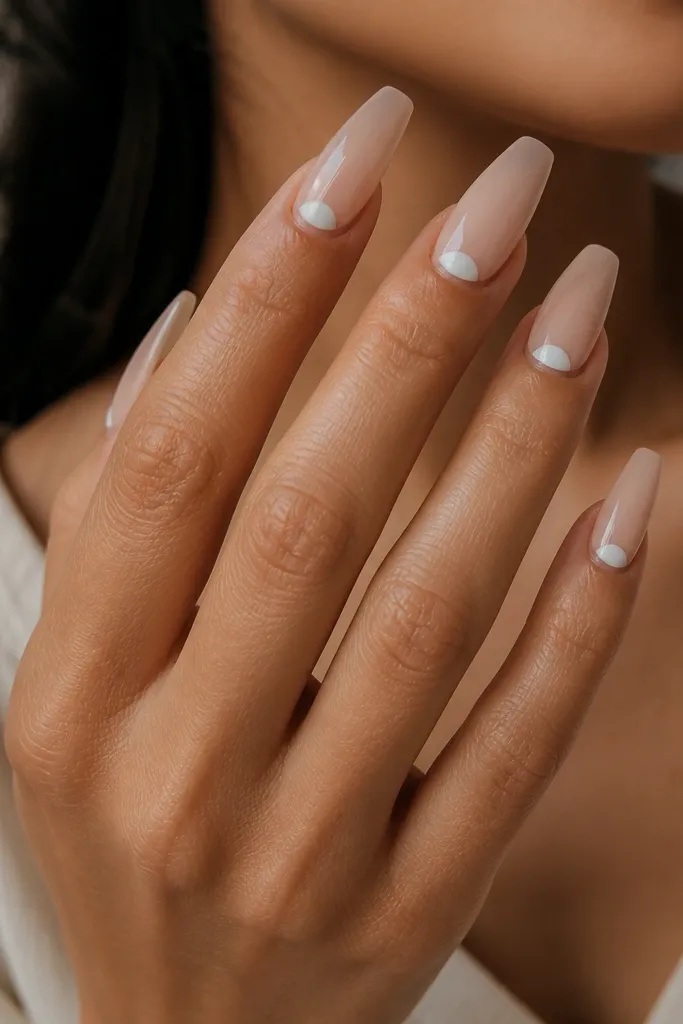
This one is forgiving because the white sits close to the cuticle line, not across the whole nail. Negative space lets your natural nail show through, which makes regrowth less noticeable. It also photographs well because the shape reads instantly even at a quick glance.
After nude base, place a thin white acrylic arc at the cuticle area, staying about 1 mm away from the sidewalls. File gently so the arc stays crisp, then seal with gloss. Keep the arc small on shorter coffin lengths; it looks cleaner than a huge smile line.
Editor's noteUse a striping brush with a gel topcoat to draw a guide arc before you place acrylic so both hands match.
Watch outDon't let the white arc touch the sidewalls - it lifts and looks messy fast.
3. Milk Tea Marble Tips
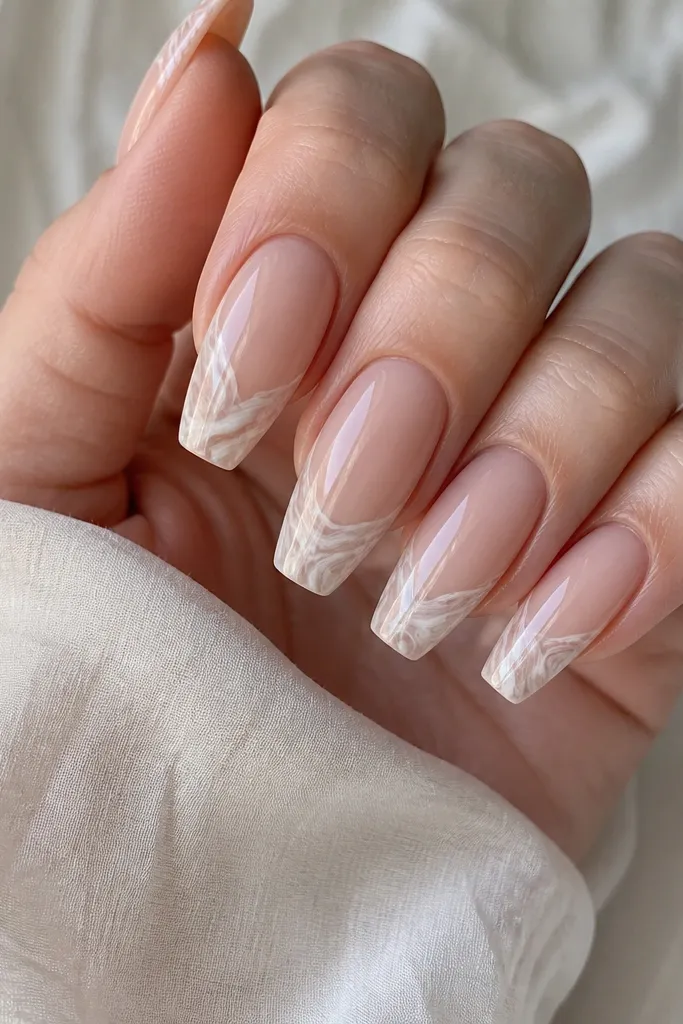
Marble tips hide small chips because the design already has movement. The mix of white with light beige/gray lines looks natural, not harsh, and it still reads "white nails" in daylight. I like this when I want something softer than pure white blocks.
Make a white cap first, then add marble lines on top using a thin detail brush with diluted gray-beige gel or acrylic paint. Keep the marble confined to the last 3-4 mm of the nail so regrowth doesn't drag the pattern down. Seal twice with topcoat for a smooth finish.
Editor's noteThin your gray-beige line color so it stays pencil-line thin - thick lines make it look like paste.
Watch outAvoid putting marble across the whole nail plate - it's harder to keep neat at fills.
4. Glossy White Ombre Fade
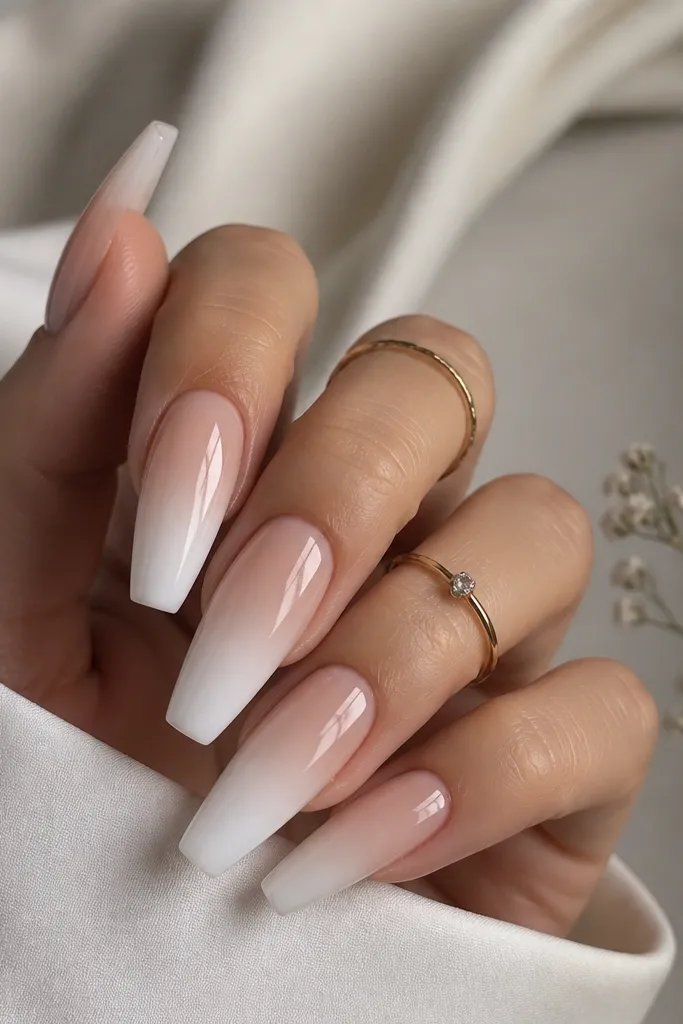
Ombre is low-maintenance because the blend is already "graduated," so regrowth doesn't create a hard line. You get a brighter tip without the stark boundary that chips show up against. I've worn this through a messy week of cleaning because the gradient disguises small filing gaps.
Use nude acrylic as your base, then add white acrylic at the tip. While it's still workable, blend the white upward with light strokes and minimal pressure so you don't smear. File smooth and topcoat glossy.
Editor's noteBlend in thin layers - one heavy layer makes an uneven ridge you'll feel when you run your finger over the nail.
Watch outAvoid blending too high toward the cuticle; it makes the nail look cloudy as it grows.
5. White Chrome Accent Stripe
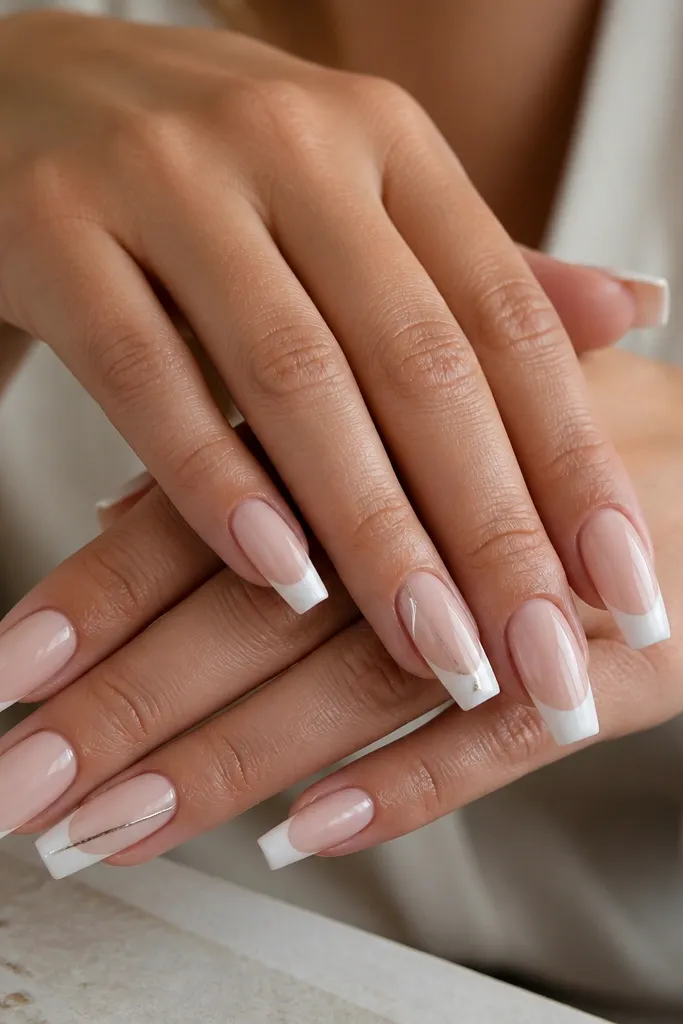
Chrome is the fastest way to make plain white look intentional. Since the stripe is small, it doesn't require heavy art time, and it hides micro-scratches better than full decals. I like placing it diagonally so it catches light when you move your hands.
Build the snowcap white tip first. Add a thin diagonal line with white gel liner, cure, then apply white chrome powder over the stripe area and seal with topcoat. Keep chrome only on 2-3 nails for that "picked" look.
Editor's notePress chrome powder lightly with a small foam applicator so it doesn't spread past your stripe.
Watch outAvoid sealing chrome with a thick layer - it can dull the shine and look cloudy.
6. Matte White Tip + Glossy Micro-Heart
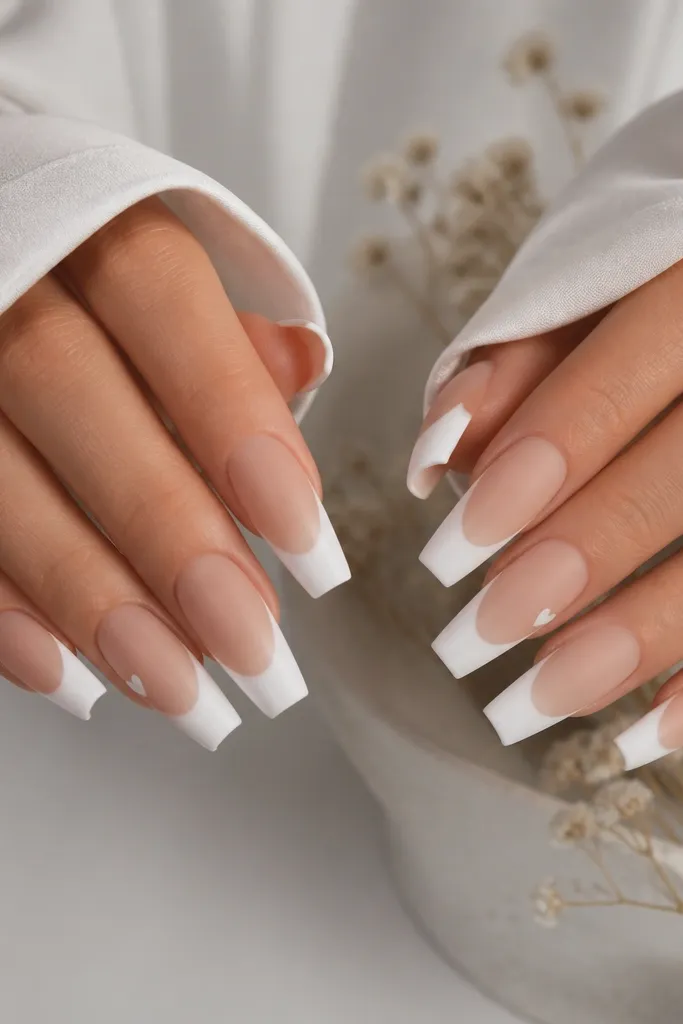
Matte tips hide tiny imperfections in the surface better than full gloss, so your set looks smooth longer. The tiny glossy heart gives contrast without needing a full design. It's cute without being high-maintenance because the art is small and easy to reapply at fills.
After acrylic and filing, apply matte topcoat only over the white tip area. Draw a small heart on one accent nail using glossy white gel, cure, then leave the rest matte. If you want extra durability, seal the heart with a thin gloss coat only over the heart.
Editor's noteMark the heart placement with a dot using a toothpick before you draw the outline.
Watch outAvoid matte topcoat over the entire nail if you hate fingerprints - it will show smudges.
7. French Coffin, Thick White Smile
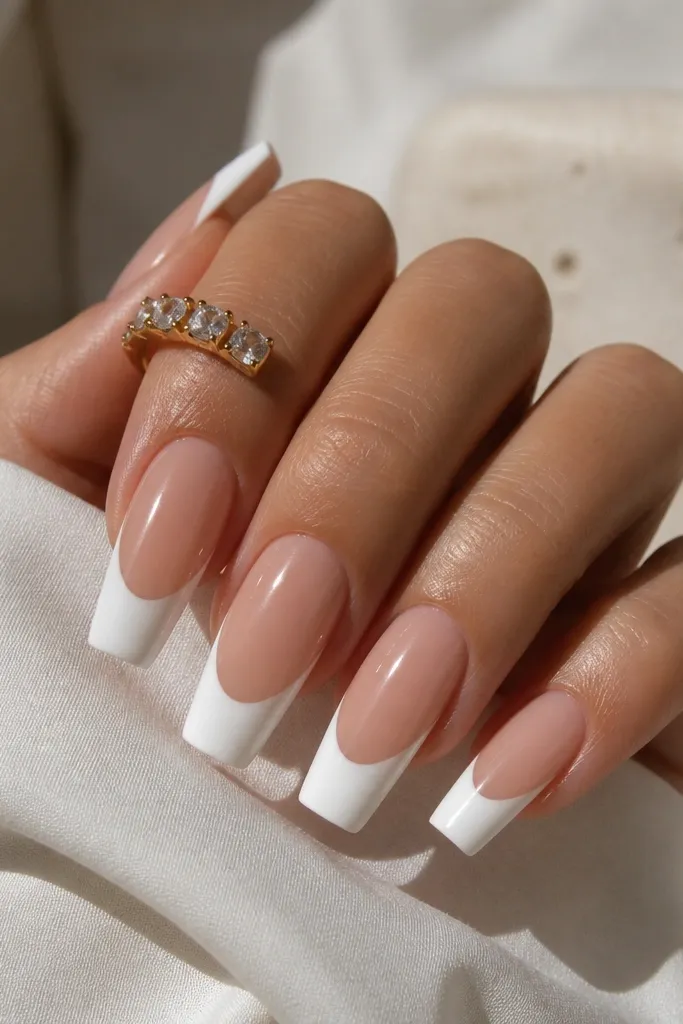
A thick French smile looks high-end and stays readable as your nail grows. It's also easier than full-white because you control the line thickness and keep the center nude. I've had this last longer between fills because chips show less on the nude area.
Use nude base first, then apply white acrylic along the smile line using a guide strip or a French nail stencil. Keep the smile width about 2-3 mm on medium coffin nails. File the smile edge smooth, then gloss everything.
Editor's noteStick with one smile width per hand so the nails match even when you're tired.
Watch outAvoid wobbly smile lines - uneven edges look cheap even with perfect polish.
8. White Glitter Dust at the Edge
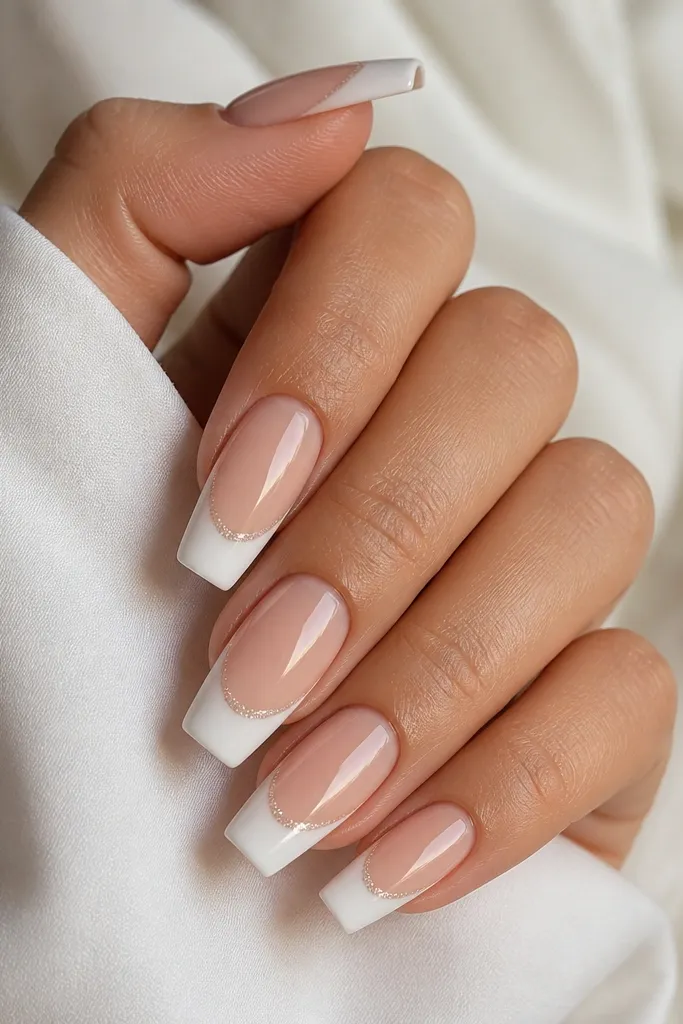
Glitter at the edge makes chips less obvious because the edge already has texture. The dust is subtle - not chunky - so it stays wearable for work and still looks special at night. It's one of my go-to "easy care" styles because you don't need full coverage glitter everywhere.
After white tip cap, rub a tiny amount of fine white glitter powder into the last 1-2 mm of the tip. Seal with topcoat and cap the edge. If your glitter is too sparkly, mix it with a drop of clear gel so it spreads thin.
Editor's noteUse a silicone-tipped tool or a foam applicator so you don't over-sprinkle glitter.
Watch outAvoid chunky glitter - it catches on fabric and you'll feel it within days.
9. White Lace Line Art on Nude
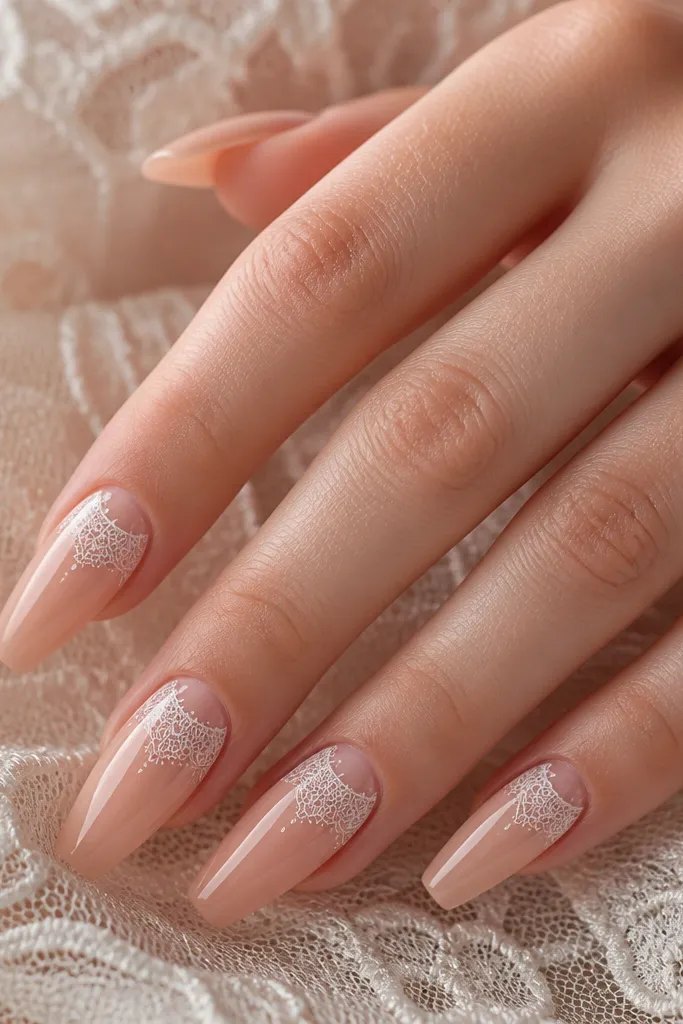
Line art makes white look expensive without covering the whole nail in thick acrylic. It's also low-maintenance because you can keep the base super sheer and only rebuild the line area if something lifts. The trick is using linework that stays thin and airy.
Build a sheer nude base and a light white outline near the cuticle and side edges. Use a gel liner for smooth, controlled lines and cure each nail if your gel system requires it. Seal with gloss, then do a second topcoat pass for strength.
Editor's notePractice the lace pattern on a spare nail tip first - your hand speed matters for clean lines.
Watch outAvoid thick paint lace - it looks like sticker residue once it cures and files.
10. White Marble Swirl Full Tip
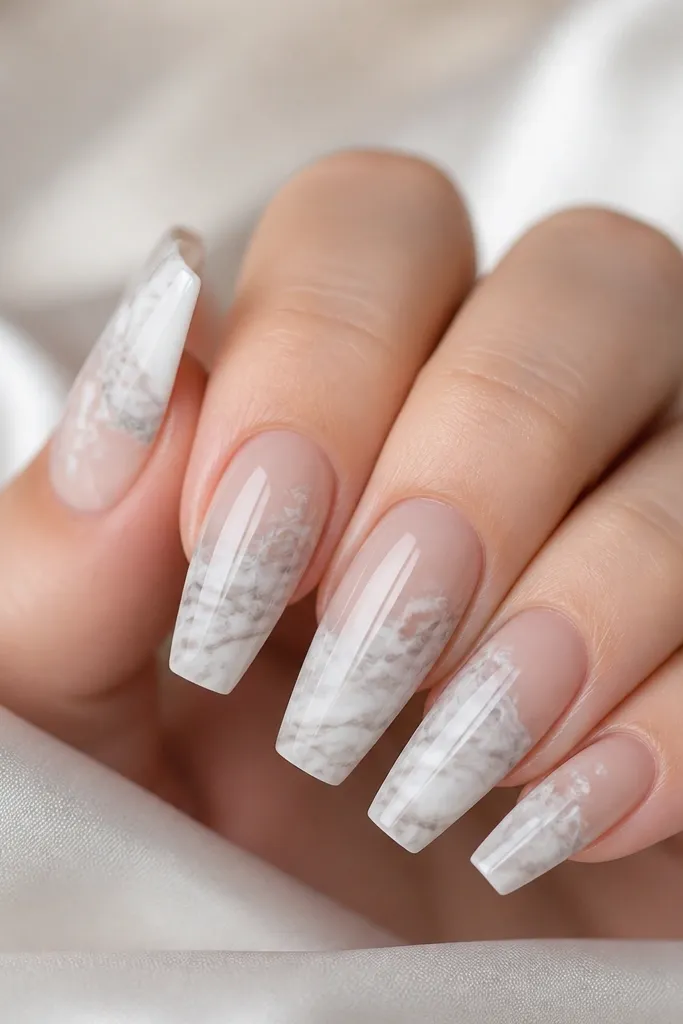
This is bolder marble that still stays practical because the pattern is mostly white and gray, not high-contrast colors that show every regrowth line. Marble also hides small filing marks, which is a real life-saver when you do your own fills. It reads "white set" even when the nails are growing out.
Start with a white cap, then drag thin gray-beige lines through it with a toothpick. Swirl lightly so you get feathered lines, not blobs. File smooth, then topcoat glossy twice for a glass finish.
Editor's noteKeep the gray lines 30-40% thinner than you think - they should look like smoke.
Watch outAvoid heavy dragging - it smears and turns into a cloudy patch.
11. Chalk White Matte with Sheer Nude Base
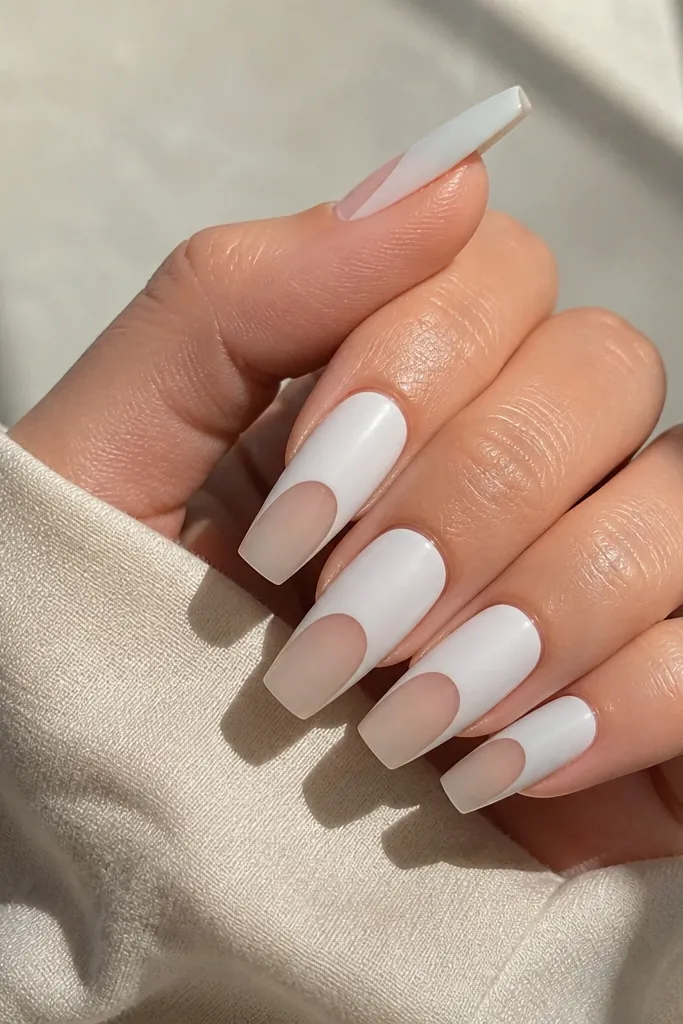
Chalk matte hides tiny surface imperfections and makes white look soft instead of glossy-plastic. The sheer nude middle keeps it from looking like you painted over everything. This combo is perfect for winter outfits because it looks cozy, not stark.
Apply nude base, then place matte white acrylic on the top half only. File a clean horizontal line that's slightly curved to match the nail shape. Use matte topcoat over the white section; keep the nude section matte too if you want the whole set uniform.
Editor's noteAfter you buff, wipe nails with lint-free pad and alcohol before matte topcoat so it doesn't grab texture.
Watch outAvoid glossy topcoat over chalky matte acrylic - it turns dull and streaky.
12. White 3D Bow Accent
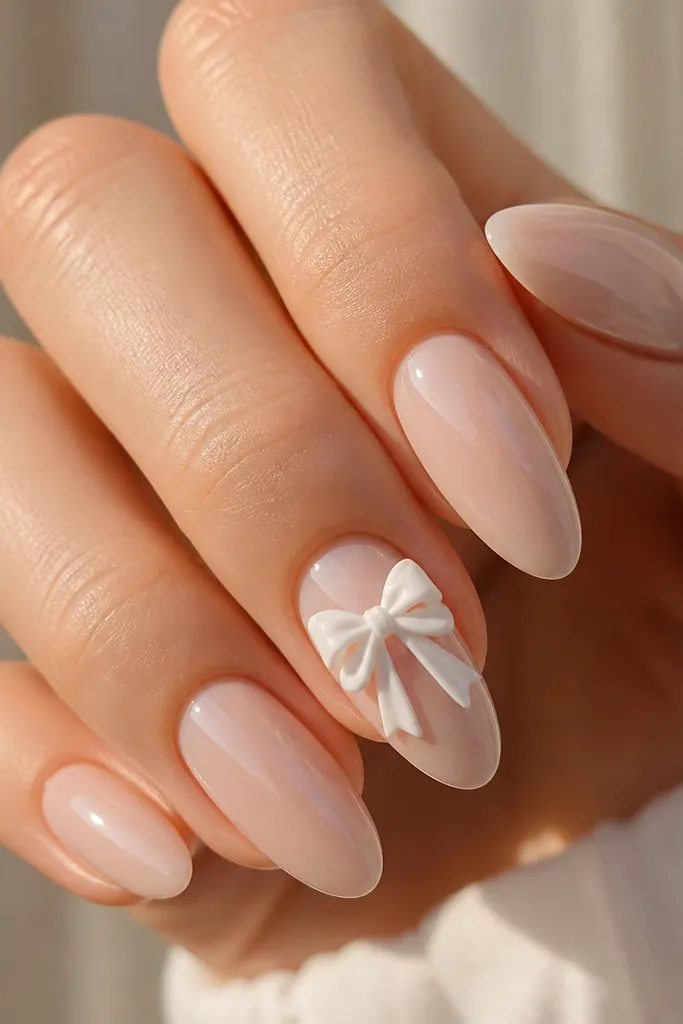
A small 3D bow makes a set feel special without covering the entire nail in art. Because it's raised, it needs a strong seal, but once it's sealed it lasts surprisingly well for events and daily wear. Keep the bow tiny so it doesn't catch on sleeves.
Build your nude and white tip first. Sculpt a bow using two thin acrylic strips for loops and a small dot for the knot, then place it near the cuticle but not touching the skin. File the edges so it's smooth, then topcoat over the bow carefully.
Editor's noteUse a slower bead size for 3D so it holds shape without collapsing while curing.
Watch outAvoid big bows - they snag on hair and make the set feel bulky.
13. White Opal Micro-French
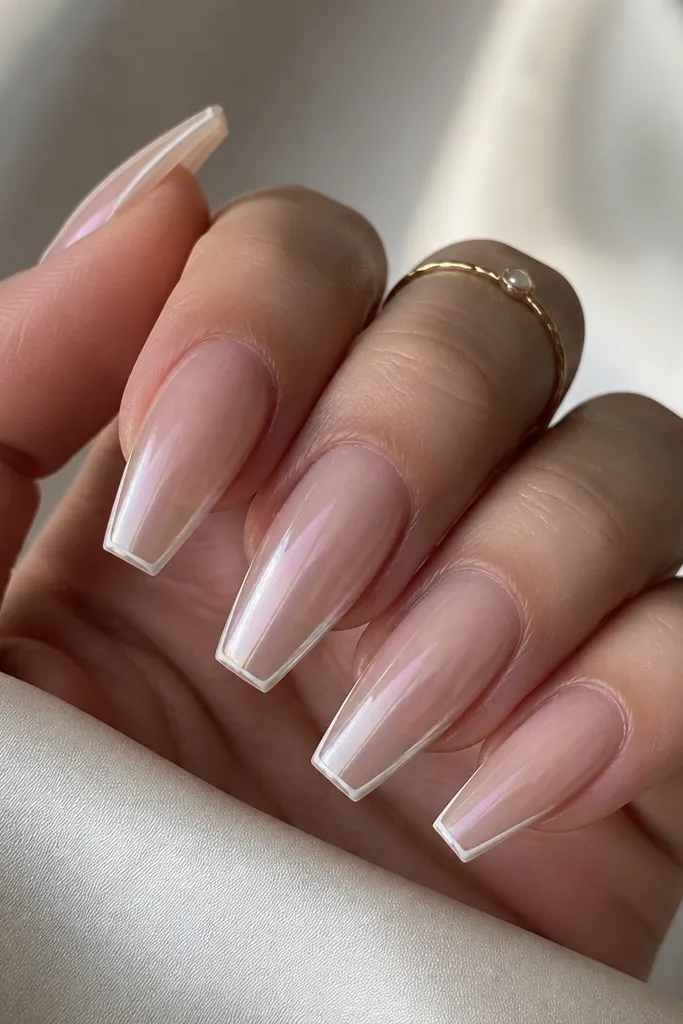
Micro-French is low-maintenance because the line is thin and regrowth doesn't look harsh. Opal shimmer on the nude base gives you that "fresh manicure" glow even when the white line is far from the cuticle. It's a clever way to keep white subtle but still present.
Do a nude base and add a thin white line at the smile using gel liner or a very precise acrylic bead. Over the nude area, rub a pearly opal powder lightly and seal. Keep the white line about 1 mm wide for that delicate look.
Editor's noteTap opal powder on with a dry brush, then seal immediately so it doesn't clump.
Watch outAvoid thick opal layers - they turn gritty and dull under light.
14. White Gradient Cuticle Fade
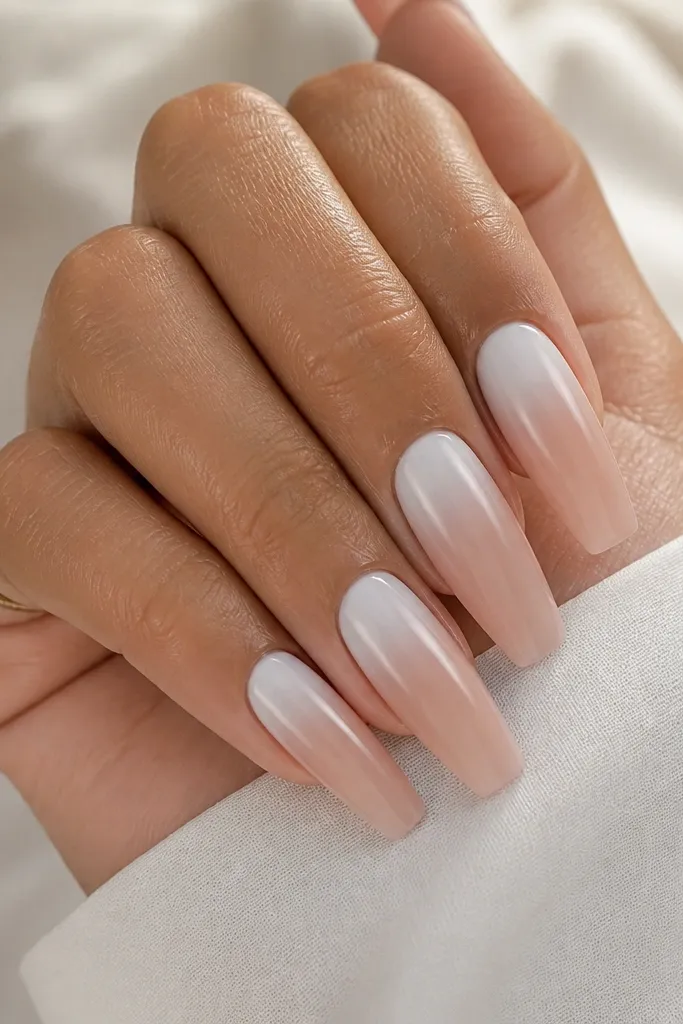
This design hides regrowth because the white fades, not stops. It looks clean and airy, and you don't get that hard line that screams "fill day." I like it for people who want white but hate the look of heavy French tips.
Apply nude base, then sponge or stipple a thin white acrylic/gellike layer near the cuticle and blend it outward a few millimeters. Keep it light so the nail still looks see-through. Seal with gloss and cap the edges.
Editor's noteUse a very small amount of white at the cuticle - you should see the fade, not a painted block.
Watch outAvoid overloading the cuticle with white - it can look chalky and grow out uneven.
15. White Dipped Tip with Clear Negative Center
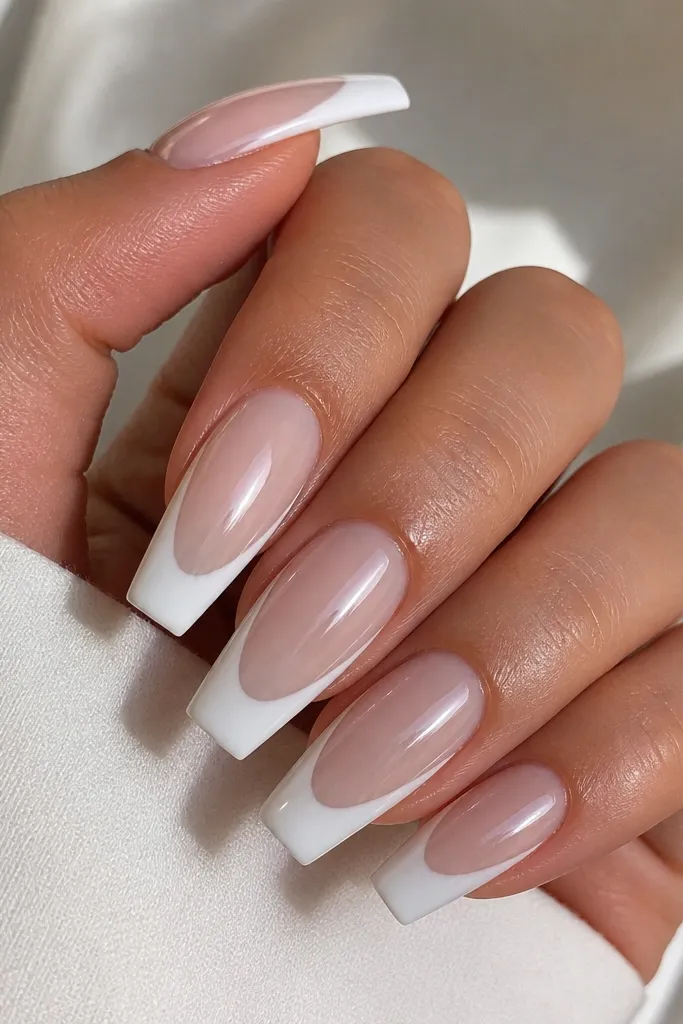
This gives you a bold white tip without sealing white across the whole nail plate. The clear center keeps it looking light and fresh, and it also makes fills easier because you're rebuilding mostly the tip area. It's one of the few white looks that still feels "clean" even with shorter coffin lengths.
Use clear or ultra-sheer acrylic for the base, then apply white acrylic only at the tips like a dip. Blend the edge slightly but keep the center mostly transparent. File smooth and topcoat glossy so the clear part stays shiny.
Editor's noteIf your white looks uneven, build it in two thin layers instead of one thick bead.
Watch outAvoid thick blending into the clear center - it turns cloudy and loses the dipped effect.