1. Milky Sheer Coffin with Cobalt Micro French
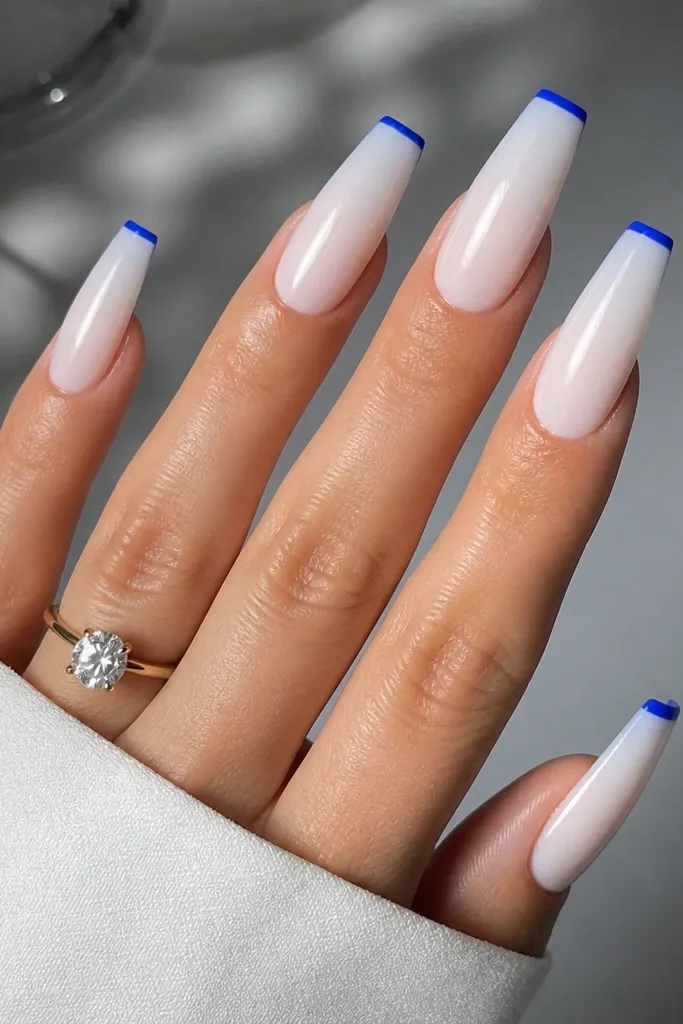
This one reads expensive because the base is soft and transparent, like skin after moisturizer. The micro French keeps the blue sharp and intentional instead of broad. I use a cobalt that's slightly deeper than royal so it looks rich under daylight without turning neon. The glossy finish makes the tip line look crisp in photos.
Apply a sheer milky acrylic or sheer gel base across all nails, keeping the cuticle area natural and clean. Paint the French with a striping brush about 1-1.5 mm wide and keep it centered on the coffin tip. Seal with a high-gloss topcoat, then cure fully so the surface stays glassy.
Editor's noteIf your line looks wobbly, do two thin passes instead of one thick one.
Watch outDon't make the French too wide - wide tips look costume-y on coffin.
2. Watermelon Gloss Coffin with Thin White Cuticle Arc
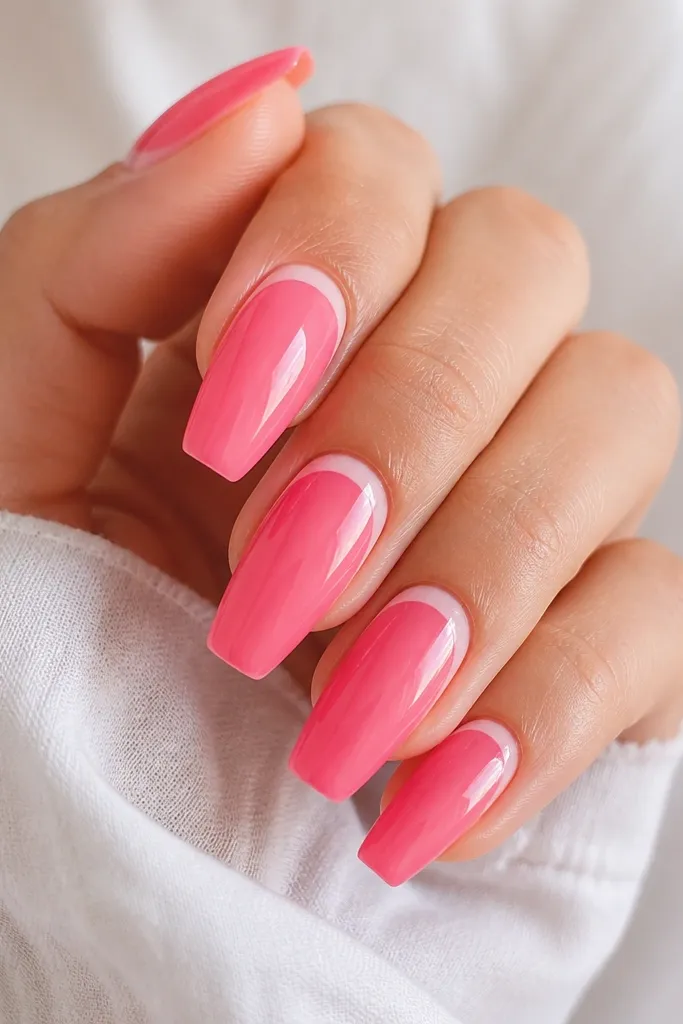
Watermelon pink looks luxe when it's glossy and controlled, not faded. That thin white arc at the cuticle gives a "light reflection" effect that makes the nail look sculpted. The arc also balances the bright color so it doesn't overwhelm the finger. In summer photos, the white catches highlights and makes the set look freshly done.
Use a saturated watermelon pink as the main color, leaving no patchy coverage near the edges. With a fine liner brush, paint a crescent arc right under the cuticle line on each nail, keeping it narrow. Add a clear topcoat layer that's thicker on the center for a wet look.
Editor's noteUse a liner brush you can control with your whole hand - pinch grip makes arcs shake.
Watch outSkip chunky white stickers; they look raised and cheap under close-up lighting.
3. Lemon Sorbet Coffin with Clear Jelly Sidewalls
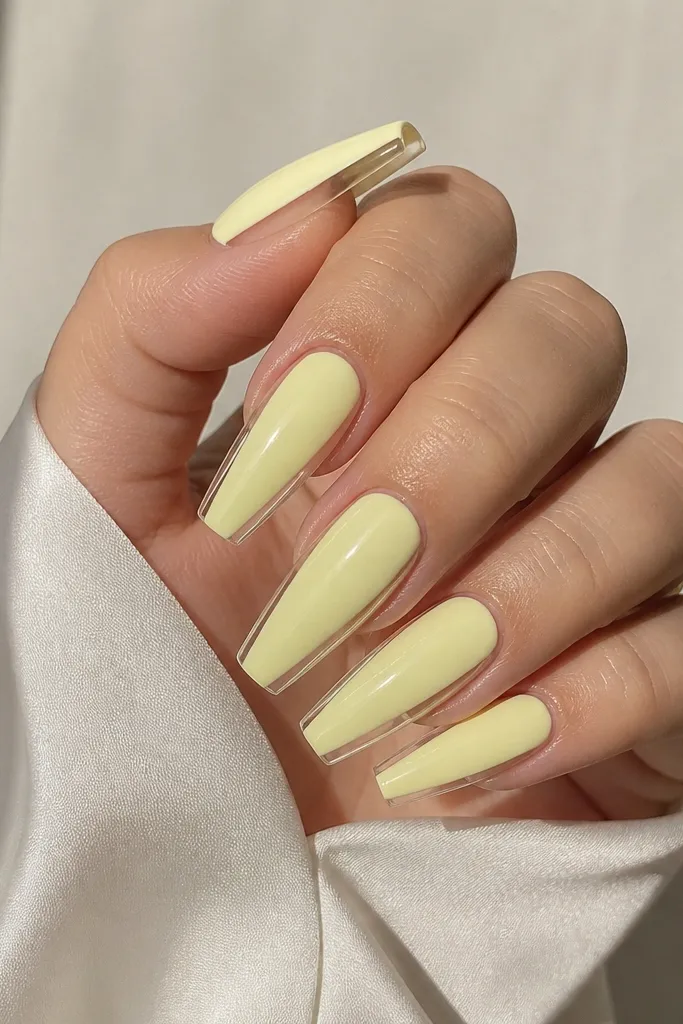
This design is expensive because it has dimension without heavy art. The clear jelly sidewalls make the nail look like it's layered and fluid, the way glass looks in the sun. The lemon stays soft and "dessert" instead of harsh because the sides are translucent. That contrast gives a salon 3D effect even though you're doing simple steps.
Paint the center with lemon sorbet, leaving a thin gap on each sidewall. Brush clear jelly gel along both side gaps and cure, then topcoat over everything. Keep the clear strip thin (about 0.5-1 mm) so it reads refined.
Editor's noteWipe the brush on a lint-free pad before applying jelly so it doesn't flood the sidewall.
Watch outDon't let the jelly bleed under the center - cloudy edges make it look messy.
4. Sea Glass Coffin with Turquoise Chrome Tips
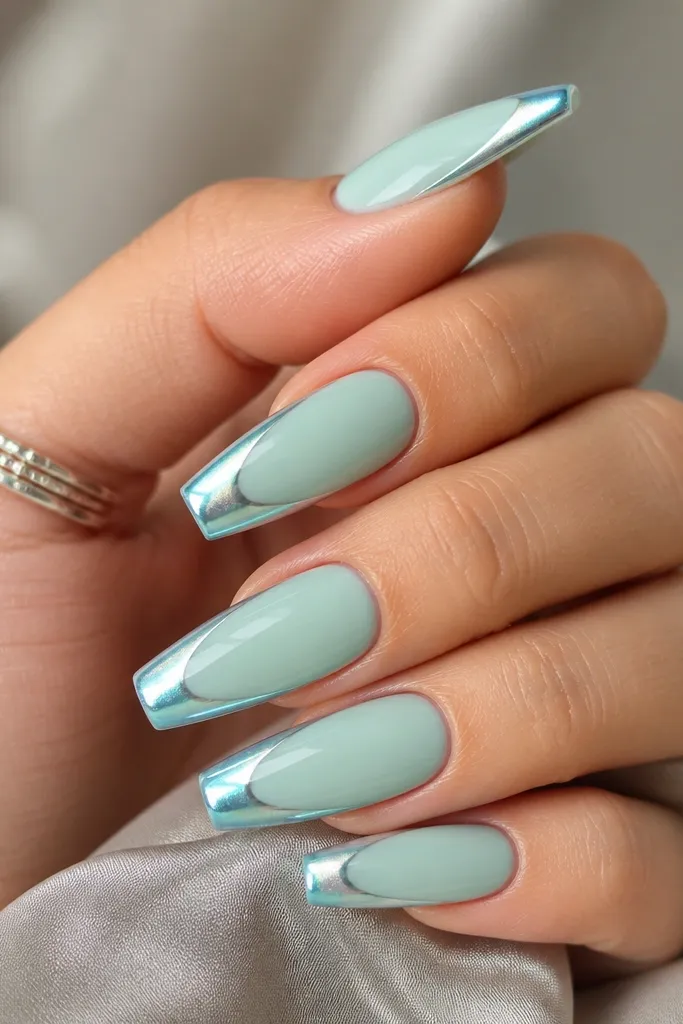
Sea-glass tones are instantly summer, but they look high-end when the chrome is toned and placed only on the tip. The turquoise flash adds a premium shimmer that looks expensive in sunlight. Because the base is soft and airy, the chrome doesn't feel loud. The chrome edge should look like a gradient cutoff, not a blunt sticker line.
Use a pale mint base with a sheer opacity so it looks like frosted glass. Apply chrome only on the last 2-3 mm of the coffin tip, then buff the surface lightly so it doesn't look gritty. Seal with a topcoat that doesn't fully dull the chrome (use a chrome-friendly topcoat).
Editor's notePress chrome with a foam applicator and lift straight up to avoid streaks.
Watch outDon't over-topcoat chrome with a thick matte top - it kills the luxe shine.
5. Rose Quartz Coffin with Micro Rhinestone Halo
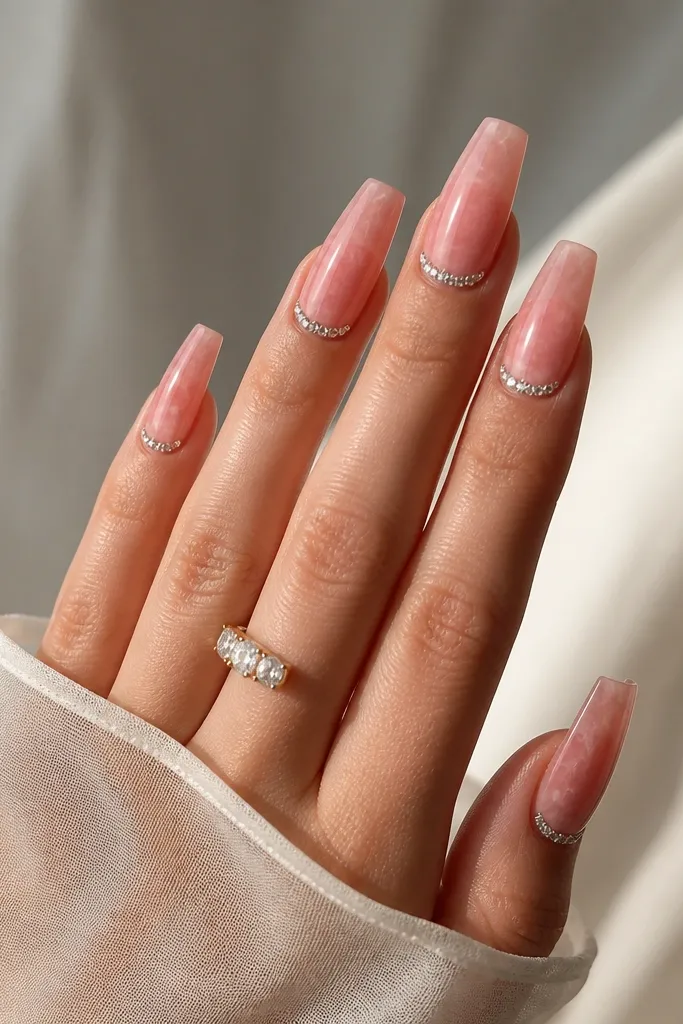
Rose quartz looks luxe when it has movement: faint veins and a slightly smoky center. The micro rhinestone halo at the cuticle creates a "jewelry" look without filling the whole nail. It also frames the nail bed so the set looks intentional and clean. In daylight, the stones sparkle like a watch face.
Build a translucent rose base, then add thin milky-pink veining with a striping brush. Place 8-12 micro rhinestones in a half-moon along the cuticle, leaving a small gap at the corners for neatness. Cap with a thin layer of clear gel over the stones so they sit flush.
Editor's noteUse tweezers with a sharp tip and place stones starting from the center outward.
Watch outDon't pack stones too tightly - gaps look cheap, but overcrowding looks bulky.
6. Champagne Nude Coffin with Gold Leaf at the Tip
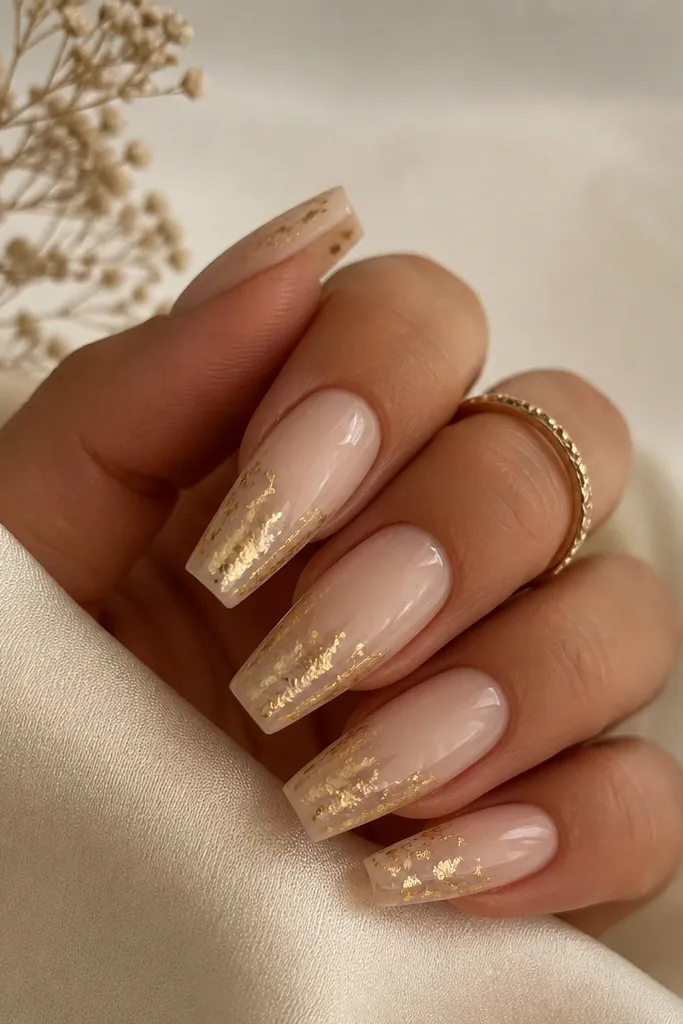
Warm nude plus gold leaf is the fastest route to "expensive" because it reads like jewelry and a manicure together. Gold leaf at the tip keeps the design light and prevents the nail from looking cluttered. The irregular edges of leaf make it look organic, like real foil rather than painted metal. Under summer light, the gold catches and flashes without needing glitter.
Start with a champagne nude base that's slightly more opaque at the center than near the cuticle. Add gold leaf in small torn pieces over the tip area and leave a little nude showing for contrast. Seal with a glossy gel topcoat in two thin layers so the leaf lays flat.
Editor's notePress gold leaf with a dry cotton swab, not a wet brush, so it doesn't smear.
Watch outSkip glitter topcoats over leaf - they mute the gold and make it look dusty.
7. Black Cherry Coffin with Glossy Red Jelly Lines
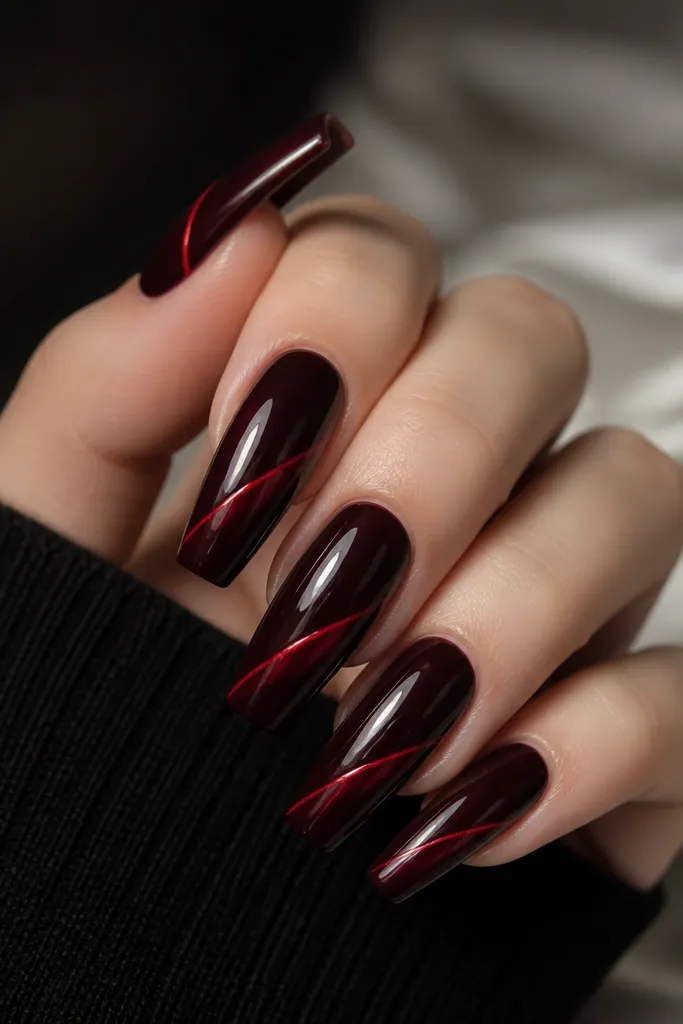
This one looks high-end because black makes red look richer, not louder. The jelly lines have thickness and shine, so they look like glass seams instead of paint. Diagonal placement adds motion and keeps the set from feeling flat. It's dramatic enough for night events but still summer-friendly because the red is juicy, not burgundy-matte.
Paint the nails black cherry (not flat black). Use a fine brush to draw two diagonal jelly lines, leaving space between them. Cure, then add a second thin jelly pass if you want the lines to look extra raised.
Editor's noteMark the diagonal with a tiny dot first, then connect the dots with one smooth stroke.
Watch outDon't use matte topcoat - it makes jelly lines look like stickers.
8. White Milk Coffin with Peach Ombre Bottom Half
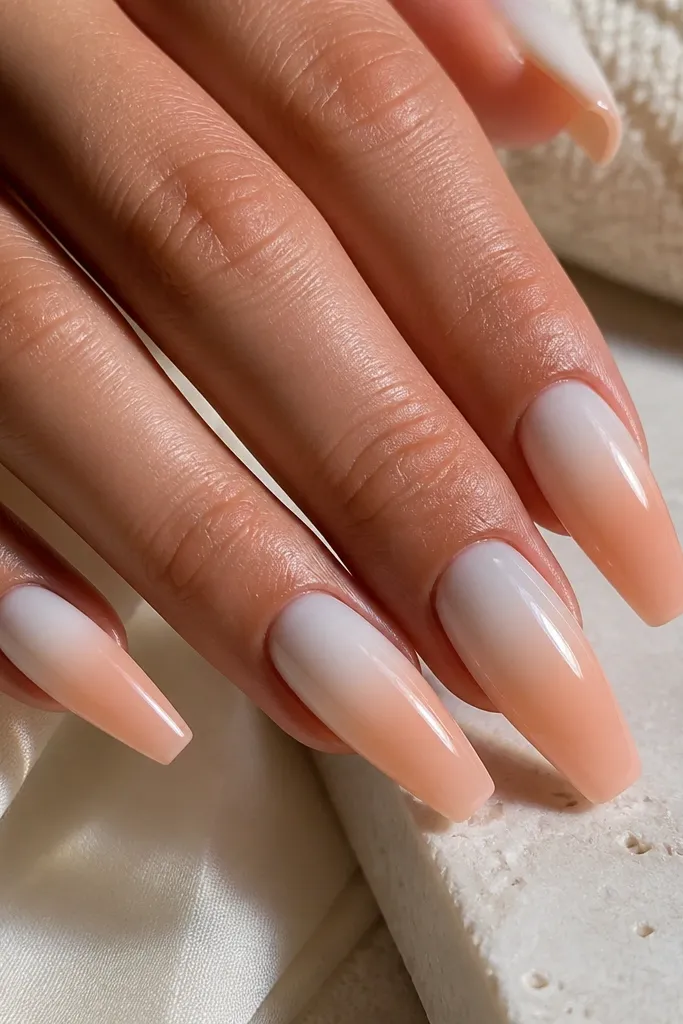
The luxe effect comes from the ombre sitting lower on the nail - it makes the nail look longer and cleaner. White milk at the top softens the peach, so it feels airy instead of heavy. I keep the gradient very smooth using sponge blending, and the glossy finish makes it look like it's glowing. It photographs well because the top stays bright and the bottom adds warmth.
Apply a white milky base, then sponge peach gel onto the bottom third while feathering upward. Wipe the sponge on a palette so the color isn't too dense near the fade line. Cure fully between layers, then seal with a thick-gloss topcoat for a smooth surface.
Editor's noteDo two light sponge layers instead of one heavy layer for a smoother ombre.
Watch outDon't blend too high - if peach reaches the cuticle, it looks messy and short.
9. Iced Champagne Coffin with Tiny Star Confetti
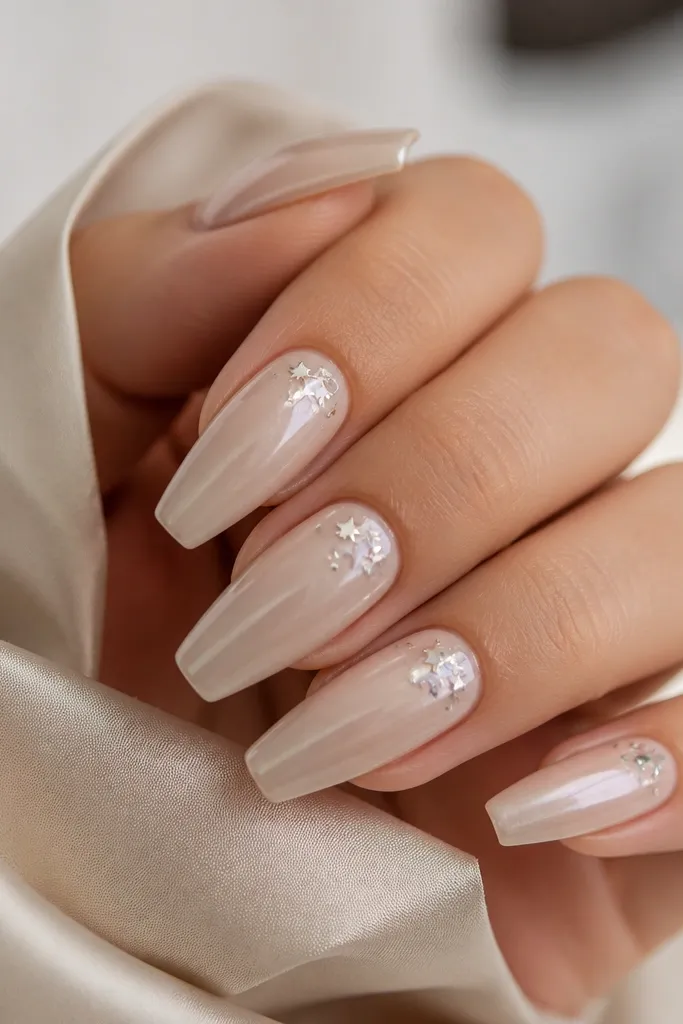
This set looks expensive because the sparkle is tiny and controlled. Star confetti adds a "summer night sky" vibe, but only if you keep it sparse. I like scattering stars on 2-4 nails and leaving the rest clean to avoid a craft-store look. The pearly base makes the stars pop without needing chunky glitter.
Use an iced champagne gel with a fine shimmer. Pick up tiny star pieces with tweezers and place them in small clusters near the cuticle, then cap with clear gel. Keep stars under the topcoat so they don't catch fabric and snag.
Editor's noteUse a matte gel brush to cap around stars without flooding the whole nail.
Watch outDon't add star confetti to every nail - it turns into busy glitter instead of luxe.
10. Coral Satin Coffin with Barely-There Gold Foil Specks
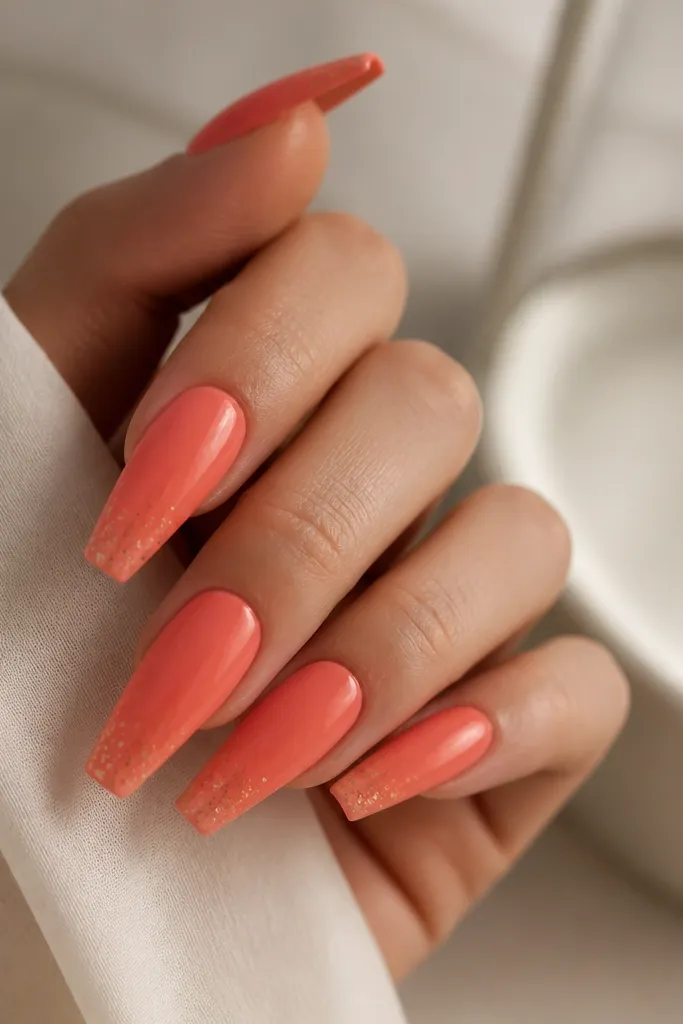
Satin-gloss coral looks like it belongs with summer dresses, and the gold specks add that expensive jewelry vibe. The specks should be tiny and uneven, like natural foil flakes. I keep the concentration heavier near the tip so the nail has a focal point. The satin effect is what makes it feel softer and more premium than regular glossy coral.
Paint coral and finish with a satin topcoat or a satin-mixed gloss topcoat (thin layers). Add gold foil specks using small torn pieces pressed lightly at the tips. Seal again with a satin-safe top so the foil stays smooth.
Editor's noteIf foil looks too bright, press it lightly - partial contact reads more natural.
Watch outDon't use thick gold leaf chunks - they snag and look chunky.
11. Teal Marble Coffin with Clear Negative Space Window
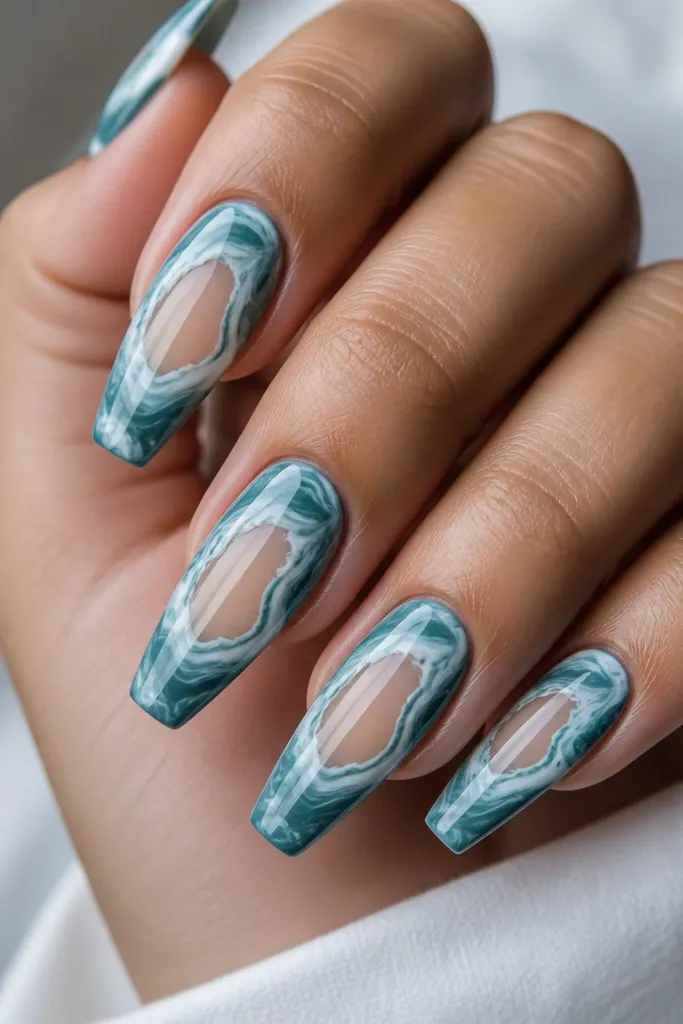
Marble can go cheap fast, but negative space fixes that instantly. The clear window keeps the design airy and makes it feel tailored, like modern art on glass. Teal marble reads summer because it has that ocean tone, and the white keeps it bright. The clear area also makes the set look less bulky and more sculpted.
Build a clear base first where the window will be, then place teal and white marbling around it using a thin brush. Use a stipple technique for the marble breaks so it looks organic. Seal carefully without flooding the window area, then topcoat over the marble.
Editor's noteKeep marble lines thin - thick swirls hide the coffin shape.
Watch outDon't cover the whole nail with opaque marble - it kills the luxe negative space effect.
12. Lilac Chrome Coffin with Micro French Outline
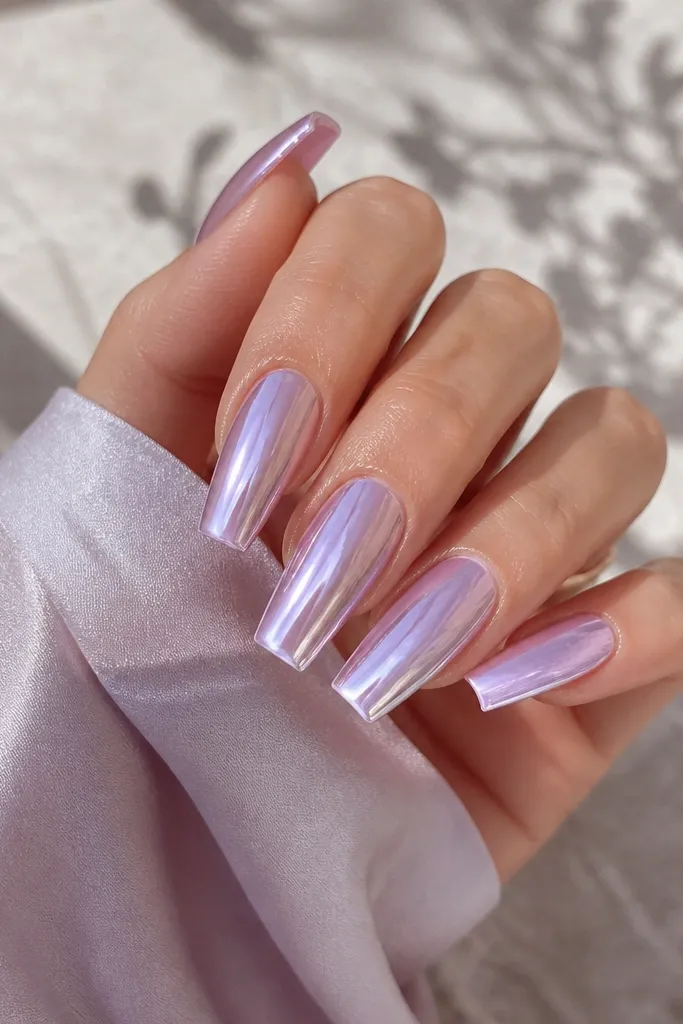
Chrome plus a micro outline looks expensive because it creates layers: mirror base and a delicate border. The lilac tone is soft enough for summer, but the chrome makes it feel high-end. That thin outline adds shape definition so the coffin tips look sharp in photos. It's one of those designs that looks simple until you see it in direct light.
Apply lilac chrome powder over a lilac gel base cured to tackiness. Then paint a micro outline along the tip edge with pale lavender gel, keeping it 0.5-1 mm thick. Cure and topcoat lightly so the chrome stays reflective.
Editor's noteOutline last, after chrome, so you don't muddy the mirror finish.
Watch outDon't use a matte topcoat - chrome needs gloss to look luxe.
13. Tropical Palm Accent Coffin with Clear Base
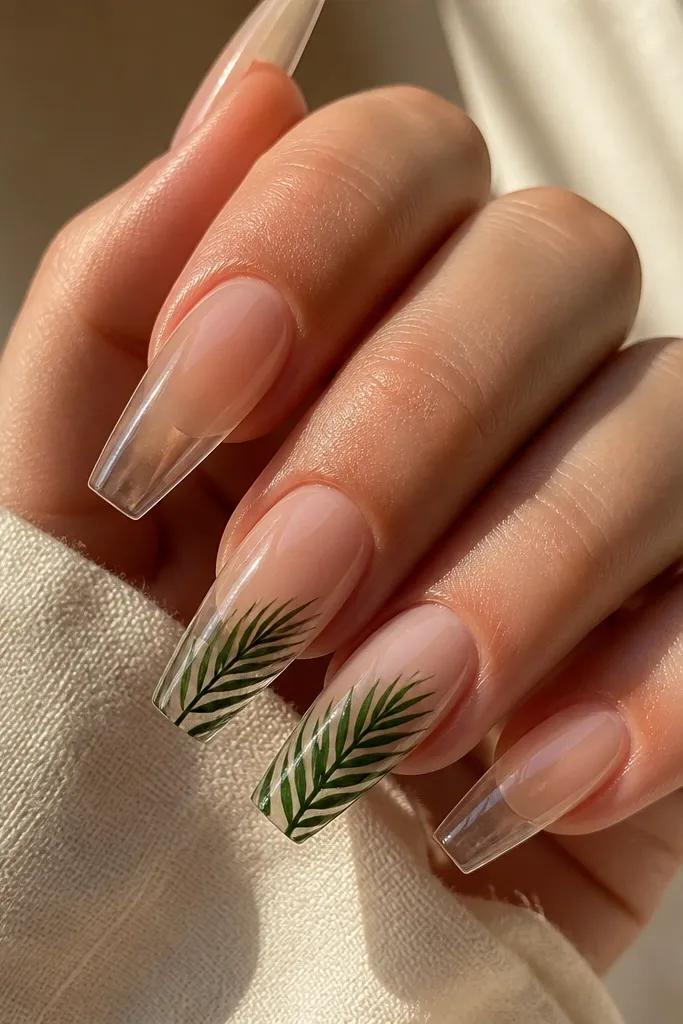
Line art looks expensive when the base is clean and the art is small. This set uses a clear or lightly pink-tinted base so palm leaves look like they're drawn on glass. Dark green line art pops against the transparency, and the minimal placement keeps it from looking themed or childish. It's perfect for vacations where you want something cute but still grown-up.
Use a clear extension or sheer pink base for all nails. On accent nails, draw palm leaf lines with a fine liner brush, then add a tiny dot or short stroke near the leaf for detail. Seal with a glossy topcoat, keeping the art under the surface so it doesn't lift.
Editor's noteUse a liner brush with a tight tip; wide brushes make leaf lines look fuzzy.
Watch outDon't fill in the leaves solid - thick fill turns line art into a sticker.
14. Coral + Gold Chain Link Coffin Tips
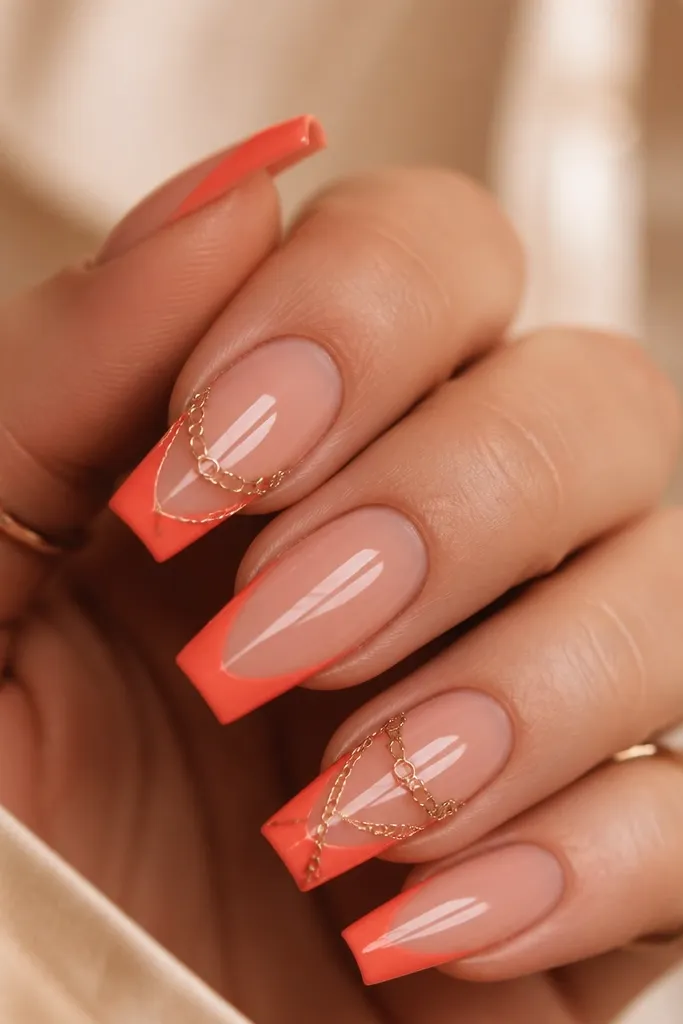
Gold chain at the tip reads like designer jewelry. Coral keeps it summery, while the chain creates that high-end "detail" moment. I like chain placement only on the tip so the rest of the nail stays smooth and wearable. The chain also makes the coffin shape look sharper because it follows the tip curve.
Paint coral evenly, then place chain decals along the last 3 mm of the tip. Press them flat, cap with thin clear gel, and cure. File the edges lightly so the chain doesn't feel raised against skin.
Editor's noteIf you hand-paint the chain, use a gel liner and draw links one at a time, then cap.
Watch outDon't leave decal edges visible - raised edges catch on everything.
15. Nude Coffin with Pink Chrome Aura Glow
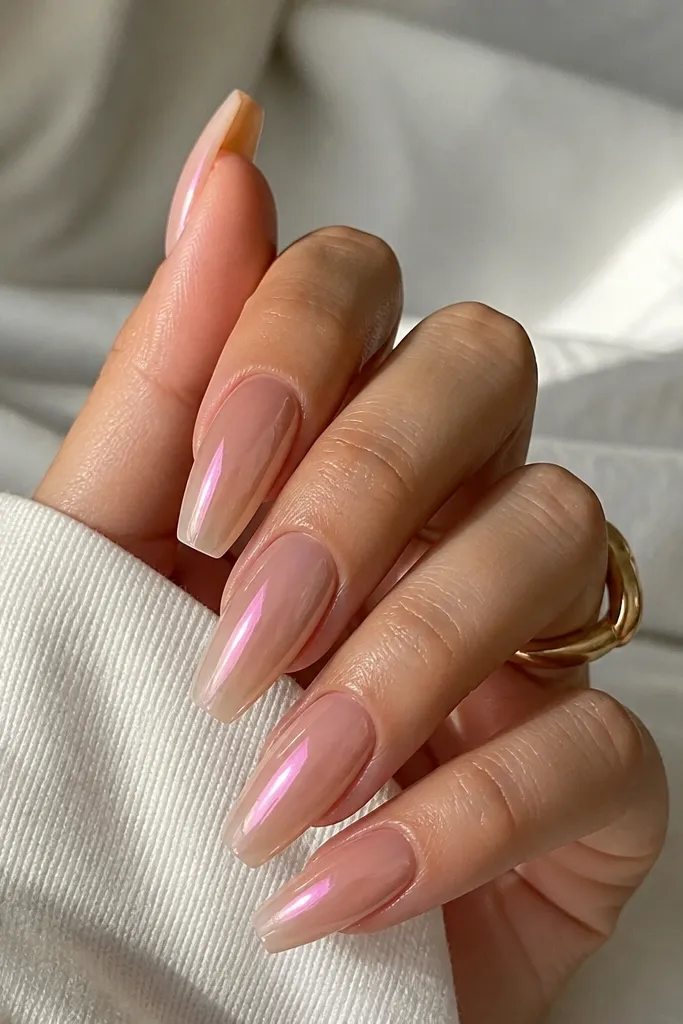
Aura chrome looks expensive because it's diffused and smooth, like light on skin. The nude base keeps it wearable, and the pink glow gives a romantic summer feel. I keep the aura centered slightly above the middle so it elongates the nail. The result is "pretty from far away, detailed up close."
Apply a nude base with a slightly warm undertone. Add pink chrome powder with a sponge applicator, focusing on the center and feathering outward until it fades. Seal with a chrome-friendly topcoat to keep the glow reflective.
Editor's notePractice on one nail first - aura placement is all about where the center glow sits.
Watch outDon't pack chrome to full opacity - it turns into a harsh block.
16. Seafoam Coffin with Pearl Drop Cuticle
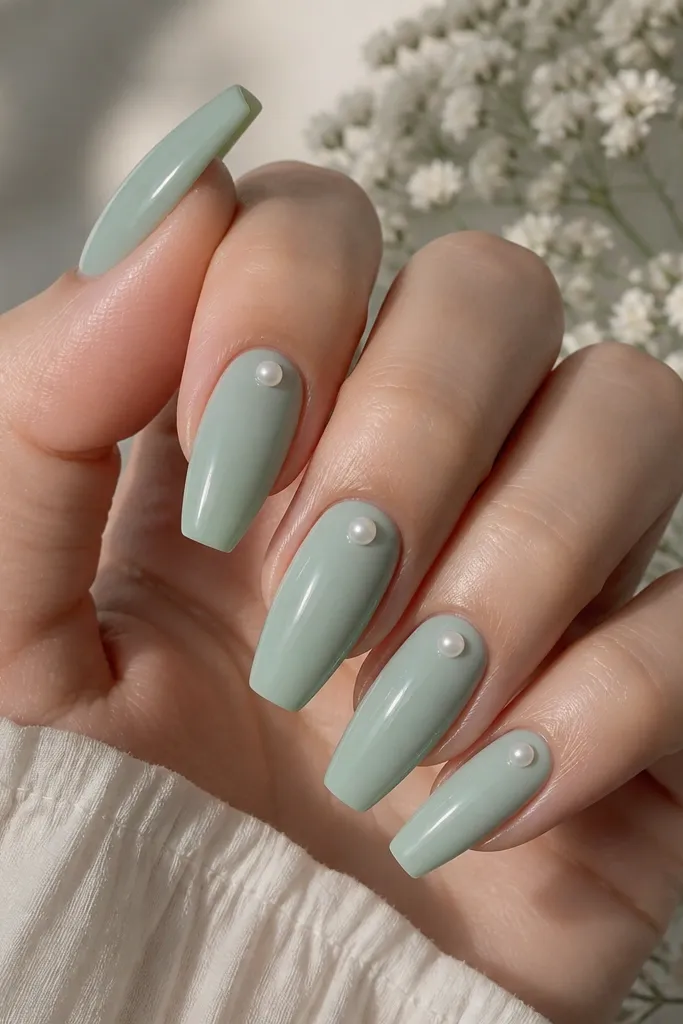
A single pearl at the cuticle looks like a luxury accessory. Seafoam is a soft summer color that flatters every skin tone, and the pearl gives it a clean, high-end focal point. Because it's one bead, the set stays light and not overdecorated. In photos, the pearl reflects light and makes the nail bed look extra polished.
Paint seafoam as a smooth layer, then place one micro pearl or small teardrop pearl near the cuticle center. Use gel to anchor it, cure, then cap with clear gel so it feels smooth. Topcoat over the full nail for a glassy finish.
Editor's noteKeep the pearl small enough that it sits under the topcoat without sticking up.
Watch outDon't place multiple pearls on every nail - it turns into a costume look.
17. White Coffin with Gold Rim French and Sheer Pink Base
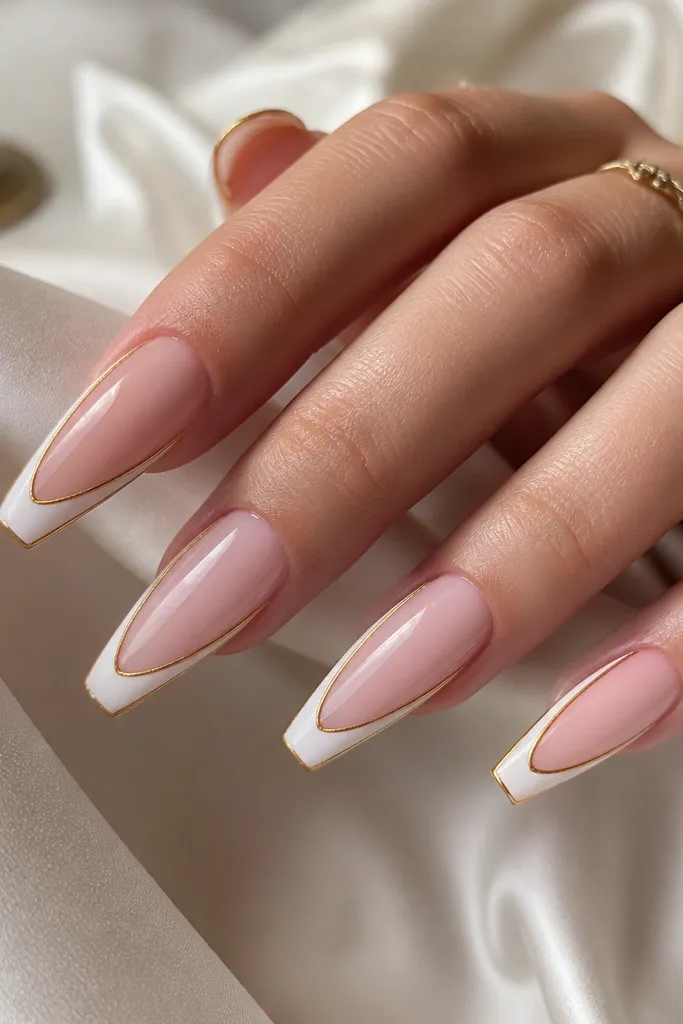
This is classic summer luxe: sheer pink for softness and white for brightness. The gold rim is what makes it feel expensive, because it looks like a plated edge on jewelry. Keep the rim line thin so it reads delicate, not thick. The contrast between pink, white, and gold makes the coffin shape look sharp in sunlight.
Build a sheer pink base, then apply white tips in a clean micro French shape. With a gold gel and a striping brush, trace the outer edge of the white tip line. Cure and cap with a glossy topcoat for a smooth, framed look.
Editor's noteIf gold bleeds, wipe your brush on a lint-free pad and reload lightly.
Watch outDon't skip cleanup around the sidewalls - gold rim mistakes show fast.
18. Mint Sorbet Coffin with Clear Crystal Cluster Tip
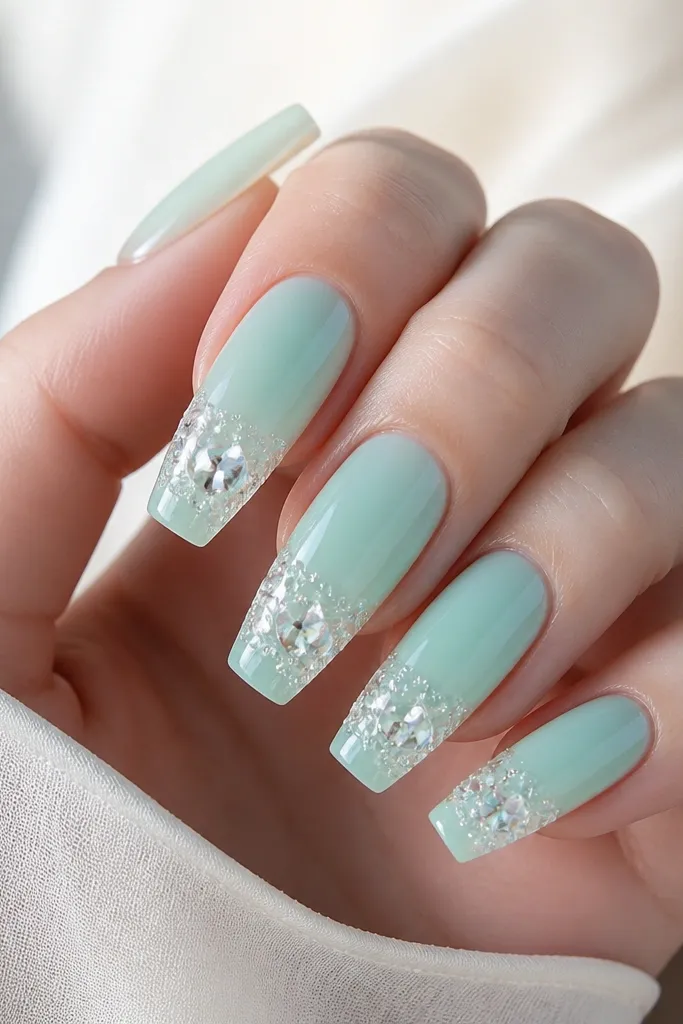
Clear crystals look luxe when they're clustered, not scattered. Mint sorbet is fresh and summer-friendly, and the crystal cluster adds sparkle without changing the color story. I place the crystals at the very center of the tip so the coffin point stays the focus. It looks like a high-end salon set because the cluster has shape and spacing.
Paint mint sorbet, then place 1-2 sizes of clear crystals in a tight cluster at the tip center. Anchor with gel and cure, then cap with clear gel so crystals sit flush. Keep the cluster only 2-3 mm wide to avoid bulk.
Editor's noteMix two crystal sizes (one tiny, one medium) so it looks dimensional.
Watch outDon't glue crystals flat on top of paint without capping - they lift and snag.
19. Sunkissed Peach Coffin with Honey Gold Chrome Fade
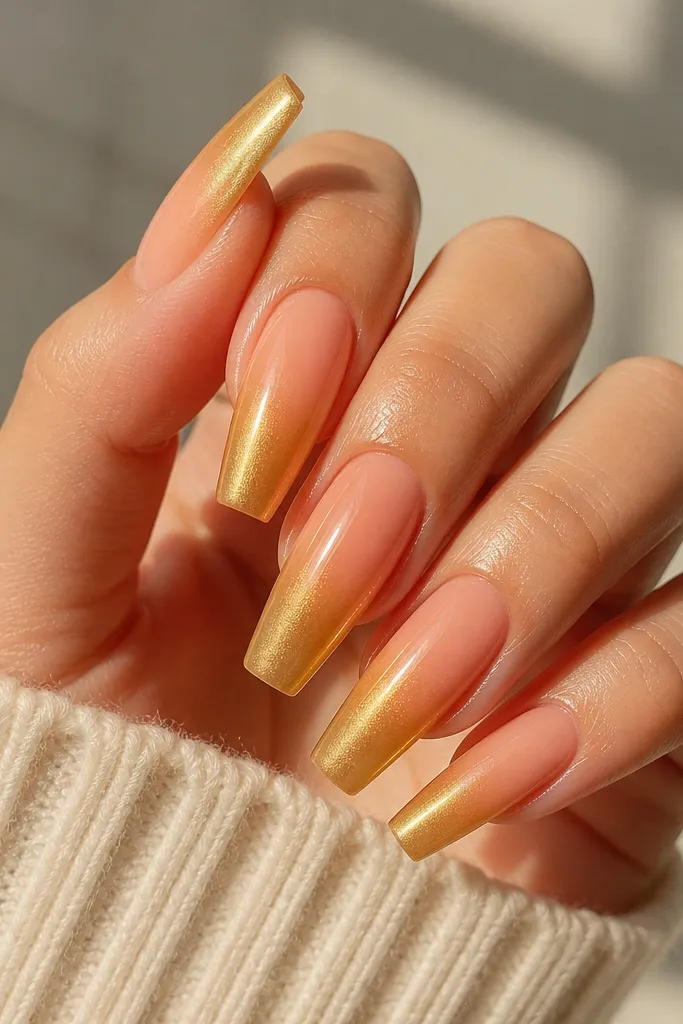
Gold fade looks expensive because it mimics sunlight hitting the nail edge. Peach keeps it soft and summery, while honey gold is warmer than yellow-gold so it reads flattering. The fade should look airy, not like a solid gold cap. When it's done right, your nails look warm and photo-ready even in cloudy weather.
Apply a saturated peach base with a glossy topcoat or gel layer. Add honey gold chrome from the tip upward using a sponge applicator, then feather until it fades around the mid-nail. Seal with a chrome-safe topcoat so the shine stays strong.
Editor's noteFeather with less pressure - too much pressure makes a harsh line.
20. Chocolate Brown Coffin with Pink Chrome Aura Cutline
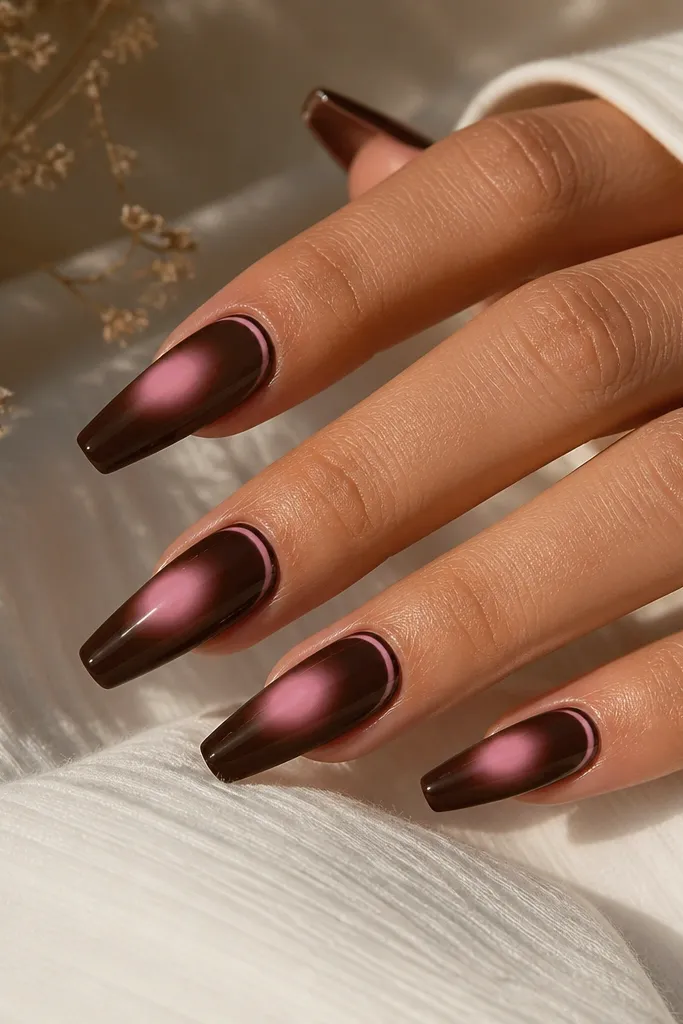
Dark bases are underrated for summer because they make bright accents look expensive. The pink chrome aura creates a glow effect that looks like lighting, not decoration. The thin cutline line adds structure so the design feels intentional rather than random. It's a great option if you want something bold but still sleek.
Paint chocolate brown smoothly and cure. Apply pink chrome in two steps: first an aura centered mid-nail, then a thin chrome line closer to the cuticle (about 1 mm away). Topcoat with a chrome-friendly finish so the aura stays reflective.
Editor's noteKeep the aura slightly above center on shorter nails - it elongates the look.
Watch outDon't smear chrome over wet gel - it turns streaky fast.
21. Iced Pink Coffin with Clear Jelly Top and Micro Glitter Edge
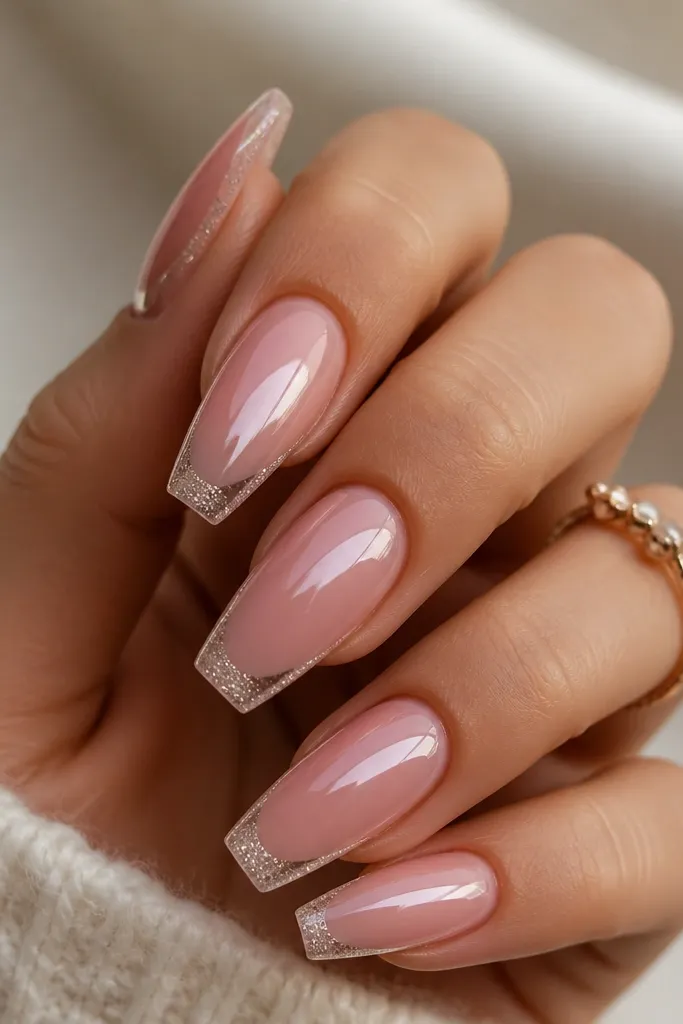
Micro glitter at the edge looks high-end because it stays delicate. The clear jelly top makes the nail feel thick and glossy like gel sculpture, not thin polish. Iced pink is soft enough for day wear but still reads luxurious because of the shine and the controlled sparkle. It also hides small imperfections because the jelly layer smooths the surface.
Use an iced pink gel as the base, then apply a clear jelly layer across the whole nail. Before curing the final layer, add micro glitter only on the last 2 mm of the tip. Cap with one more thin clear jelly layer to lock everything in.
Editor's noteUse a fine glitter with tiny particles - chunky glitter kills the luxe effect.
Watch outDon't paint glitter up the sides; it makes the nail look uneven.
22. Seaweed Green Coffin with Gold Foil Half-Moon
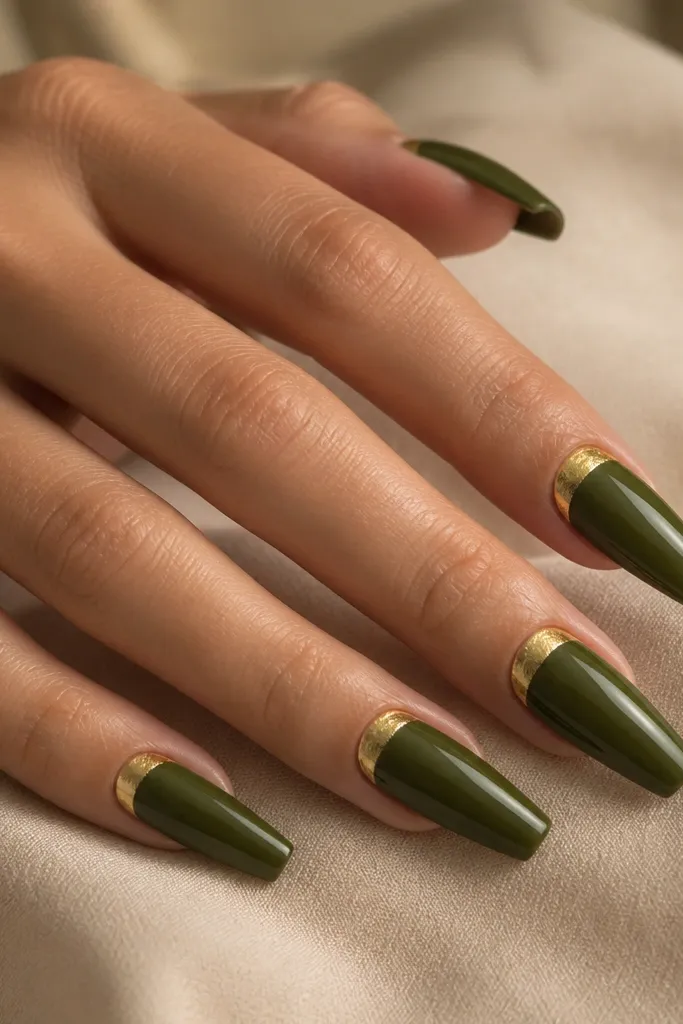
Gold foil half-moons at the cuticle look like designer nail jewelry. Seaweed green is deep and earthy, which makes gold look warmer and more expensive. The half-moon placement keeps the design clean and doesn't crowd the tip. In photos, the foil catches light right where your hands move.
Paint seaweed green smoothly. Tear gold foil into small pieces and press them into a half-moon around the cuticle, leaving a thin line of green visible for contrast. Cap with gel and cure, then topcoat for a glassy finish.
Editor's noteUse smaller foil pieces near the corners so the half-moon stays symmetrical.
Watch outDon't flood the cuticle with foil - thick foil makes it look like a sticker.
23. Sage Nude Coffin with White Vein Marble Accent on Two Nails
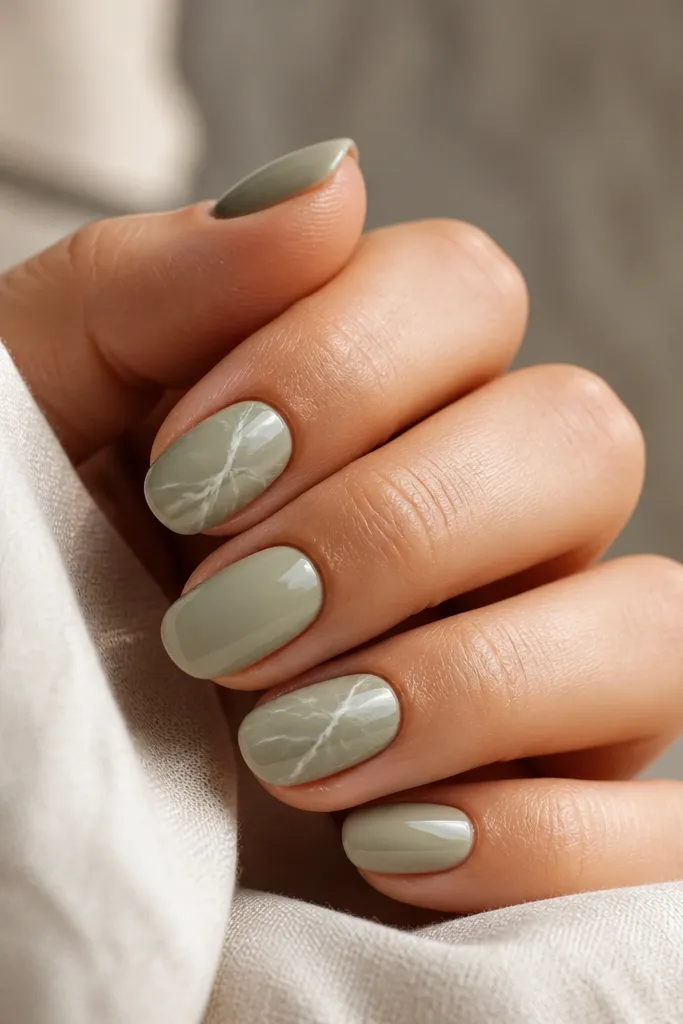
This looks expensive because it mixes calm color with one controlled art moment. Vein marble on only two nails keeps the set from feeling busy, and the thin veins read more realistic than big swirls. Sage nude is flattering and summer-appropriate, like soft plants after rain. The glossy finish makes the marble look like it's under glass.
Paint all nails sage nude and cure to full gloss. On two accent nails, add white veining with a striping brush, then lightly blend the edges for a natural marble effect. Seal with clear gel and topcoat over everything.
Editor's noteKeep veins thin and slightly broken - perfect straight veins look fake.
Watch outDon't marble all ten nails - you lose the luxe focal point.
24. Orange Sorbet Coffin with White Daisy Dot Tips
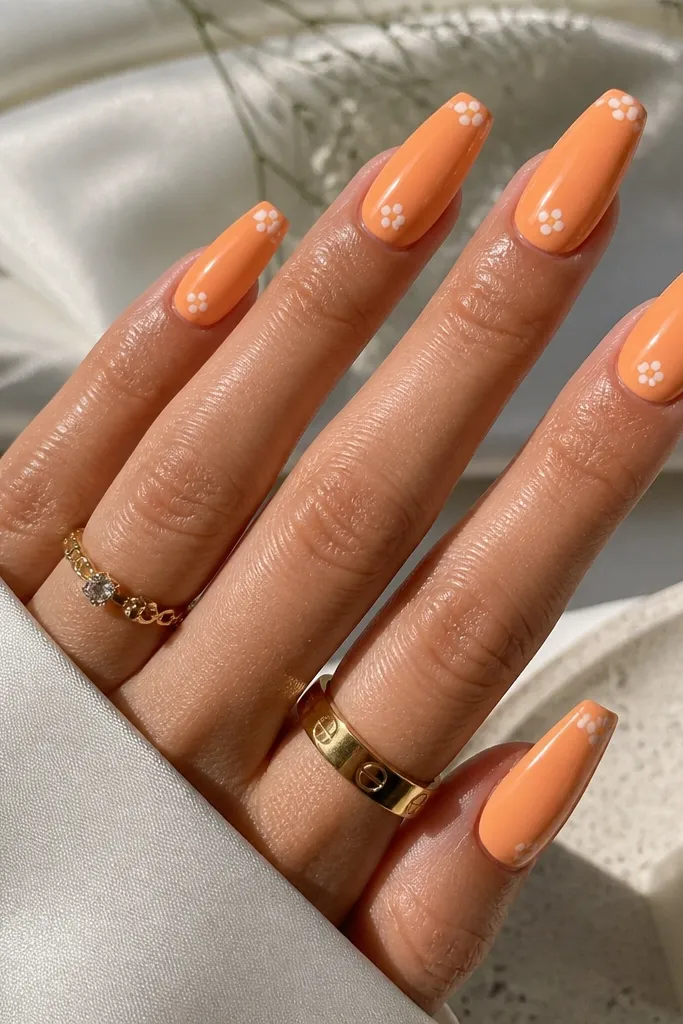
Daisies look super summer, but luxe comes from spacing and scale. The petals are tiny and consistent, and the orange base is smooth without streaks. White daisy tips create a clean "pattern" look that still feels light and playful. It reads expensive when the dots are perfectly round and the set stays glossy.
Paint orange sorbet with full coverage. Use a dotting tool to place one white dot center, then place five petals around it with consistent spacing. Keep the daisy cluster at the very tip center, then cap with glossy topcoat.
Editor's noteLet the orange cure fully before doing dots so they don't smear.
Watch outDon't make daisies huge - oversized petals look childish on coffin.