1. Smoky Taupe Coffin with Micro Gold Veins
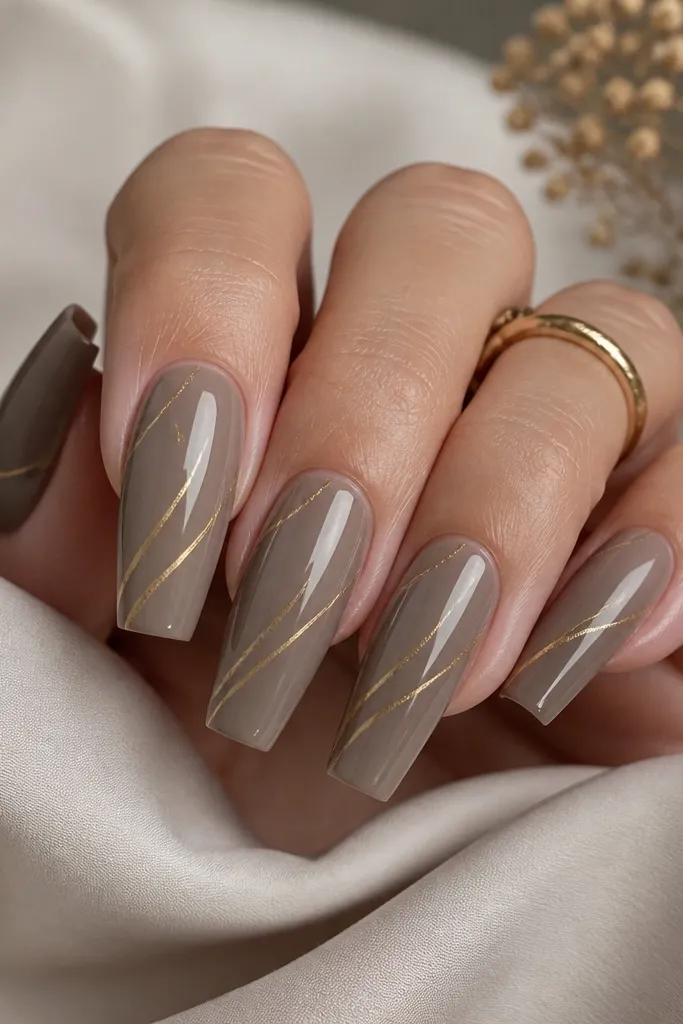
This look uses a cool smoky taupe base that flatters most skin tones and looks clean even as it grows out. The micro gold veins add movement without turning the set into a busy mess. Because the veins start around the middle, you don't get that "dark line at the cuticle" problem. The glossy topcoat makes the taupe look smooth and salon-smooth.
File the nail to a true coffin - the tip should be narrow but not razor-thin. Apply a sheer taupe builder layer, then add the gold vein lines using a fine striping brush with metallic gold gel. Cure each nail fully before topcoat. Finish with a high-gloss gel topcoat so the gold looks sealed and crisp.
Editor's noteDo one accent nail per hand (ring finger) if you want it extra wearable.
Watch outAvoid placing the gold veins right next to the cuticle - that's what makes grow-out look messy.
2. Evergreen Forest Fade with Silver Chrome Tips
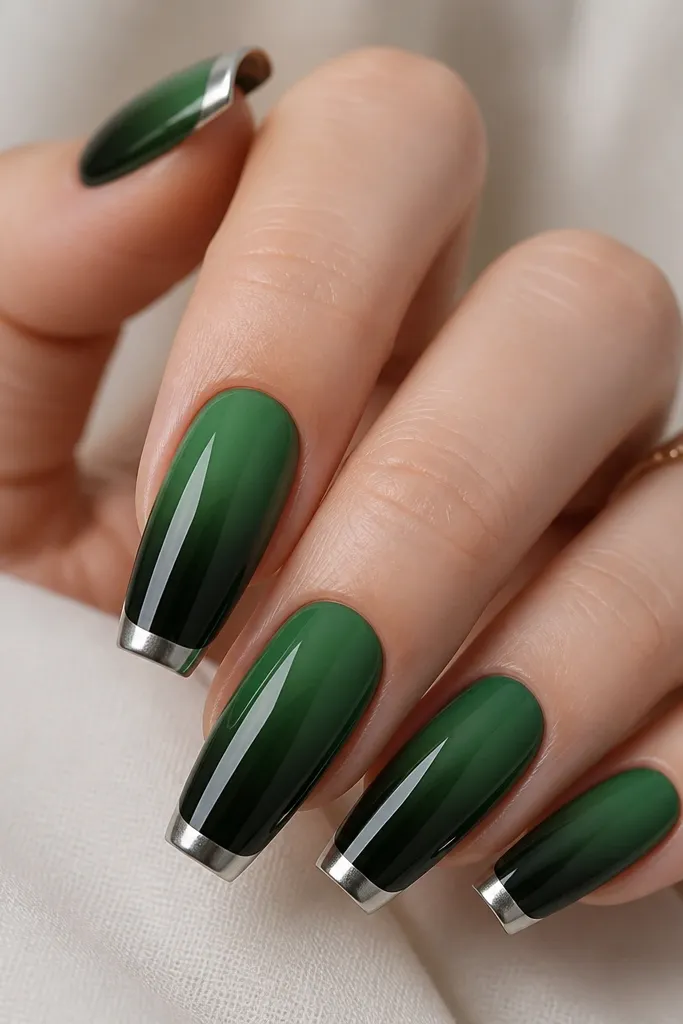
The evergreen fade reads wintery and classy without needing holiday stickers. Silver chrome at the tip gives a crisp edge that catches light every time you move your hands. The fade is forgiving - as the nail grows, the darker area stays in the same visual zone. It also pairs well with both casual outfits and dressy looks.
Build the base with a forest green acrylic or gel, then blend downward using a sponge technique so the center looks smooth. Keep the chrome band limited to the top 20-25% of the nail so it doesn't overpower. Apply chrome powder over a sticky chrome gel only on the tip band, then seal with topcoat.
Editor's noteWipe the chrome gel tack layer consistently before powder so you don't get patchy silver.
Watch outDon't chrome the whole nail - it starts to look flat and cheap as it grows out.
3. Cocoa Espresso Nude with Glossy Espresso Speckles
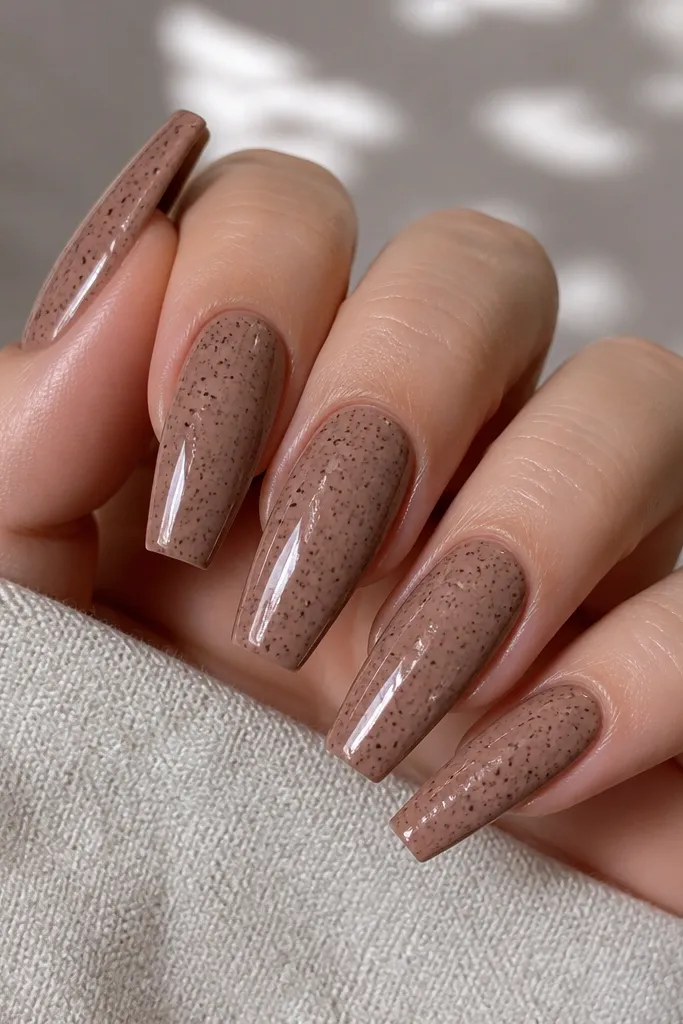
This is the "I woke up polished" set. The cocoa nude base looks soft and natural, while the glossy speckles add texture you can see up close. It stays seasonal_evergreen because the color family works in every month. Speckles also hide small chips because they blend with the nail's surface texture.
Use a milky cocoa nude as your base and keep it semi-sheer so the nail looks like it's glowing from within. Add speckles with a dotting tool using dark espresso gel, then cure. Seal with a thick glossy topcoat so the speckles look raised and shiny.
Editor's noteMake speckles denser toward the tip and lighter near the middle for a length-extending effect.
Watch outAvoid matte topcoat on this one - the speckles lose their "fresh" look.
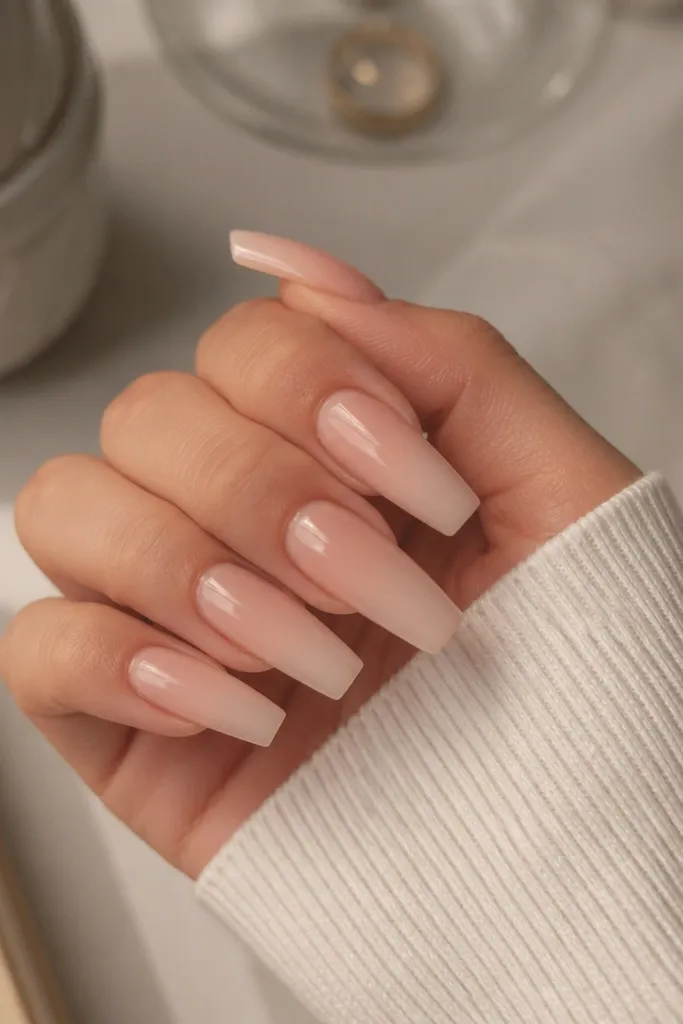
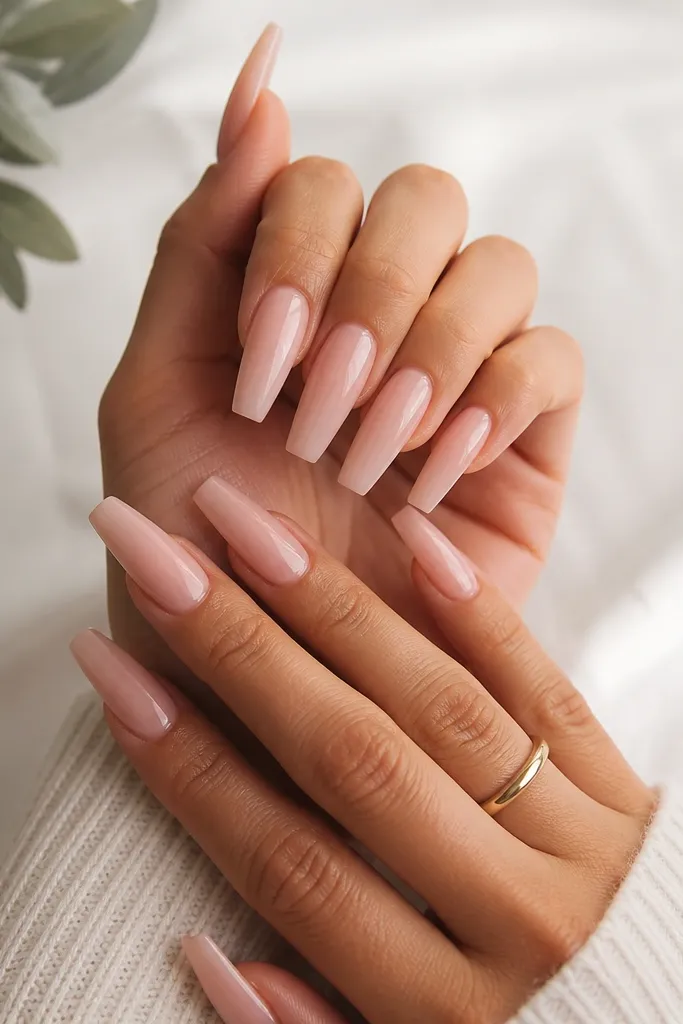
4. Icy Pearl Coffin with Clear Jelly Jelly-Gloss
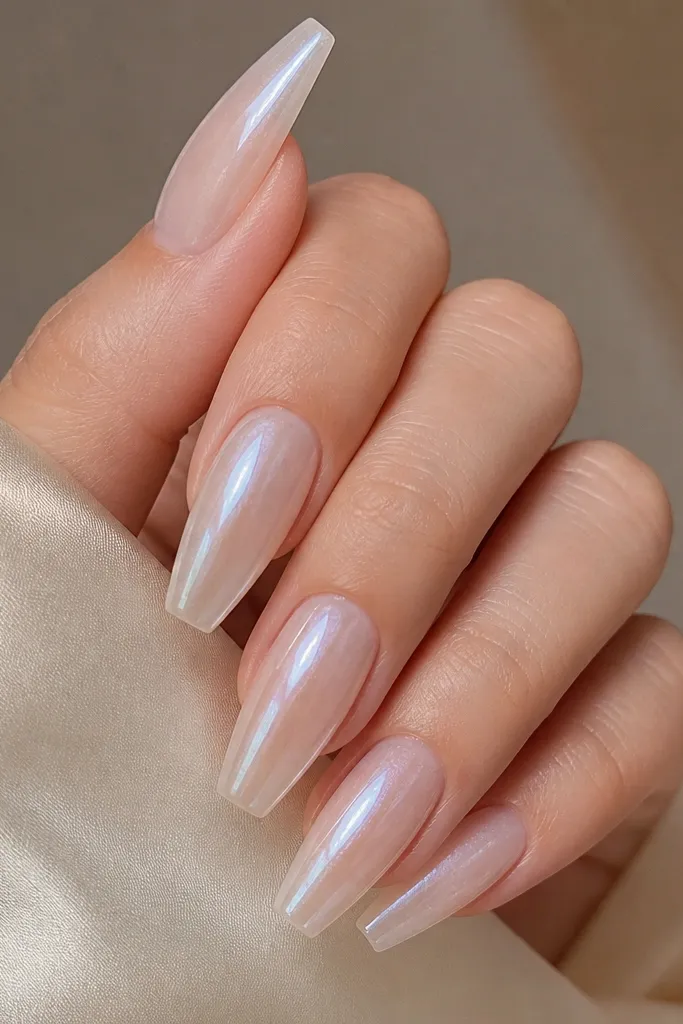
If you want evergreen year-round nails that never look dated, go for icy pearl. The shimmer is subtle in daylight and pops under indoor lighting. The clear jelly-gloss topcoat makes the nails look hydrated and glassy, not dry or chalky. It's also low-maintenance because the design doesn't rely on lines that can grow out visibly.
Apply a translucent pearl builder layer, keeping the cuticle edge tight and smooth. Add no nail art on most nails; just let the pearl shift do the work. If you add art, keep it to one tiny pearl dot near the tip on the ring finger. Topcoat with a clear jelly gel for that thick, wet look.
Editor's noteUse a pearl that leans slightly blue-gray so it reads icy, not yellow.
Watch outAvoid thick opaque pearl layers - they look cloudy as they grow out.
5. Velvet Blush Coffin with Tiny Rhinestone Crescent
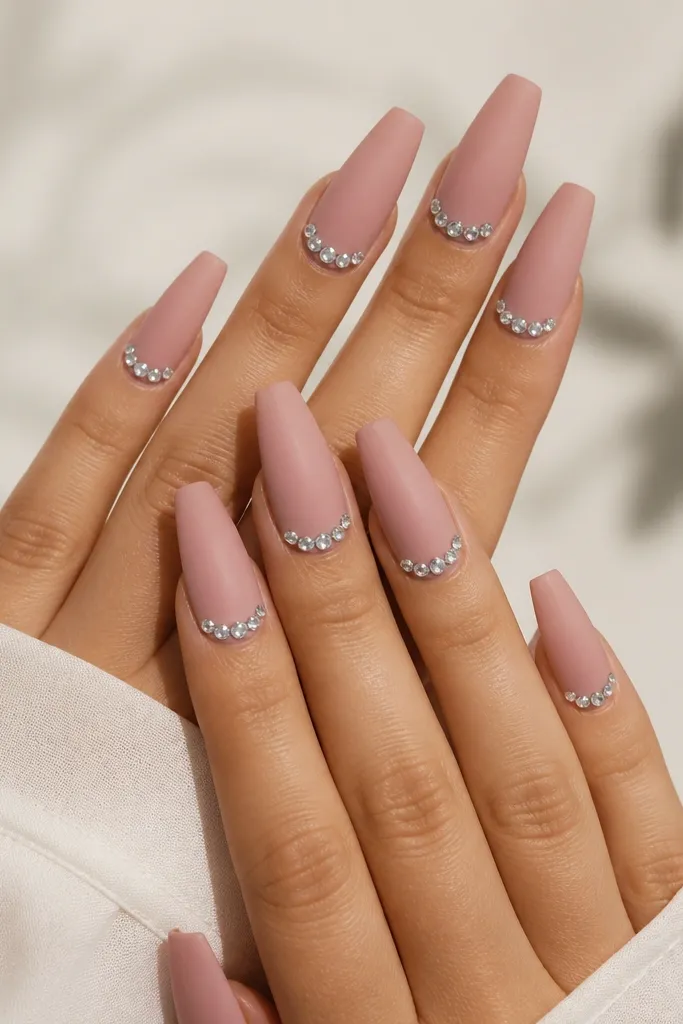
Velvet blush is soft, flattering, and it reads "seasonal" without changing the whole set. The rhinestone crescent adds sparkle that doesn't feel like costume jewelry. Placing the stones mid-nail keeps the cuticle clean and makes the grow-out look less noticeable. Matte velvet also hides tiny surface imperfections that happen after a week of chores.
Build the nails in a light blush base and buff to a smooth matte finish using a velvet-matte topcoat. Place a small rhinestone arc with gel adhesive - aim for 4-6 stones per nail. Cure firmly, then seal with a matte topcoat around the stones but keep the stones themselves glossy so they catch light.
Editor's notePress each rhinestone with a flat tool right after placement so it sits flush.
Watch outAvoid putting rhinestones right at the cuticle line - they snag and lift first.
6. Deep Berry Coffin with Gold Foil Half-Moon
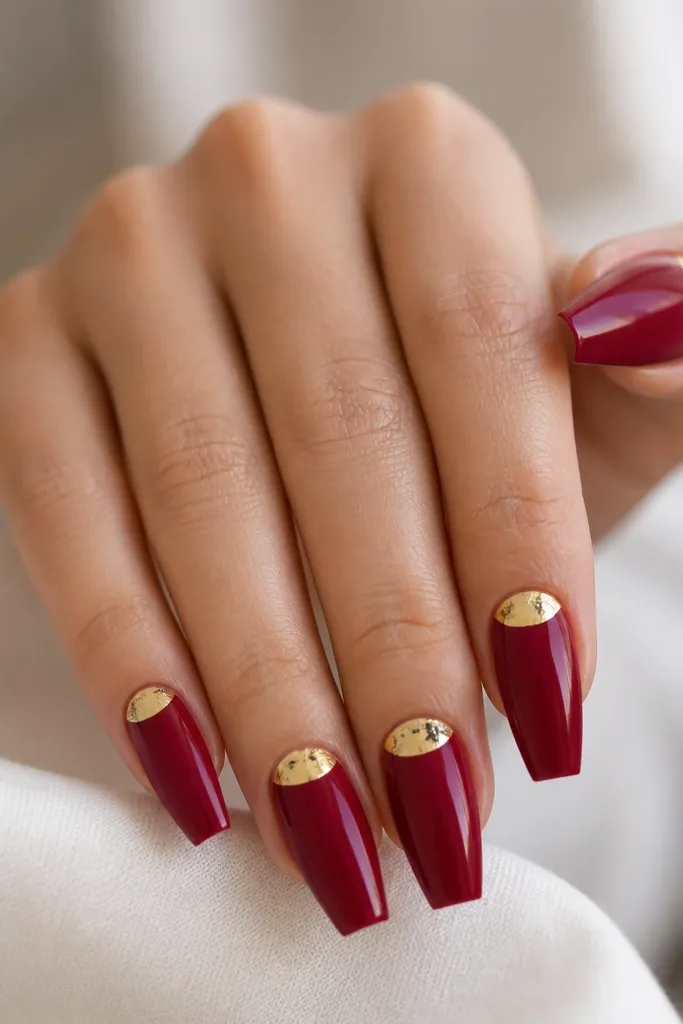
Deep berry is evergreen because it's dark enough for winter and bright enough for fall. The gold foil half-moon gives that high-end "jewelry" look without needing full coverage foil. Keeping it as a half-moon means it stays classy and doesn't overwhelm your nail bed. The glossy topcoat makes the berry look rich instead of flat.
Apply a deep berry builder layer and cure fully. Use gold foil adhesive gel in a crescent shape about 2-3mm away from the cuticle, then press thin gold foil pieces into it. Cure again and seal with a glossy topcoat to smooth the foil edges.
Editor's noteUse smaller foil pieces and overlap them lightly so you don't get big gaps.
Watch outAvoid thick foil blobs - they feel rough and chip faster.
7. Forest Green Marble with Clear Negative Space
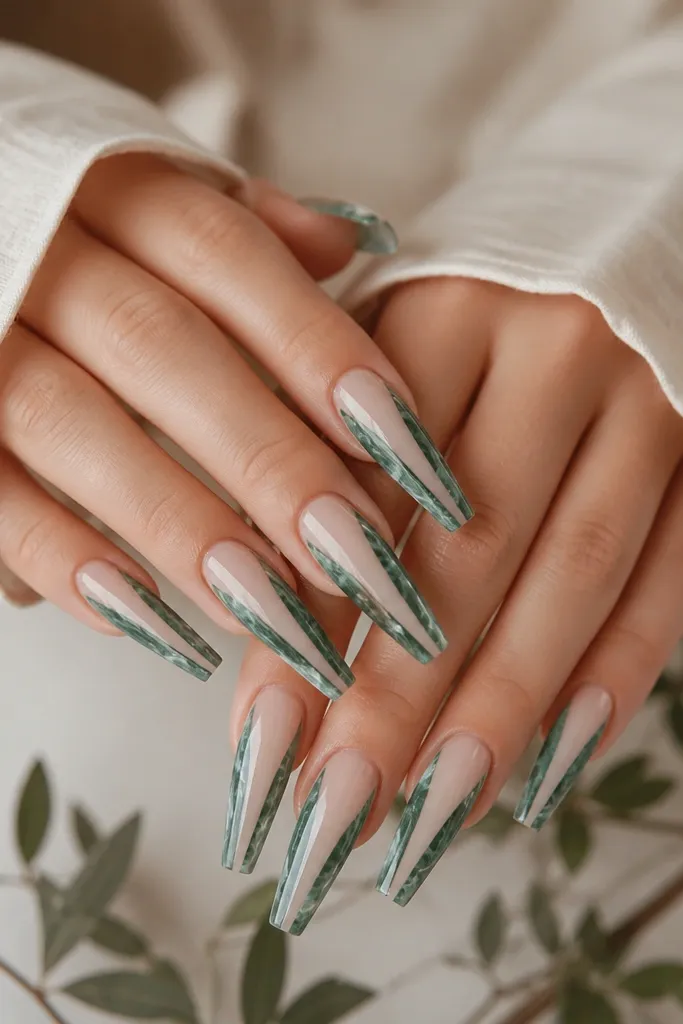
Marble looks fancy year-round, and negative space keeps it from looking heavy. The forest green stays seasonal_evergreen because it reads natural and grounded. White wisps in the marble add contrast so the swirls show even on shorter grow-out. The clear base keeps your nails looking longer and lighter.
Start with a clear base (or a sheer nude if you prefer) and leave a thin center negative-space strip. Add forest green gel in thin layers on the sides, then drag a white gel through it with a fine brush to create marble veining. Seal with a medium-thick glossy topcoat so the marble looks smooth, not raised.
Editor's noteUse a plastic wrap technique for marble - it helps you get those soft, cloudy swirls.
Watch outAvoid thick marble lines - they look like dried paint and lift at the edges.
8. Smoky Plum Gradient with Soft Pearl Beads
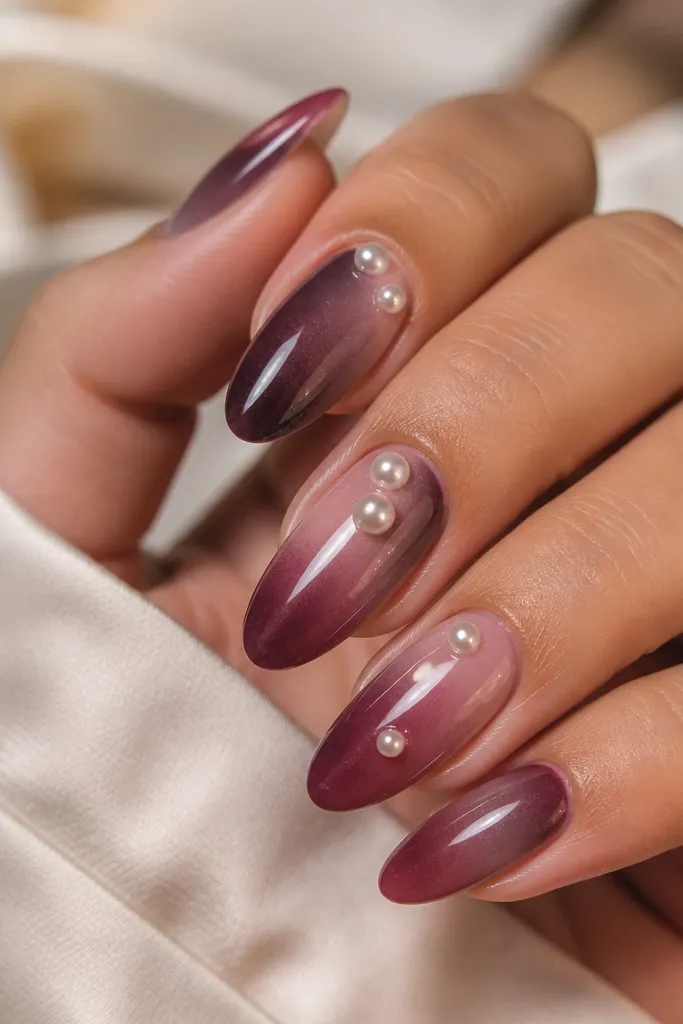
A smoky plum gradient is a perfect evergreen fall-to-winter color because it isn't too bright and it isn't too dark. The pearl beads add a gentle, romantic texture without going full bridal. Keeping the beads small and placed to the side avoids the "bumpy cuticle" problem. The gradient helps the grow-out blend more naturally.
Use a sheer base, then sponge or airbrush plum tones from mid-nail to tip. Keep the cuticle area slightly lighter so it looks airy. For the pearl beads, place 4-6 tiny pearls using a gel adhesive on one accent nail. Cure and topcoat carefully so the beads stay secure.
Editor's noteSeal pearls with a thin layer of topcoat over them, then wait 60 seconds before curing to reduce bubbles.
Watch outAvoid big pearls - they snag and the acrylic around them lifts.
9. Neutral Nude Coffin with Matte Cuticle Halo
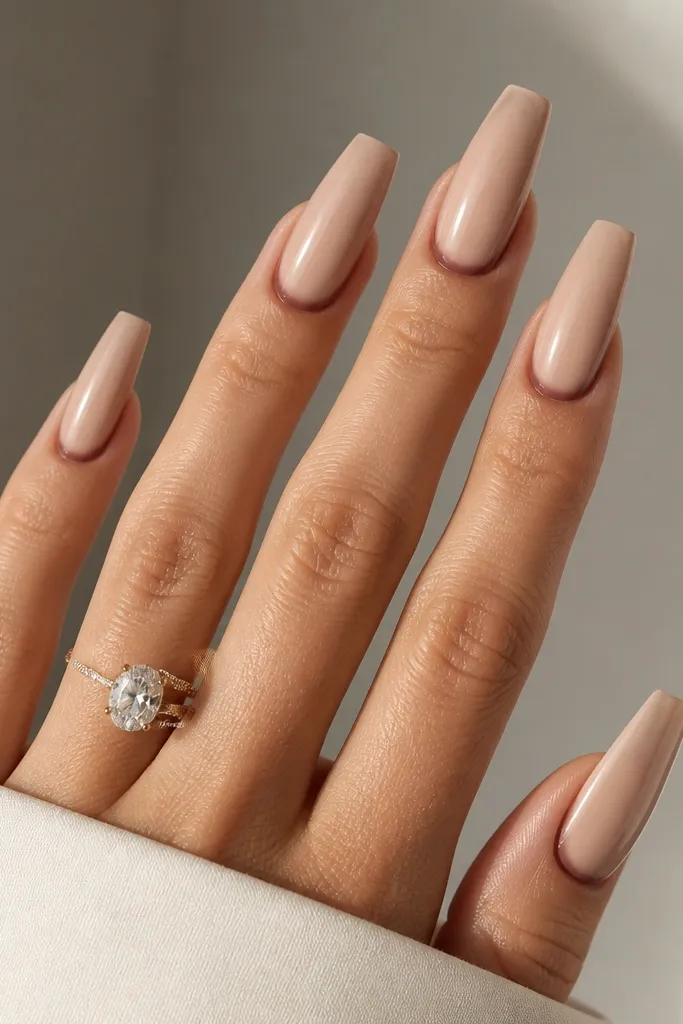
This look plays with finish, not color. The neutral nude stays evergreen, and the matte halo makes the nails look intentional even with no art. Finish contrast catches the eye more than a random sticker ever does. It's also forgiving because even if a little grows out, the halo still reads like a design detail.
Apply a nude builder gel and cure. After shaping, paint a thin matte gel ring at the cuticle using a small striping brush, leaving a tiny glossy gap between the halo and the cuticle edge. Cure, then topcoat everything else glossy for a clean two-texture look.
Editor's noteUse tape as a guide for a straight halo - it stops the ring from turning lopsided.
Watch outAvoid matte gel bleeding onto the glossy area - it makes the border look messy.
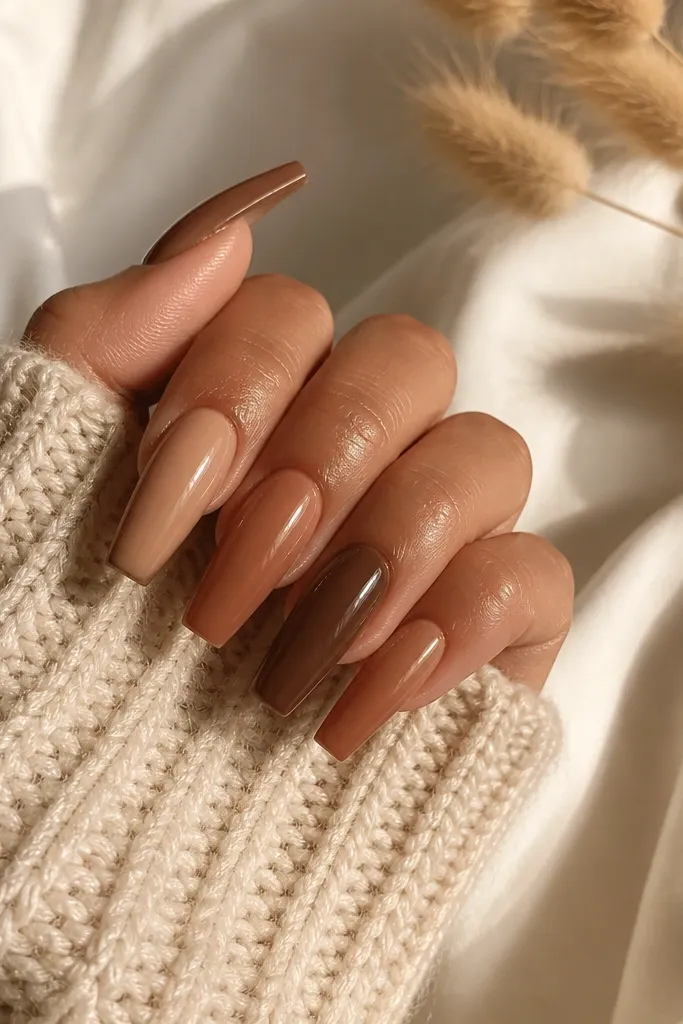
10. Caramel Toffee Coffin with Gold Outline Tips
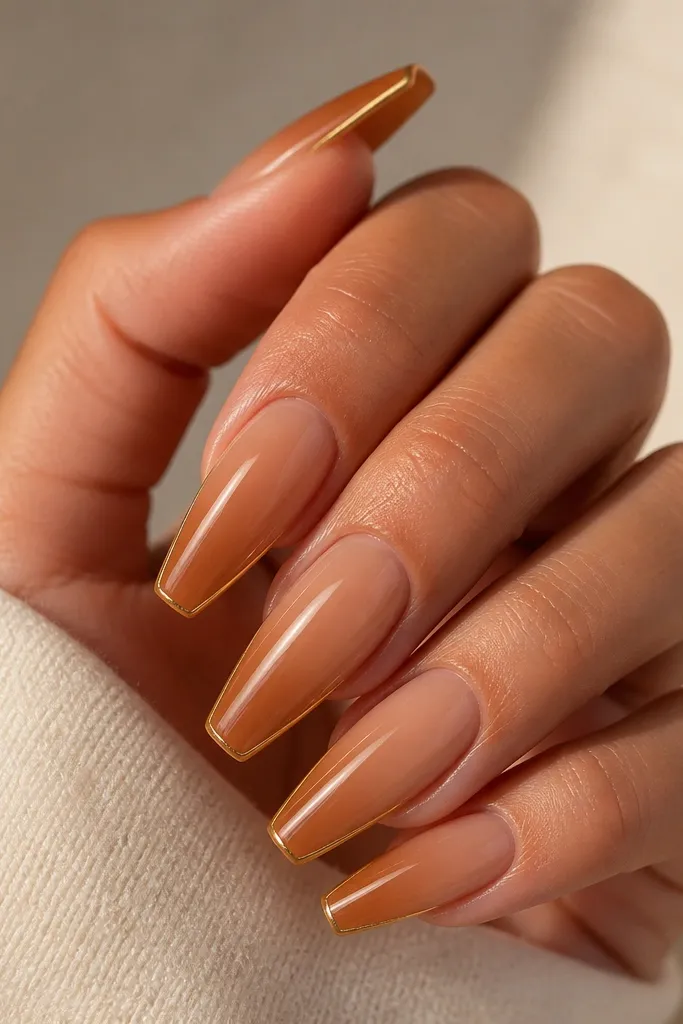
Warm caramel tones look expensive year-round, especially on coffin shapes where the tip catches light. The gold outline makes the nail tip look sharper and longer without adding bulk. Because the gold is only at the edge, it grows out more smoothly than designs that sit near the cuticle. This is the set I wear when I want "pretty" but not loud.
Build a gradient from nude caramel to deeper toffee at the tip. Then use a fine liner brush to draw a gold outline along the very edge of the tip - keep it thin, like 0.5mm. Cure, then seal with glossy topcoat so the outline stays crisp.
Editor's noteOutline just the outer arc, not the whole top - it keeps it modern.
Watch outAvoid thick gold lines - they look like a sticker once the nail grows.
11. Black Licorice Coffin with Red Micro Liner
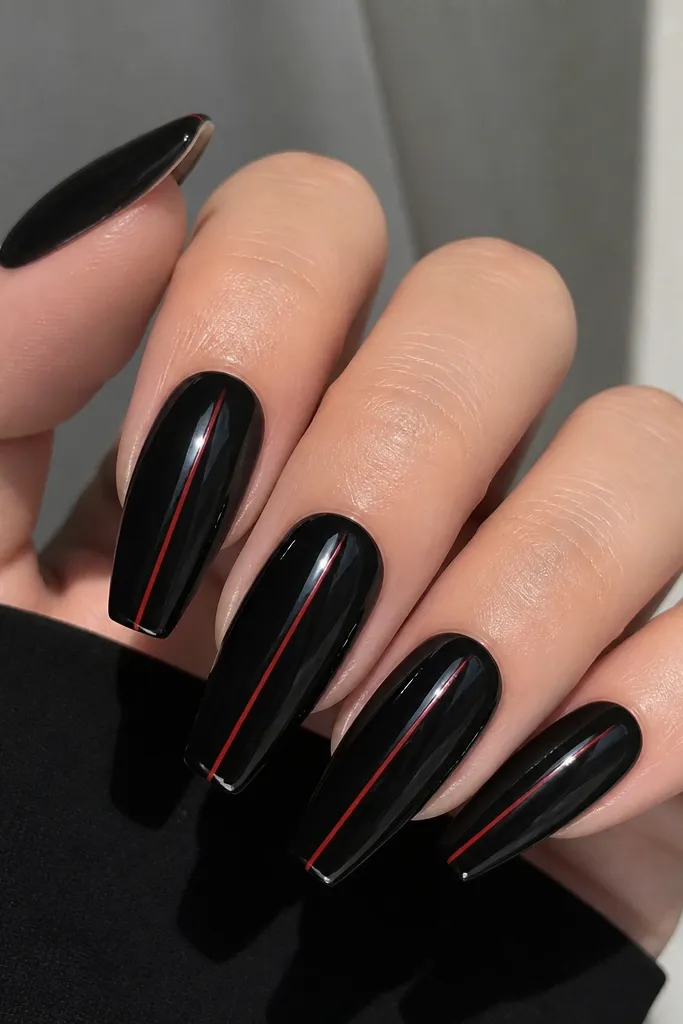
This is edgy but still wearable because the art is minimal. Glossy black is evergreen in every season, and the red micro liner adds just enough contrast to feel styled. I like it for nights out and also for work when you want something different without glitter. The thin line also hides minor surface scratches because it breaks up reflections.
Apply a full glossy black builder or gel and cure hard. Use a striping brush to paint a single center line in red gel, staying away from the cuticle by 2-3mm. Cure each nail, then topcoat for glassy shine.
Editor's noteLet the red line cure fully before topcoat so it doesn't bleed into the black.
Watch outAvoid multiple lines or thick stripes - it turns into a cheap nail wrap look.
12. Emerald Green One-Shoulder Accent
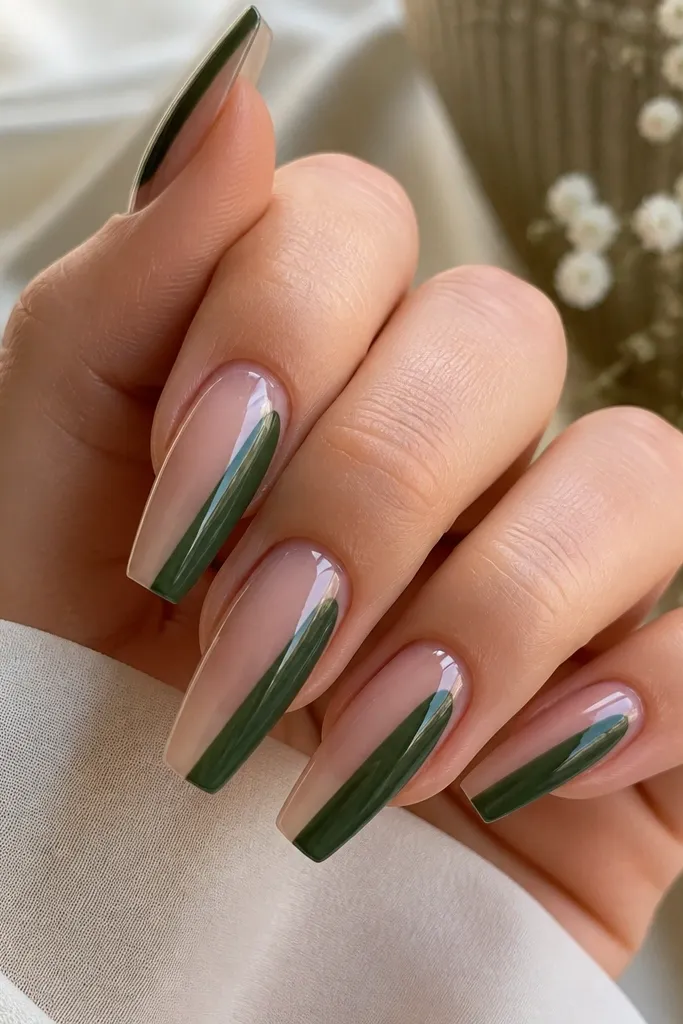
The one-shoulder panel is a clean design trick that makes nails look longer. The emerald green is evergreen, and the negative space keeps it from feeling heavy. Because the accent starts at the mid-nail, your grow-out doesn't erase the design - it just shifts the panel upward slightly. It also looks amazing with gold jewelry.
Use a sheer nude base and keep it glossy. With a gel brush, paint an emerald panel only on one side, stopping short of the cuticle by 2-3mm. Blend the edge lightly with a second brush so it looks smooth, not painted-on. Cure, then seal with a glossy topcoat.
Editor's noteAngle the panel so it follows your natural nail curve, not straight across.
Watch outAvoid covering the entire nail - you lose the length effect.
13. Champagne Nude Coffin with Pearlized Swirl
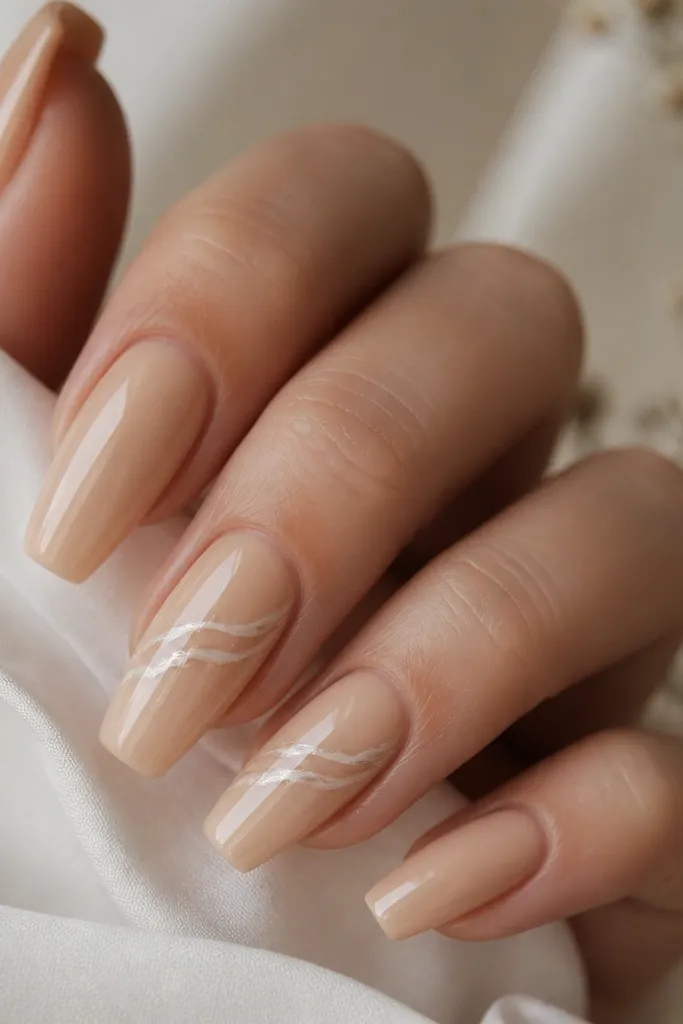
Champagne nude is my go-to evergreen base when I want soft glamour. The pearlized swirl adds movement without turning into full nail art. It also photographs well because the swirl catches light while the base stays calm. This set is perfect for events but still works on a random Tuesday.
Apply a nude champagne builder layer and cure. Use a fine brush to paint a thin swirl with pearl gel - keep the line width consistent. Add one tiny white dot highlight along the swirl for dimension. Topcoat glossy and cure fully.
Editor's noteMake the swirl slightly thicker on one side so it looks dimensional under light.
Watch outAvoid thick swirls - they look lumpy and chip at the edges.
14. Rosewood Brown Coffin with Sheer Pink Tips
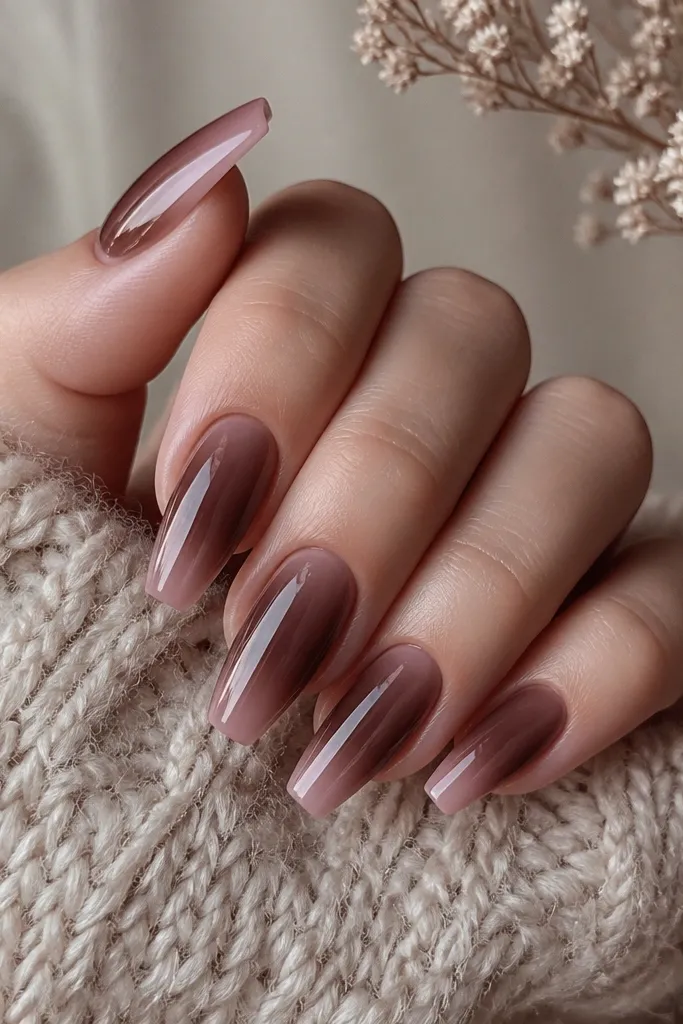
This is the seasonal_evergreen combo that works because it's still in the same color family. Rosewood brown anchors it for fall and winter, and sheer pink tips keep it fresh for spring and summer. The sheer tip overlay also hides small growth gaps better than opaque color blocks. It's subtle, but it looks intentional when you move your hands.
Build the rosewood brown base first and blend toward the center. Then add a sheer pink gel at the tip and feather it up with a brush so it fades smoothly. Keep the pink translucent - you should still see the brown underneath. Cure and finish with glossy topcoat.
Editor's noteUse a damp brush to feather the pink edge so you get a smooth gradient, not a hard line.
Watch outAvoid opaque pink tips - they look like a sticker when the nail grows.
15. Sea Glass Green with Clear Outline Stars
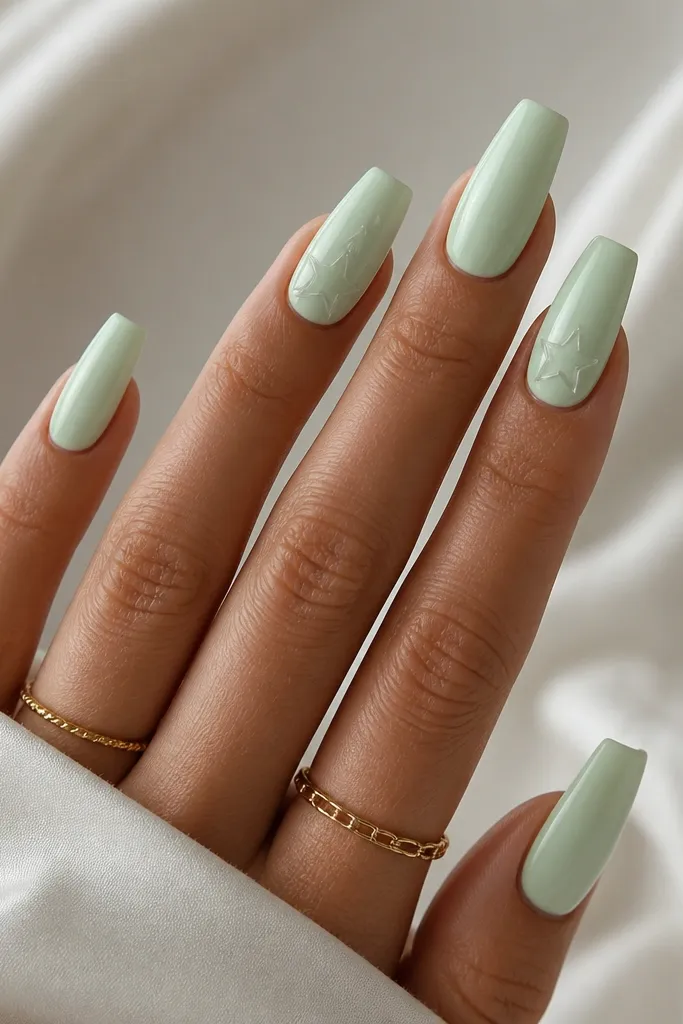
Sea glass green is evergreen because it's calming and clean, not tied to one season. The clear outline stars give a playful vibe without adding heavy pigment or glitter. Since the stars are outlined, they don't create bulk that lifts. The glossy finish makes the green look like it's lit from inside.
Apply a sea glass green gel in thin layers to get that translucent look. For star outlines, use a dotting tool and fine brush to draw tiny stars using clear gel (or a very sheer gel) and cure. Add stars to only the ring and index fingers for balance. Seal with a glossy topcoat that keeps the clear lines crisp.
Editor's noteScale the stars down - the smaller they are, the more expensive they look.
Watch outAvoid filled-in stars - solid shapes look childish fast.
16. Smoked Rose Coffin with Black Lace Trim
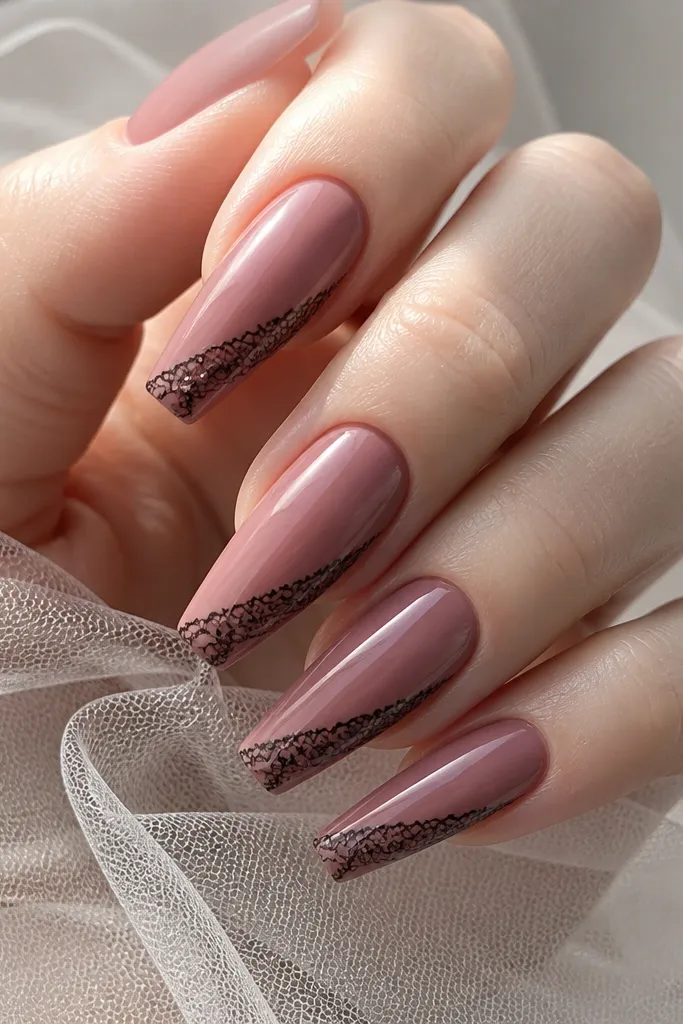
Smoked rose keeps it soft and wearable, while black lace trim adds that "evening" edge. The lace is placed along the side near the tip, so it reads like a detail rather than a full cover print. This combination works year-round because the rose isn't too bright and the black isn't too harsh. It also looks great on medium and longer coffin lengths.
Start with a smoked rose builder gel and cure. Use lace nail stamp or a lace nail transfer strip if you're fast with it; otherwise paint lace using a thin striping brush. Place the lace trim only along one side of the nail from mid-tip downward, then seal with glossy topcoat in two thin layers.
Editor's noteIf you paint lace by hand, practice on a sticky nail form first - the spacing matters.
Watch outAvoid lace across the whole nail - it looks like a decal once it grows out.
17. Pearl Chrome Dust Coffin with Clear Cuticle
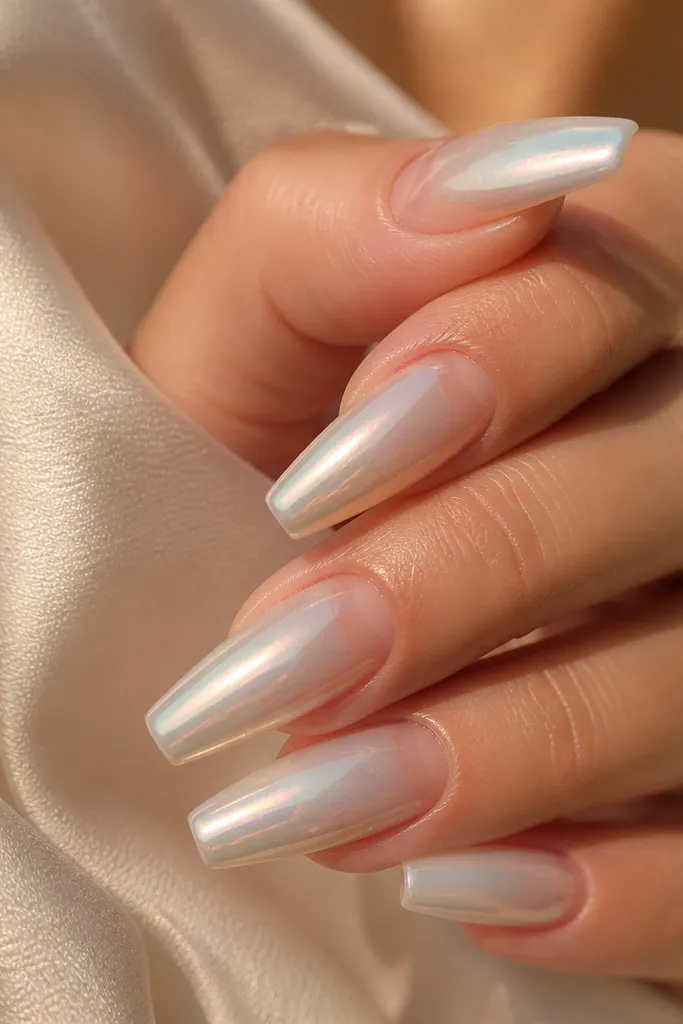
This look is all about the transition. Clear at the cuticle keeps the nail bed looking fresh, and pearl chrome dust gives that Instagram glow without needing rhinestones. It works in every season because pearl chrome is neutral - it shifts with your outfit. The gradient makes grow-out less obvious because there's no hard color line.
Apply a clear builder or clear overlay and keep it thin near the cuticle. Apply pearl chrome gel from mid-nail to tip, then dust chrome powder over it and blend with a makeup sponge for a soft gradient. Cure and seal with glossy topcoat.
Editor's noteUse a loose press when applying chrome powder so you get dust texture instead of a harsh block.
Watch outAvoid thick chrome coverage - it cracks sooner on coffin shapes.
18. Warm Sand Coffin with Brown Micro French Edge
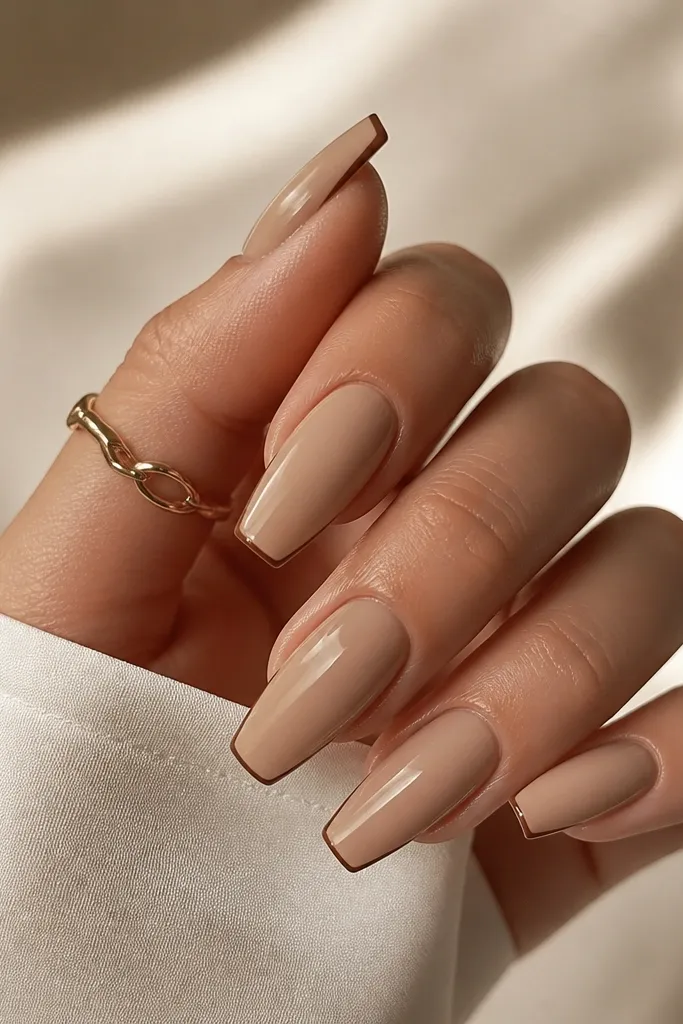
Micro French is one of the most wearable acrylic designs I've done because it stays neat as your nail grows. The warm sand base is evergreen and forgiving, and the brown edge gives definition without looking like a thick marker line. It also hides small chips better than solid tips because the line is thin and smooth. This is my go-to "work nails" set.
Paint warm sand nude as the base, then draw the micro French line with a fine brush using a brown gel. Keep the line width under 0.7mm and make it sit right at the tip edge. Cure, then topcoat glossy. If you want extra durability, add a thin clear gel over the French line before curing.
Editor's noteUse a French guide strip so both hands match even if you're doing it at home.
Watch outAvoid wide French tips - they look bulky and cheap on coffin.
19. Navy Ink Coffin with Matte Satin Topcoat
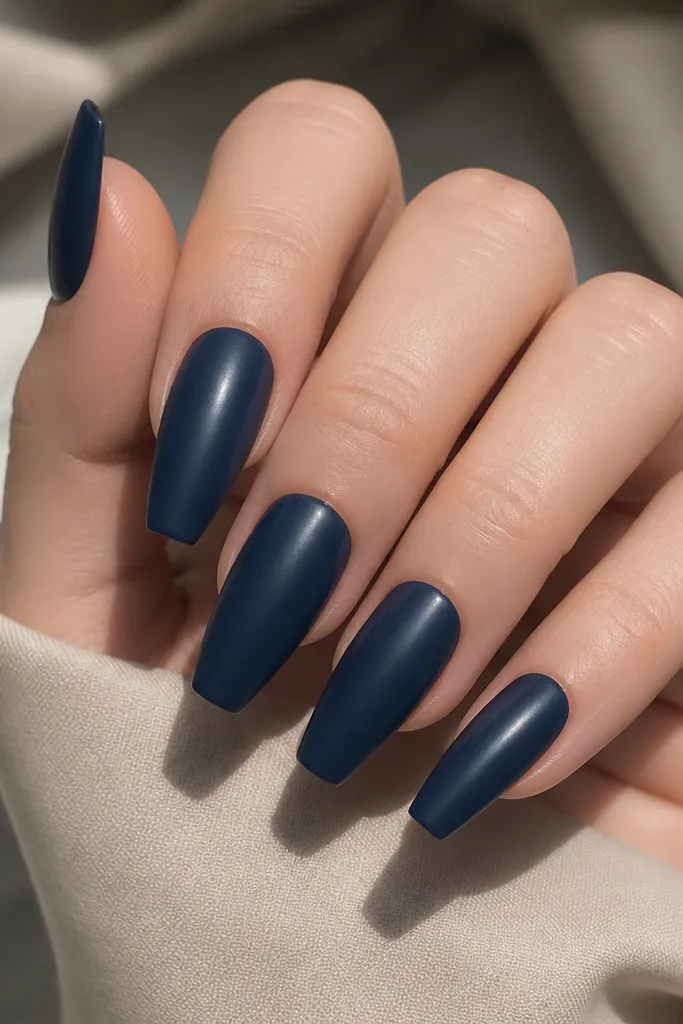
A plain navy satin set is evergreen year-round because it reads polished without needing decoration. The satin finish gives depth and soft light reflection, so it doesn't look dull like flat matte. Navy also pairs with every metal color in your jewelry. When your nails grow out, it still looks intentional because there's no design line to break.
Use a deep navy gel or acrylic color and build it with even thickness. Cure fully and buff lightly so the surface is smooth. Apply satin-matte topcoat (not velvet matte) for that soft sheen. Cure again and wipe the tack layer clean.
Editor's noteKeep the surface very smooth before topcoat - satin shows bumps more than glossy does.
Watch outAvoid flat matte on navy - it can look chalky under indoor light.
20. Emerald Crystal Coffin with Side Rhinestone Line
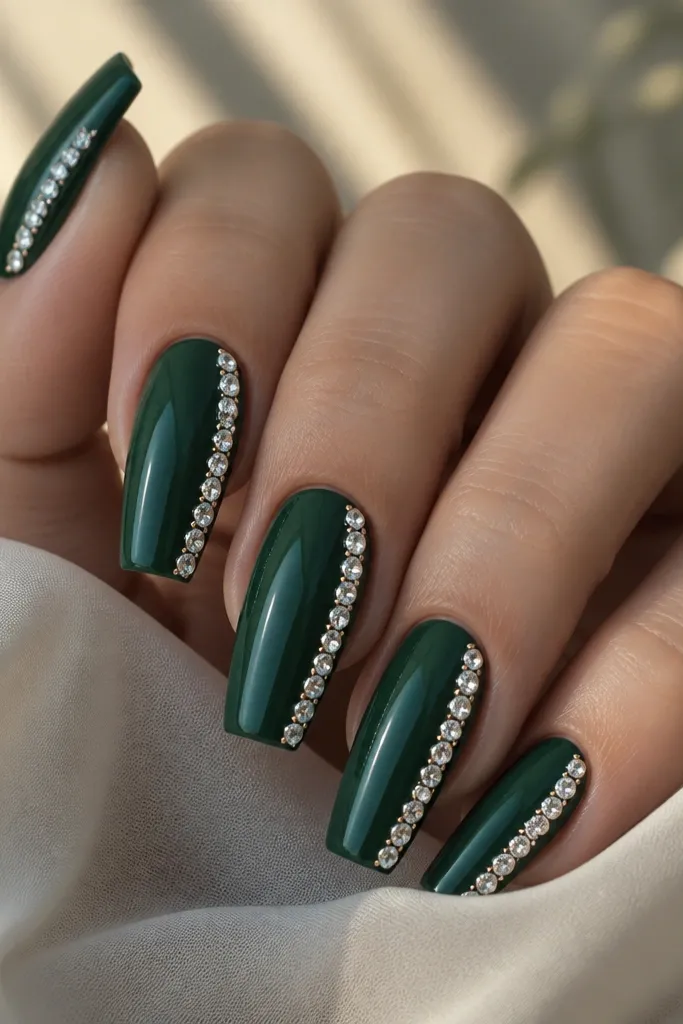
This is the "wear it out" evergreen set. The emerald base is deep and rich, and the rhinestone line makes it look custom even if you keep the rest plain. Side placement keeps the stones from catching on your cuticle and reduces lifting. It also makes your nail look slimmer and longer because the stripe follows the coffin shape.
Apply emerald gel evenly and cure. Place rhinestones along one side starting around 3-4mm from the tip edge - not at the very end, so they don't snag. Use gel adhesive, press each stone, cure, then seal with a thin topcoat over and around the stones. Make sure you cap the stone edges so water and debris can't sneak underneath.
Editor's noteUse tweezers with a fine tip and good lighting - stone alignment matters more than the number of stones.
Watch outAvoid gaps in the rhinestone line - it looks like you ran out of stones.
21. Caribbean Teal Coffin with White Palm Outline
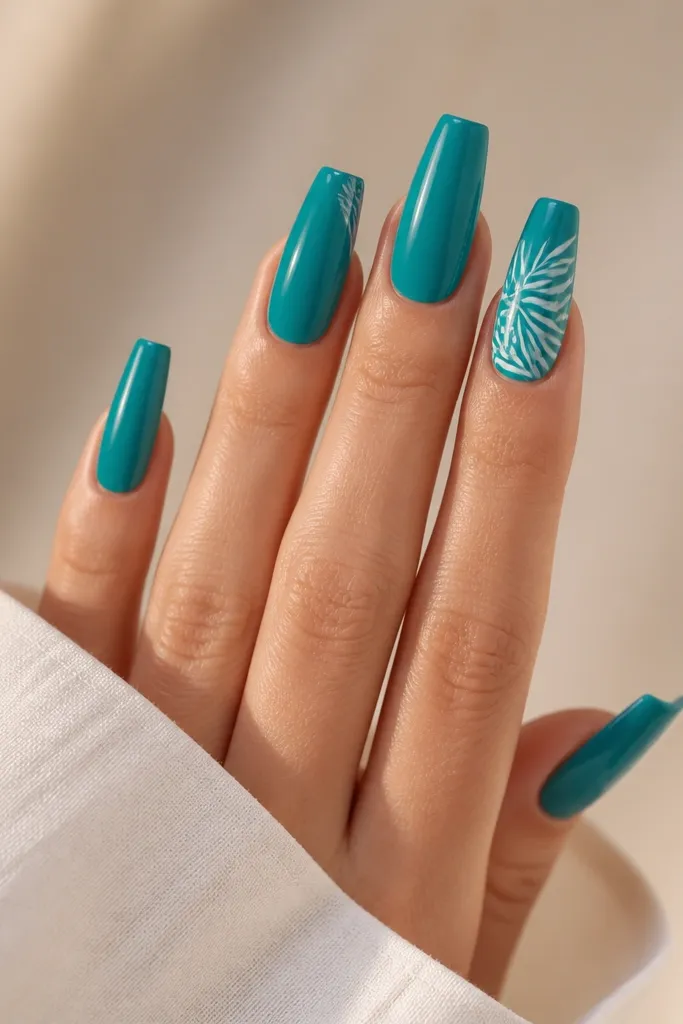
Teal is evergreen when you pick the right shade - Caribbean teal looks fresh in summer but still deep enough for fall. White palm outlines add a vacation vibe without turning the set into a theme park. Outlines are easier to grow out because there's less paint mass near the cuticle. The glossy base makes the teal look like it's wet.
Paint teal in even thin layers and cure. Use a fine liner brush to draw palm outlines (you can copy a simple trunk and leaf pattern). Keep the white lines thin and consistent, and place them only on one or two nails. Topcoat glossy for a smooth surface.
Editor's noteIf your lines wobble, pause to let the gel level slightly before curing - it tightens the line edges.
Watch outAvoid filled-in palm shapes - they look heavy and can crack at the edges.
22. Mocha Nude Coffin with Latte Art Center Line
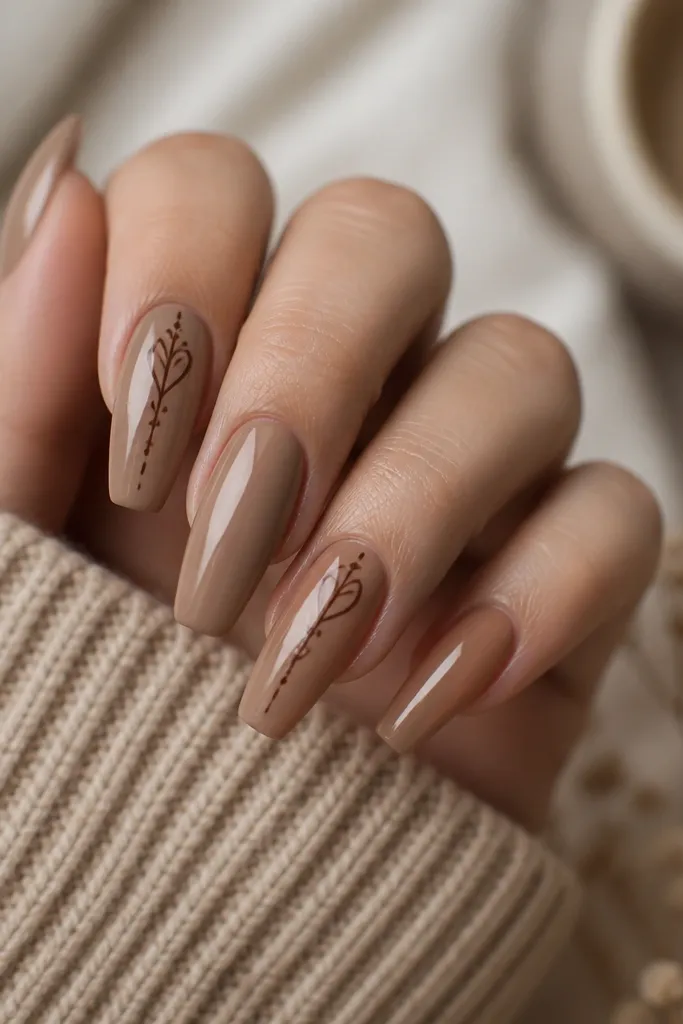
This is one of my favorite evergreen year-round concepts because it's cute without being childish. A mocha nude base is neutral and always wearable, and the latte art line looks like a tiny tattoo on the nail. The design sits in the center, so it reads even as the nail grows. It also pairs well with warm-toned clothing and gold rings.
Apply mocha nude gel and cure. Use a striping brush to draw a simple rosetta or heart rosetta in dark brown gel right down the center. Add 2-3 tiny dot accents near the bottom of the rosetta. Cure and seal with glossy topcoat in two thin layers.
Editor's noteKeep the latte art height to about 40% of the nail, not full-length.
Watch outAvoid complex latte art - it turns messy on a small coffin nail.
23. Black Cherry Coffin with Sheer Pink Overlay Tips
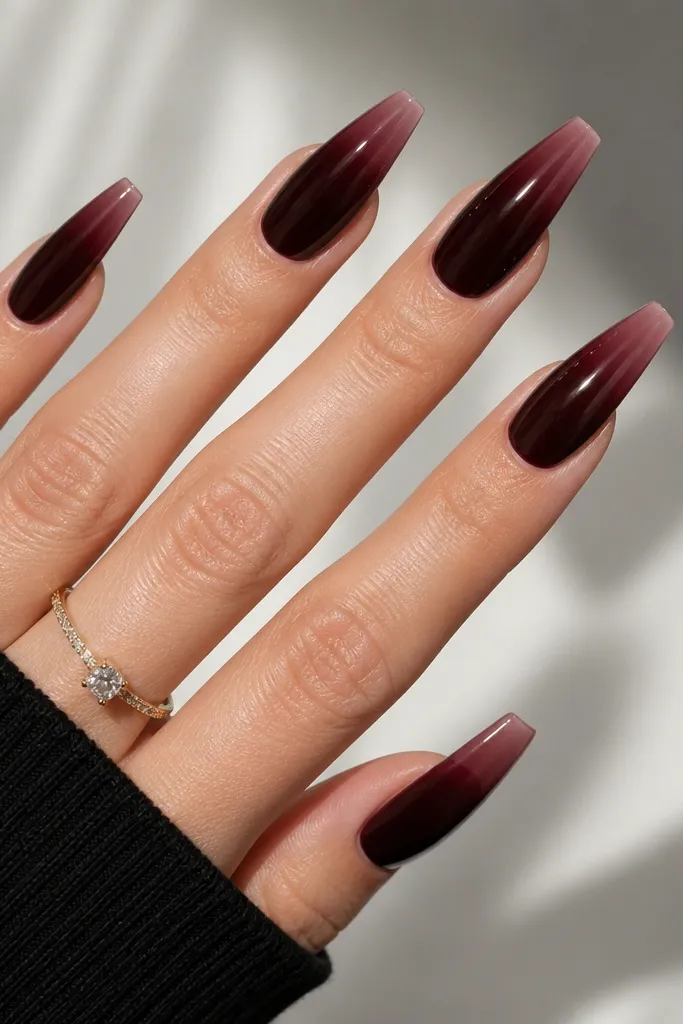
Black cherry is evergreen because it's dark enough for winter and dramatic enough for fall, but the sheer pink overlay keeps it airy. The ombré effect looks expensive because it's translucent, not striped. It also grows out nicely since the darkest color stays mid-to-tip. This set is great if you love dark nails but hate when they look too heavy.
Build a black cherry base and blend slightly lighter toward the center. Then add a sheer pink gel at the tip and feather upward to create a soft fade. Cure fully and finish with a glossy topcoat that makes the overlay look juicy and smooth.
Editor's noteChoose a sheer pink that matches your undertone - cool pink looks best over black cherry if you're fair to neutral.
Watch outAvoid opaque pink tips - the contrast looks harsh as it grows.
24. Glazed Chestnut Coffin with Thin Copper Lines
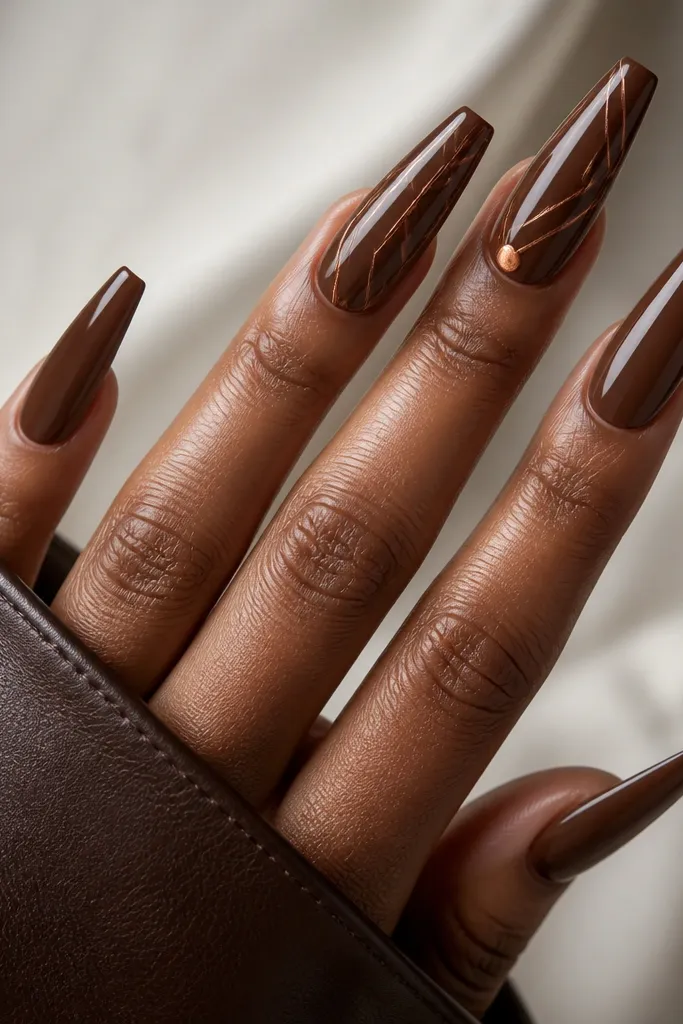
Chestnut brown is an evergreen neutral that reads warm without turning orange. The glazed finish makes it look smooth and thick, like caramel candy. Thin copper lines add structure and make the set feel designed, not random. Because the lines are thin, you don't get bulk that lifts, and the look stays clean in grow-out.
Apply chestnut brown gel in thin layers until you get full coverage, then cure and buff only lightly. Paint copper lines with a fine brush or striping tape for straight angles. Keep the lines on two accent nails to keep it elegant. Seal with glossy topcoat and cap the lines.
Editor's noteIf you use striping tape, remove it while gel is still slightly tacky so edges look clean.
Watch outAvoid thick copper strokes - they catch on fabric and chip.
25. Pearl Nude Coffin with Smoky Grey Side Ombre
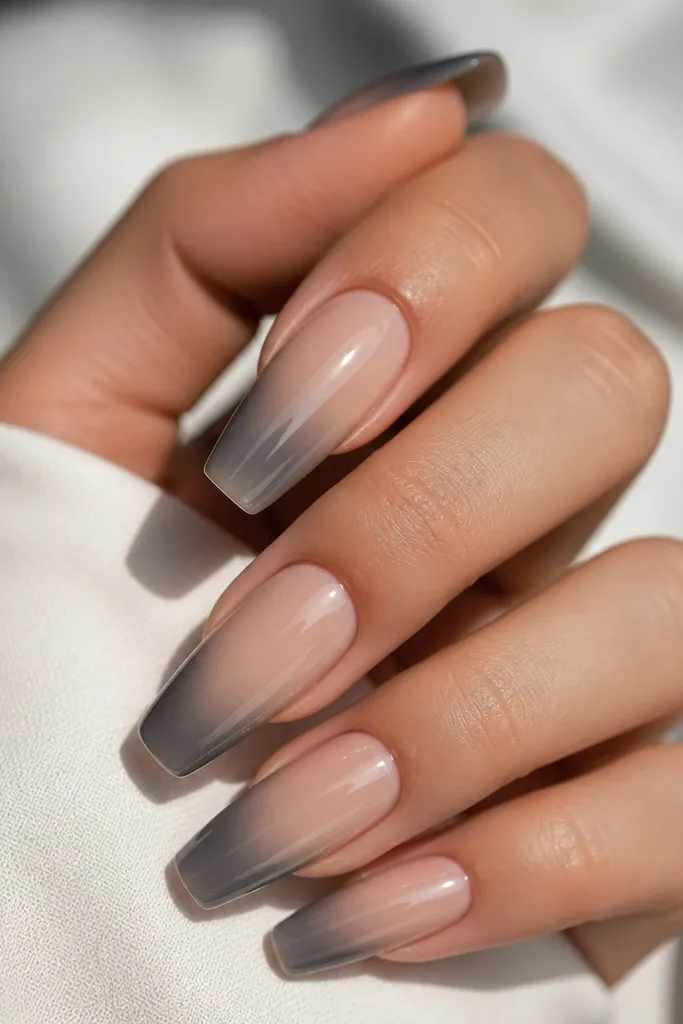
This look is evergreen because it uses neutrals and a smoky tone that works in every season. The side ombré gives depth and makes your nail look longer and slimmer. Pearl nude keeps it soft, and grey adds that cool, modern edge. It also hides grow-out because the ombré starts mid-nail, not at the cuticle.
Apply pearl nude builder and cure. Sponge smoky grey gel on one side from mid-nail to tip, feathering the edge so it blends. Use a small brush to clean up the border so it stays crisp. Topcoat glossy for a smooth, glass look.
Editor's noteUse a makeup sponge with minimal product so you avoid hard speckled edges.
Watch outAvoid grey near the cuticle - it makes the nail look dirty as it grows.